
National Finance Center
Office of the Chief Financial Officer
U.S. Department of Agriculture
May 2017
webTA 3.8 - Employee
PUBLICATION CATEGORY
T&A Processing
PROCEDURE MANUAL
webTA 3.8 - Employee

Publication Category: T&A Processing
webTA 3.8 - Employee
i
Table of Contents
Latest Update Information ........................................................................................... 1
Accessibility for Users of Assistive Technology ....................................................... 3
Typographical Conventions ......................................................................................... 5
Feedback ....................................................................................................................... 6
Overview ........................................................................................................................ 7
Related Systems ............................................................................................................... 8
Getting Started ............................................................................................................ 11
Logging In ........................................................................................................................ 11
Logging Out ..................................................................................................................... 22
Changing Your Password .............................................................................................. 22
Sorting Lists .................................................................................................................... 23
Help ................................................................................................................................... 24
Employee ..................................................................................................................... 27
T&A Data ...................................................................................................................... 29
Entering Your T&A .......................................................................................................... 29
Entering Leave and Other Time on Your T&A ............................................................. 32
Entering Dollar Transactions on Your T&A ................................................................. 34
Validating Your T&A ....................................................................................................... 36
T&A Summary ............................................................................................................. 45
Leave ............................................................................................................................ 47
Adding a Leave Request ................................................................................................ 47
Editing a Leave Request for a New or Future Pay Period .......................................... 51
Deleting a Leave Request .............................................................................................. 53
Viewing Your Leave Request History ........................................................................... 54
Viewing Your Leave Requests in a Calendar View ..................................................... 57
Premium Pay ............................................................................................................... 59
Adding a Premium Pay Request ................................................................................... 59
Editing a Premium Pay Request for a New or Future Pay Period ............................. 62
Deleting a Premium Pay Request .................................................................................. 65
Viewing Your Premium Pay Request History .............................................................. 66

Publication Category: T&A Processing
webTA 3.8 - Employee
ii
Viewing Your Premium Pay Requests in a Calendar View ......................................... 69
Leave Donations ......................................................................................................... 71
Donating Leave ............................................................................................................... 71
Editing a Leave Donation Request for the Current or Future Pay Periods .............. 74
Deleting a Leave Donation Request .............................................................................. 77
Default Schedule ......................................................................................................... 78
Editing Your Default Schedule ...................................................................................... 78
Certified T&As ............................................................................................................. 81
Accounts ..................................................................................................................... 83
Reports ........................................................................................................................ 87
Send Task .................................................................................................................... 91
View Tasks .................................................................................................................. 92
Index ............................................................................................................................ 95

Publication Category: T&A Processing
webTA 3.8 - Employee
1
Latest Update Information
Section
Description of Change
webTA 3.8 Employee
Procedure
This is the first issuance of the webTA 3.8 Employee procedure
manual. The HR Administrator, Supervisor, and Timekeeper
procedure manuals are being issued concurrently with this
procedure.

Publication Category: T&A Processing
webTA 3.8 - Employee
3
Accessibility for Users of Assistive Technology
The National Finance Center (NFC) is committed to providing applications that may be used
with assistive technology.
In order to meet this commitment, NFC will comply with the requirements of the United States
Access Board.
NFC must ensure that users with disabilities be provided with access to have the same options
within an application as those with no disability, unless an undue burden would be imposed upon
NFC.
Help for Users of Assistive Technology
Online help utilizes hypertext markup language (HTML) frames which display help in a separate
browser. Each Help page contains a Table of Contents with links and Help content. Some Help
topics include one or more Related Topics.
To Navigate within Frames:
1. Select Help. The browser opens. By default, the focus is in the content pane.
2. Select the Tab key to move the focus to the Related Topics (if any).
3. Select the Enter key to open a related topic link.
OR
Select the Tab key to move the focus to the Table of Contents.
1. Select the Enter key to open a different help topic link.
To Navigate and Select Options from a Select Box or Combination Box:
Press the spacebar to expand all options.
Press the Up and Down Arrow keys to move through the options.
Select the Enter key to make a selection.
Navigation with Keyboard Shortcuts/Commands
To move forward from link to link or to interactive elements, select the Tab key.
To move backward from link to link or to interactive elements, select the Shift + Tab keys.
To select hyperlinks, select the Enter key.
To select a particular key, tab to the particular button and select the Enter key.

Publication Category: T&A Processing
webTA 3.8 - Employee
4
Note: Some commands may not be supported by all browsers.
Contact Information for Users of Assistive Technology
If you experience an issue due to accessibility as defined by the United States Access Board,
please contact your Agency Servicing Personnel Office for assistance. Authorized Agency
Contacts (AACs) listed in Table Management System (TMGT) Table 063, Contact Type 04,
should call the NFC Contact Center at 1-855-NFC-4GOV (1-855-632-4468). When contacting
the applicable person, please include all information regarding the function that you are trying to
use within the application.

Publication Category: T&A Processing
webTA 3.8 - Employee
5
Typographical Conventions
Convention
Example
References to a button are indicated in Tahoma
10-point bold.
Select the Save button.
References to email addresses are indicated in
Tahoma 10-point italics.
For additional assistance, send email to
References to menu options are indicated in Arial
Narrow 10-point italics.
To print the Earnings and Leave (E&L)
Statement, select File > Print.
References to system messages are indicated in
Tahoma 10-point bold.
The message Changes have been made.
Save changes? is displayed.
References to valid values are indicated in
Courier New 12-point bold.
Valid values are None, End or Start.
References to actual data are indicated in
Courier New 12-point bold.
Enter 10 into the field.
References to telephone numbers are indicated
in Tahoma 10-point bold.
For assistance, call 1-800-555-1212.

Publication Category: T&A Processing
webTA 3.8 - Employee
6
Feedback
You can provide feedback to NFC from within the Web version of the manual. Select the Send
Feedback link. This will activate a pre-addressed email for you to add your comments. This
pre-addressed email automatically identifies your exact location in the document so that we can
better address your comments and/or questions.

Publication Category: T&A Processing
webTA 3.8 - Employee
7
Overview
webTA is a Web-based Time and Attendance (T&A) report application specially designed to
meet the T&A reporting requirements for Federal Departments or Agencies and their employees.
The application can be securely accessed with an Internet browser, allowing users the flexibility
to enter time from anywhere they have an Internet connection. Transaction Code (TC) and leave
type tables are used to enter data in webTA. Once approved, the T&As are picked up on
scheduled build files and transmitted to NFC for processing. Once received, these T&A files are
edited using the Time and Attendance Validation System (TIME) job.
Employee profile information is brought into webTA via a Payroll/Personnel System (PPS)
biweekly feed from NFC. This information is retrieved from PPS after the Personnel Input
System's (PINE) and the Personnel Update System's (PEPL) run each evening. This daily file
updates all accessions and separations. New employee records should be added via this PPS
biweekly feed. Only in special circumstances should an employee be added directly into webTA.
This eliminates errors and maintains consistency between webTA and PPS. At the end of the pay
period, additional information is updated after the Bi-Weekly Examination Analysis and
Reporting System's (BEAR) run is complete.
webTA allows for both the Timekeeper and/or the employee to enter and submit T&A data on a
daily basis throughout the pay period.
webTA is used to:
Maintain a personal information record for each employee at a specific T&A contact
point. This record contains employee-related information needed for T&A reporting.
Gather data entered for the purpose of recording attendance and leave, and for calculating
employee wages each pay period.
Enter T&A data at any time during the pay period.
Record daily time.
Allow for the timekeeper to enter and submit an employee’s T&A if the employee is not
available.
Establish a default schedule for an employee so that only absences from work or changes
in the tour of duty must be entered.
Enter scheduled leave in advance.
Record cost accounting.
Select TC and Accounting Codes from drop-down lists.
Maintain accounting tables at the Agency level.
Enter corrected/split/final T&As.

Publication Category: T&A Processing
webTA 3.8 - Employee
8
Perform certain edits to determine if the data is correct.
Provide T&A related reports.
Provide a T&A Data option which allows a T&A to be viewed at any point in the
process.
T&As are processed through TIME, which reads, collects, edits, audits, and validates the data for
payment. All errors encountered are reflected on an error list, and T&As in question are placed in
an error suspense file. T&A errors are corrected by NFC and are again processed through TIME.
After T&As pass all edits and are validated, the database is updated for subsequent payment
processing.
Timely submission of T&As is necessary because of the impact on the employee’s pay. T&As
should be completed on the last day of the pay period and processed as soon as possible. T&As
should be transmitted to NFC no later than close of business the Tuesday following the last day
of the pay period.
This section includes the following topics:
Related Systems .......................................................................................................... 8
Related Systems
webTA data is displayed and/or interfaces with the systems and/or applications described below.
Adjustment Processing System (ADJP). ADJP provides automatic handling for a variety of
payroll adjustments. This system processes adjustments based on data received on corrected
T&As and late personnel actions.
Bi-Weekly Examination and Analysis Reporting System (BEAR). BEAR generates a "system
sweep" by closing out one pay period and setting up the next pay period for
payroll/personnel-related information. This system generates various reports/actions that affect
an employee's payroll/personnel database record. BEAR runs the second Sunday of the pay
period.
Employee Personal Page (EPP). EPP is used by employees to view payroll, leave, travel, health
insurance, life insurance, and other personal information; to read news items from the Agency or
NFC; and to link to other sites. The Self Service option of EPP is used to change an employee's
residence address, Federal and State tax withholding, financial allotments, and direct deposit
information.
EmpowHR. EmpowHR is a human capital management system that is an integrated suite of
commercial and Government applications that can be leveraged to automate common

Publication Category: T&A Processing
webTA 3.8 - Employee
9
administrative tasks associated with human resource management and reduce internal operational
costs using industry best practices.
FOCUS Reporting System (FOCUS). FOCUS is used to provide Agency offices with ad hoc
reporting capabilities on an "as-needed" basis.
Information/Research Inquiry System (IRIS). IRIS is used for researching personnel-related
inquiries received from employees and other sources. IRIS provides immediate access to at least
1 year of current and 5 years of historical personnel data and certain payroll document history.
Insight. Insight is a comprehensive, enterprise-wide data warehouse with advanced reporting
and business intelligence capabilities. Insight provides customers integrated data and flexible
analytics to drive strategic business decisions.
Management Account Structure Codes System (MASC). MASC is an online system that
provides users with direct system access to add, replace, delete, and query table data. MASC is
composed of tables and accounting documents that contain support information for edits,
references, reports, and identifiers used in application programs. This support information
ensures that NFC maintains a high degree of data integrity and validity. It is important that
MASC contains up-to-date and accurate data. The accounting codes entered in webTA are edited
against MASC.
Payroll Processing System (PAYE). Using the data entered in webTA and the related personnel
information from the database, PAYE computes the employee's gross pay, makes applicable
deductions, applies adjustments (corrected T&As and/or personnel documents) from ADJP,
develops the net amount due, and prepares data for the issuance of a salary payment by Treasury.
PAYE updates the database to reflect salary payments, as well as the employee's leave. PAYE
also prepares an earnings statement for all paid employees each pay period, reflecting the current
payment, plus year-to-date information on earnings, deductions, leave, adjustments, retirement,
etc.
Payroll/Personnel Inquiry System (PINQ). PINQ is used as a tool for researching
payroll-related inquiries received from employees and other sources. PINQ provides immediate
access to at least 25 pay periods of current payroll data. Data entered in webTA is displayed in
PINQ after it passes the TIME edits.
Personnel Input System (PINE). PINE is a subsystem of PPS. PINE edits data released from
Payroll/Personnel entry systems, payroll documents, and position data. PINE edits the data
before it is applied to the Payroll/Personnel database, comparing the employee's database record
to the data being entered. PINE processes personnel actions and payroll documents Monday
through Friday of each week and on the first Saturday of the pay period, regardless of the
effective pay period.
Personnel Update System (PEPL). PEPL performs the update function of the personnel areas
of the database. All documents passing validation through PINE are processed through PEPL for
transmission to the database. The data is retrieved during the pay period from PEPL and

Publication Category: T&A Processing
webTA 3.8 - Employee
10
displayed in IRIS. PEPL also produces a log of all transactions applied to the database, as well as
utilization and management reports.
Position Management System Online (PMSO). PMSO is a real-time online database online
system of PPS. PMSO allows Agencies to add, change, inactivate, reactivate, and delete/restore
position data for immediate update to the PMSO database. PMSO also provides Agencies report
generation and online inquiry capabilities for PMSO data and allows for complete control and
management of position data.
Report Generator System (CULPRPT). CULPRPT is an online reporting system used to
generate formatted payroll and personnel-related reports. CULPRPT reports are used to alert
Agency staff to missing T&As or personnel documents, discrepancies in leave balances, and
failure of TIME edits.
Reporting Center (RPCT). RPCT is a Web-based reporting application on the Application
Launchpad of the NFC home page. RPCT offers Administrative, Financial, Personnel, and
Workforce reports. The Leave Error report is used by timekeepers and is available in RPCT.
Table Management System (TMGT). TMGT is a menu-driven database management system
that provides direct access to table records containing selected data elements from the
payroll/personnel, financial, and administrative systems. TMGT allows authorized users to view
and update records, request reports, and view documentation data for various tables used in
application programs. All TCs used in webTA are from TMGT Table 032, Transaction Codes.
Time & Attendance Validation System (TIME). The initial processing of T&As is
accomplished through TIME, which reads, collects, edits, audits, and validates the data for
payment. All errors encountered are reflected on RPCT's T&A Error Analysis Report and the
T&A in question is placed in an error suspense file. The T&A is corrected at NFC and is
processed through TIME again. After the T&A passes all edits and is validated, the data is
updated on the database for subsequent payment processing.
Time Inquiry Leave Update System (TINQ). TINQ is an online leave entry and correction
system used to update leave data that is incorrect and cannot be corrected by submission of
corrected T&As.

Publication Category: T&A Processing
webTA 3.8 - Employee
11
Getting Started
webTA may be accessed from any computer or mobile device with an Internet connection. This
allows users to complete T&A transactions from any location.
This section includes the following topics:
Logging In .................................................................................................................. 11
Logging Out ............................................................................................................... 22
Changing Your Password ......................................................................................... 22
Sorting Lists ............................................................................................................... 23
Help ............................................................................................................................. 24
Logging In
Users may log in to webTA via:
User ID and password
eAuthentication (user ID and password)
eAuthentication (Lincpass)
To Log In Using a User ID and Password:
1. Connect to the NFC Home Page (http://www.nfc.usda.gov).
2. On the NFC Home Page (http://www.nfc.usda.gov), select the Applications tab. The
Application Launchpad is displayed.

Publication Category: T&A Processing
webTA 3.8 - Employee
12
3. On the Application Launchpad, select the webTA icon. The Time & Attendance Login
page is displayed.
Figure 1: Time & Attendance Login Page

Publication Category: T&A Processing
webTA 3.8 - Employee
13
4. Select the login link. The webTA Login page is displayed.
Figure 2: webTA Login Page
5. Complete the fields as follows:
Field
Instruction
User ID
Enter your webTA user ID.
Password
Enter your webTA password.
6. Select the Log In button. The Main Menu page is displayed.
To Log In Using eAuthentication with a User ID and Password:
1. Connect to the NFC Home Page (http://www.nfc.usda.gov).
2. On the NFC Home Page (http://www.nfc.usda.gov), select the Applications tab. The
Application Launchpad is displayed.

Publication Category: T&A Processing
webTA 3.8 - Employee
14
3. On the Application Launchpad, select the webTA icon. The Time & Attendance Login
page is displayed.
Figure 3: Time & Attendance Login Page

Publication Category: T&A Processing
webTA 3.8 - Employee
15
4. Select the login link. The webTA Login page is displayed.
Figure 4: webTA Login Page

Publication Category: T&A Processing
webTA 3.8 - Employee
16
5. Select the Login using eAuthentication link. The eAuthentication Login page is displayed.
Figure 5: eAuthentication Login Page
6. Complete the fields as follows:
Field
Instruction
User ID
Enter your eAuthentication user ID.
Password
Enter your eAuthentication password.
7. Select the LOGIN button. The Main Menu page is displayed.
To Log In Using eAuthentication with LincPass:
1. Connect to the NFC Home Page (http://www.nfc.usda.gov).
2. On the NFC Home Page (http://www.nfc.usda.gov), select the Applications link. The
Application Launchpad is displayed.

Publication Category: T&A Processing
webTA 3.8 - Employee
17
3. On the Application Launchpad, select the webTA icon. The Time & Attendance Login
page is displayed.
Figure 6: Time & Attendance Login Page
4. Select the login link. The webTA Login page is displayed.

Publication Category: T&A Processing
webTA 3.8 - Employee
18
Figure 7: webTA Login Page

Publication Category: T&A Processing
webTA 3.8 - Employee
19
5. Select the Login using eAuthentication link. The eAuthentication Login page is displayed.
Figure 8: eAuthentication Login Page

Publication Category: T&A Processing
webTA 3.8 - Employee
20
6. Select the LincPass (PIV) button. The eAuthentication Login page - Agency Partner Login
is displayed.
Figure 9: eAuthentication Login Page - Agency Partner Login

Publication Category: T&A Processing
webTA 3.8 - Employee
21
7. Select the applicable Agency from the Please select your Agency drop-down list. The
ActivClient Login page is displayed.
Figure 10: ActivClient Login Page
8. Complete the PIN field.

Publication Category: T&A Processing
webTA 3.8 - Employee
22
9. Select the OK button. The Select a Certificate page is displayed.
Figure 11: Select a Certificate Page
10. Select the applicable PIV Authentication certificate.
11. Select the OK button. The Main Menu page is displayed.
Logging Out
To exit webTA, select the Logout link from any page.
Changing Your Password
You can change your webTA password. Also, depending on your Agency's policy, Timekeepers
and HR Administrators may force a new password on your account, but they cannot look up your
current password.

Publication Category: T&A Processing
webTA 3.8 - Employee
23
To Change Your Password:
1. Select the Change Password button on the Main Menu. The Change Employee Password
page is displayed.
Figure 12: Change Employee Password Page
2. Complete the fields as follows:
Field
Instruction
Current Password
Type your current password.
New Password
Type your new password.
New Password (again)
Retype your new password.
3. Select the Save button to save your new password.
OR
Select the Cancel button to cancel. The Main Menu is displayed.
Sorting Lists
Some webTA pages have lists in a table format. Most of these lists can be sorted by selecting the
+ (sort icon).
Note: Selecting the sort icon for a column sorts the entire table by row, not just the items in the column.

Publication Category: T&A Processing
webTA 3.8 - Employee
24
To Sort a List:
1. Select the + icon in the header of the column. The sort icon changes from a plus sign to
an arrow.
Figure 13: Example of a Page with Sorting Lists
2. Select the arrow to point down to sort the list in descending order.
OR
Select the arrow to point up to sort the list in ascending order.
Help
Help is available on all pages in webTA.

Publication Category: T&A Processing
webTA 3.8 - Employee
25
To Access Help in webTA:
1. On any page in webTA, select the Help link. The applicable Help page is displayed.
Figure 14: Example of Help Page
2. Select the X to exit the Help page and return to the previous page in webTA.

Publication Category: T&A Processing
webTA 3.8 - Employee
27
Employee
Using webTA, an employee can:
Enter T&A data.
View a summary of current pay period T&A information.
Submit leave and premium pay requests.
View certified T&As.
Select accounting codes.
Assign descriptions to accounting codes.
Generate leave audit reports.
Submit requests and tasks to supervisors and/or timekeepers.
All employee functions are accessed from the Employee Main Menu, which is displayed upon
logging in to webTA.
Figure 15: Employee Main Menu

Publication Category: T&A Processing
webTA 3.8 - Employee
29
T&A Data
T&A Data allows users to enter T&A information for past and present pay periods. Time entry for
any pay period may be entered at any time, but must be signed and approved sequentially,
otherwise the T&A will reject.
Employees may enter regular time worked, leave taken, compensatory time worked and/or
earned, and dollar transactions to be paid on the T&A.
This section includes the following topics:
Entering Your T&A ..................................................................................................... 29
Entering Leave and Other Time on Your T&A ......................................................... 32
Entering Dollar Transactions on Your T&A ............................................................. 34
Validating Your T&A .................................................................................................. 36
Entering Your T&A
The Work Time section of the T&A Data page has daily time entry fields for each week in a pay
period. Daily work time totals are displayed in the Work Time Total row.
New in the Work Time section of the T&A Data page is used to add a new work time TC to your
T&A.

Publication Category: T&A Processing
webTA 3.8 - Employee
30
To Add a New Work Time Transaction Code (Line):
1. Select the T&A Data button from the Employee Main Menu. The T&A Data page is
displayed.
Figure 16: T&A Data Page
2. Select the New button in the Work Time section of the T&A. The New Work Time
Activity page is displayed.
Figure 17: New Work Time Activity Page
Note: To edit a TC, select the Edit button. The Edit Work Time Activity page is displayed.
To delete a TC, select the Del button. The TC is removed when you select the Del button. There is
no warning/confirmation before the TC is deleted.
3. Complete the fields as follows:

Publication Category: T&A Processing
webTA 3.8 - Employee
31
Field
Instruction
Transaction Code
Select the applicable work time TC from the drop-down list.
Prefix
Enter the prefix code, if applicable.
Suffix
Enter the suffix code, if applicable.
Account
Select the applicable accounting code from the drop-down list.
Note: If you have more than one accounting code (line of
accounting) for a particular TC, you must add the TC each time
with each separate accounting code (line of accounting).
4. Select the Save button. The T&A Data page is displayed with the new TC (work time
line) added. After you select the Save button to save the new TC, the Edit and Del buttons
are available.
OR
Select the Cancel button to return to the T&A Data page without saving the TC.
1. In the Work Time section, enter the time worked (for each TC) as follows:
Field
Description\Instruction
Time In
Enter start time in hours and minutes in 15-minute increments.
Time Out
Enter end time in hours and minutes in 15-minute increments.
TC Line
Enter time worked in hours and minutes. This field is required.
Work Time Total
Populated with the total work time for the day.
2. Select the Update button to update the T&A and keep the page open.
OR
Select the Save/Return button to save the changes and return to the Employee Main Menu.
OR
Select the Validate button to validate the T&A and return to the Employee Main Menu.
OR
Select the Cancel button to cancel the edits and return to the Employee Main Menu.

Publication Category: T&A Processing
webTA 3.8 - Employee
32
Entering Leave and Other Time on Your T&A
The Leave and Other Time section of the T&A Data page has daily time entry fields for each
week in a pay period. Daily leave and other time totals are displayed in the Leave and Other
Time Total row.
New in the Leave and Other Time section of the T&A Data page is used to add new leave and
other time TCs to your T&A.
Note: After you submit a leave slip, it will be displayed in the Leave and Other Time section under the
applicable day. If times are included on the leave slip, those times will be displayed on the T&A as well.
If there is a coordinating line of accounting on the T&A Data page (for the leave type on your leave slip),
the leave will be displayed on that line of accounting. If there is no coordinating accounting code (for the
leave type on your leave slip), Auto-generated leave (change account), will be displayed on that line.
You must then add the applicable accounting for that line.
To Enter the Accounting for Leave and Other Time:
1. Select the T&A Data button from the Employee Main Menu. The T&A Data page is
displayed.
Figure 18: T&A Data Page

Publication Category: T&A Processing
webTA 3.8 - Employee
33
2. Select the New button in the Leave and Other Time section of the T&A. The New Leave
and Other Time Activity page is displayed.
Figure 19: New Leave and Other Time Activity Page
Note: To edit a TC, select the Edit button. The Edit Leave and Other Time Activity page is
displayed.
To delete a TC, select the Del button. The TC is removed when you select the Del button. There is
no warning/confirmation before the TC is deleted.
3. Complete the fields as follows:
Field
Instruction
Transaction Code
Select the applicable leave TC from the drop-down list.
Prefix
Enter the prefix code, if applicable.
Suffix
Enter the suffix code, if applicable.
Account
Select the applicable accounting code from the drop-down list.
4. Select the Save button to save the TC (with the line of accounting).
OR
Select the Cancel button to cancel the action and return to the T&A Data page.
1. Select the Edit button next to the applicable TC in the Leave and Other Time section.
2. Complete the fields as follows:
Field
Description/Instruction
Absence Start
Enter start time in hours and minutes in 15-minute increments.

Publication Category: T&A Processing
webTA 3.8 - Employee
34
Field
Description/Instruction
Absence End
Enter end time in hours and minutes in 15-minute increments.
TC Line
Enter absence time in hours and minutes. This field is required.
Leave and Other Time
Total
Populated with the total absence time for the day.
3. Select the Update button to update the T&A and keep the page open.
OR
Select the Save/Return button to save the changes and return to the Employee Main Menu.
OR
Select the Validate button to validate the T&A and return to the Employee Main Menu.
OR
Select the Cancel button to cancel the edits and return to the Employee Main Menu.
Entering Dollar Transactions on Your T&A
The Dollar Transaction section of the T&A Data page has a Dollar Amt field for entering the
total dollar amount for each type of dollar transaction. The total dollar transaction amount for the
pay period is displayed in the Total field.
New in the Dollar Transactions section of the T&A Data page is used to add a new dollar amount
TC to your T&A.

Publication Category: T&A Processing
webTA 3.8 - Employee
35
To Add a Dollar Amount Transaction Code:
1. Select the T&A Data button from the Employee Main Menu. The T&A Data page is
displayed.
Figure 20: T&A Data Page
2. Select the New button in the Dollar Transaction section. The New Dollar Transaction
Activity page is displayed.
Figure 21: New Dollar Transaction Activity Page
Note: To edit a TC, select the Edit button. The Edit Work Time Activity page is displayed.
To delete a TC, select the Del button. The TC is removed when you select the Del button. There is
no warning/confirmation before the TC is deleted.
3. Complete the fields as follows:
Field
Instruction

Publication Category: T&A Processing
webTA 3.8 - Employee
36
Field
Instruction
Transaction Code
Select the applicable dollar TC from the drop-down list.
Account
Select the applicable accounting code from the drop-down list.
4. Select the Save button to save the dollar TC. After you select the Save button to save the
dollar TC, the Edit and Del buttons are available.
OR
Select the Cancel button to cancel the action and return to the T&A Data page.
1. Select the Edit button next to the applicable TC in the Dollar Transaction section.
2. Complete the Dollar Amt field as follows:
Field
Instruction
Dollar Amt
Enter the applicable dollar amount.
3. Select the Update button to update the T&A and keep the page open.
OR
Select the Save/Return button to save the changes and return to the Employee Main Menu.
OR
Select the Validate button to validate the T&A and return to the Employee Main Menu.
Validating Your T&A
At the end of each pay period, you must validate your T&A. After you validate your T&A, it can
be certified by your supervisor. Upon being certified by your supervisor, the T&A is sent to NFC
for processing. All T&As should be completed, validated, and certified by the Tuesday following
the end of the pay period.

Publication Category: T&A Processing
webTA 3.8 - Employee
37
To Validate Your T&A
1. Select the T&A Data button from the Employee Main Menu. The T&A Data page is
displayed.
Figure 22: T&A Data Page
2. Confirm that all work time, leave, etc., has been entered on your T&A.
3. Select the Validate button. A Validation Summary page is displayed listing any error
and/or warning associated with your T&A.

Publication Category: T&A Processing
webTA 3.8 - Employee
38
Note: A T&A may be validated with warnings. All errors must be resolved. A T&A with errors
may not be validated.
Figure 23: Validation Summary Page
4. Select the Continue button to override any warning(s) and validate the T&A.
OR
Select the Cancel button to return to the T&A Data page to resolve/correct any error(s).

Publication Category: T&A Processing
webTA 3.8 - Employee
39
1. After all error(s) have been resolved/corrected, select the Continue button. Your T&A is
displayed.
Figure 24: T&A
2. Review your T&A.
The following information may be displayed on your T&A.

Publication Category: T&A Processing
webTA 3.8 - Employee
40
Note: Not all fields will be displayed on all T&As (i.e., if you have not taken any leave within a
given pay period, the Leave Requests section will be blank).
Field
Description
Name
Populated with your name.
Pay Period
Populated with the current pay period.
Time Card Type
Populated with the type of T&A (e.g., regular, corrected, etc.)
Leave Year
Populated with the leave year.
Status
Populated with the status of the T&A. Valid values are:
Value
Meaning
No Profile
T&A Profile does not exist. A T&A Profile must be
established before T&A functions can be performed.
Val by Emp
T&A validated by employee.
Val by Tkp
T&A validated by timekeeper.
Val by
Mstr Tkp
T&A validated by master timekeeper.
Certified
T&A certified by supervisor or master supervisor.
No Data
T&A Profile exists, but no T&As have been entered.
Time In Pay
Populated with the number of hours and minutes (in HH:MM format) in
pay status.
Other Time
Populated with the number of hours and minutes (in HH:MM format) in
other time status.
Dollar Transactions
Populated with the dollar amount to be paid for dollar TCs.
Days In Pay
Populated with the total number of days in pay status for the pay
period.
Transaction
Populated with the TC for the line.
Pfx
Populated with the prefix for the line, if applicable.
Sfx
Populated with the suffix for the line, if applicable.
Account
Populated with the accounting code and description for the line.
Work Time
Description
Time In
Populated with the arrival time for each day of the pay period.

Publication Category: T&A Processing
webTA 3.8 - Employee
41
Field
Description
Time Out
Populated with the departure time for each day of the pay period.
Transaction
Populated with the work time TC for the line.
Pfx
Populated with the work time prefix for the line, if applicable.
Sfx
Populated with the work time suffix for the line, if applicable.
Account
Populated with the work time accounting code and description for the
line.
Work Time Total
Populated with the total number of hours for each day in the Work Time
section.
Leave and Other Time
Description
Absence Start
Populated with the time that the leave starts on the applicable day.
Absence End
Populated with the time that the leave ends on the applicable day.
Transaction
Populated with the leave and/or other time TC for the line.
Pfx
Populated with the leave and/or other time prefix for the line, if
applicable.
Sfx
Populated with the leave and/or other time suffix for the line, if
applicable.
Account
Populated with the leave and/or other time accounting code and
description for the line.
Leave and Other Time
Total
Populated with the total number of hours of leave and/or other time for
each day of the pay period.
Daily Total
Populated with the total of the Work Time Total and the Leave and
Other Time Total for each day of the pay period.
Type
Populated with the type of leave or premium pay requested.
Status
Populated with the status of the leave or premium pay request.
Date
Populated with the date of the leave or premium pay request.
Supervisor
Populated with the supervisor that has approved/denied the leave or
premium pay request.
Leave Requests
Description
Type
Populated with the type of leave requested.
Status
Populated with the status of the leave request.
Date
Populated with the date of the leave request.

Publication Category: T&A Processing
webTA 3.8 - Employee
42
Field
Description
Supervisor
Populated with the supervisor that has approved/denied the leave
request.
Premium Pay Requests
Description
Type
Populated with the type of premium pay requested.
Status
Populated with the status of the premium pay request.
Date
Populated with the date of the premium pay request.
Supervisor
Populated with the supervisor that has approved/denied the premium
pay request.
T&A Profile
Description
Pay Plan
Populated with your pay plan.
Tour of Duty
Populated with your tour of duty.
Duty Hours
Populated with your duty hours for the pay period.
Work Week
Populated with your work week information.
Alternative Schedule
Populated with your alternative work schedule information.
Agency
Populated with your Agency.
State
Populated with your State.
Town
Populated with your town.
Unit
Populated with your unit.
Timekeeper
Populated with your timekeeper's number.
Retain Data
Populated with default schedule information.
Account Data Code
Populated with your accounting code entry information.
Service Computation
Date
Populated with your service computation date (SCD).
Annual Leave Category
Populated with your annual leave category.
Personal Leave Ceiling
Populated with your annual leave ceiling carryover information.
Status History
Description
Timestamp
Populated with the time information for each entry on this T&A.
Status
Populated with the status for each entry on this T&A.

Publication Category: T&A Processing
webTA 3.8 - Employee
43
Field
Description
Name
Populated with the name of the person making the entry for each entry
on this T&A.
Message
Populated with any applicable messages for each entry on this T&A.
1. Select the Affirm button to confirm your T&A. A confirmation popup appears.
Figure 25: TA records validated successfully. Popup
OR
Select the Cancel button to return to T&A Data page.

Publication Category: T&A Processing
webTA 3.8 - Employee
45
T&A Summary
T&A Summary opens a read only display of the T&A for the pay period in which you are currently
working. T&A Summary is also used by supervisors to certify the T&A.
To View Current Your T&A:
1. Select the T&A Data button from the Employee Main Menu. The T&A Summary page is
displayed.
Figure 26: T&A Summary Page
2. View the T&A.
3. Select the Return button to return to the Employee Main Menu.

Publication Category: T&A Processing
webTA 3.8 - Employee
47
Leave
Leave allows users to:
Add a new leave request
Edit and/or delete pending and approved leave requests
View your leave request history
View your leave requests in a calendar view
This section includes the following topics:
Adding a Leave Request ........................................................................................... 47
Editing a Leave Request for a New or Future Pay Period ...................................... 51
Deleting a Leave Request ......................................................................................... 53
Viewing Your Leave Request History ...................................................................... 54
Viewing Your Leave Requests in a Calendar View ................................................. 57
Adding a Leave Request
To Add a Leave Request:
1. Select the Leave/Prem Pay button on the Employee Main Menu page. The Leave/Prem
Request & Donations menu is displayed.
Figure 27: Leave/Prem Request & Donations Menu

Publication Category: T&A Processing
webTA 3.8 - Employee
48
2. Select the Leave button. The Current Leave Requests page is displayed with a list of leave
requests for the current and future pay periods.
Figure 28: Current Leave Requests Page

Publication Category: T&A Processing
webTA 3.8 - Employee
49
3. Select the New Request button. The Edit/View Leave Request page is displayed.
Figure 29: Edit/View Leave Request Page

Publication Category: T&A Processing
webTA 3.8 - Employee
50
4. Complete the fields as follows:
Field
Instruction
Leave Type
Select the leave type from the drop-down list.
Transaction Type
Select the transaction type from the drop-down list.
Hour
Enter the amount of leave requested.
From
Enter the start time of the leave.
To
Enter the end time of the leave.
Sick Leave
Select the type of sick leave, if applicable.
Note: If you select Sick Leave in the Leave type field, you
must specify the applicable type of sick leave in this field.
Family and Medical
Leave Act
Select the type of Family and Medical Leave Act (FMLA), if applicable.
Employee Comments
Enter any applicable comments.
Supervisor Comments
This field is completed by the supervisor, if applicable, after the leave
request is submitted.
5. Select the Save button to save the request. After you save the request, the leave is
displayed on the T&A Data page.
OR
Select the Cancel button to cancel the request and return to the Current Leave Requests
page.

Publication Category: T&A Processing
webTA 3.8 - Employee
51
Editing a Leave Request for a New or Future Pay Period
To Edit a Leave Request for the Current or Future Pay Periods:
1. Select the Leave/Prem Pay button on the Employee Main Menu. The Leave/Prem Request
& Donations menu is displayed.
Figure 30: Leave/Prem Request & Donations Menu
2. Select the Leave button. The Current Leave Requests page is displayed with a list of leave
requests for the current and future pay periods.
Figure 31: Current Leave Requests Page

Publication Category: T&A Processing
webTA 3.8 - Employee
52
3. Select the Edit button next to the leave request to be edited. The Edit/View Leave Request
page with the applicable leave request is displayed.
Figure 32: Edit/View Leave Request Page

Publication Category: T&A Processing
webTA 3.8 - Employee
53
4. Make the applicable changes.
5. Select the Save button to save the changes. After you save your changes, the leave is
displayed on the T&A Data page.
OR
Select the Cancel button to cancel the edit and return to the Current Leave Requests page.
Deleting a Leave Request
To Delete a Leave Request:
1. Select the Leave/Prem Pay button from the Employee Main Menu. The Leave/Prem
Request & Donations menu is displayed.
Figure 33: Leave/Prem Request & Donations Menu
2. Select the Leave button. The Current Leave Requests page is displayed with a list of leave
requests for the current and future pay periods.
Figure 34: Current Leave Requests Page
3. Select the Del button next to the request you wish to delete. The leave request is removed
from the request list.

Publication Category: T&A Processing
webTA 3.8 - Employee
54
Note: The request is removed when you select the Del button. There is no warning/confirmation
before the request is deleted.
Viewing Your Leave Request History
To View Your Leave Request History:
1. Select the Leave/Prem Pay button from the Employee Main Menu. The Leave/Prem
Request & Donations menu is displayed.
Figure 35: Leave/Prem Request & Donations Menu
2. Select the Leave button. The Current Leave Requests page is displayed with a list of leave
requests for the current and future pay periods.
Figure 36: Current Leave Requests Page
3. Select the View History button. The Leave Request History page is displayed listing past
leave information.

Publication Category: T&A Processing
webTA 3.8 - Employee
55
Note: The Leave Request History page only displays leave requests that have been approved or
denied, not those that are pending.
Figure 37: Leave Request History Page
4. Select the leave request to view.

Publication Category: T&A Processing
webTA 3.8 - Employee
56
5. Select the View button. The applicable Edit/View Leave Request page is displayed. This
is a view-only page.
Figure 38: Edit/View Leave Request Page

Publication Category: T&A Processing
webTA 3.8 - Employee
57
6. Review the request.
7. Select the Return button. The Leave Request History page is displayed.
Viewing Your Leave Requests in a Calendar View
To View Your Leave Request(s) in a Calendar View:
1. Select the Leave/Prem Pay button from the Employee Main Menu. The Leave/Prem
Request & Donations menu is displayed.
Figure 39: Leave/Prem Request & Donations Menu
2. Select the Leave button. The Current Leave Requests page is displayed with a list of leave
requests for the current and future pay periods.
Figure 40: Current Leave Requests Page

Publication Category: T&A Processing
webTA 3.8 - Employee
58
3. Select the Calendar View button. The Leave Request Calendar View page is displayed.
Figure 41: Leave Request Calendar View Page
4. Navigate to the applicable month to view the approved and pending leave request(s).
5. Select the Return button. The Current Leave Requests page is displayed.

Publication Category: T&A Processing
webTA 3.8 - Employee
59
Premium Pay
Prem. Pay allows users to:
Add a new premium pay request
Edit and/or delete pending and approved premium requests
View your premium pay request history
View your premium pay requests in a calendar view
This section includes the following topics:
Adding a Premium Pay Request .............................................................................. 59
Editing a Premium Pay Request for a New or Future Pay Period ......................... 62
Deleting a Premium Pay Request ............................................................................ 65
Viewing Your Premium Pay Request History .......................................................... 66
Viewing Your Premium Pay Requests in a Calendar View .................................... 69
Adding a Premium Pay Request
To Add a Premium Pay Request:
1. Select the Leave/Prem Pay button from the Employee Main Menu. The Leave/Prem
Request & Donations menu is displayed.
Figure 42: Leave/Prem Request & Donations Menu

Publication Category: T&A Processing
webTA 3.8 - Employee
60
2. Select the Prem. Pay button. The Current Premium Pay Requests page is displayed with a
list of current and future pay period premium pay requests.
Figure 43: Current Premium Pay Requests Page

Publication Category: T&A Processing
webTA 3.8 - Employee
61
3. Select the New Request button. The Edit/View Premium Pay Request page is displayed.
Figure 44: Edit/View Premium Pay Request Page
4. Complete the fields as follows:
Field
Instruction
Premium Pay Type
Select the premium pay type from the drop-down list.
Transaction Type
Select the transaction type from the drop-down list.

Publication Category: T&A Processing
webTA 3.8 - Employee
62
Field
Instruction
Hours
Enter the amount of premium pay requested.
From
Enter the start time of the premium pay.
To
Enter the end time of the premium pay.
Employee Remarks
Enter the reason for the request.
Supervisor Remarks
N/A
5. Select the Save button to save the request. After you save your request, the premium pay
is displayed on the T&A Data page.
OR
Select the Cancel button to cancel the request and return to the Current Premium Pay
Requests page.
Editing a Premium Pay Request for a New or Future Pay Period
To Edit a Premium Pay Request for the Current or Future Pay Periods:
1. Select the Leave/Prem Pay button on the Employee Main Menu. The Leave/Prem Request
& Donations menu is displayed.
Figure 45: Leave/Prem Request & Donations Menu

Publication Category: T&A Processing
webTA 3.8 - Employee
63
2. Select the Prem. Pay button. The Current Premium Pay Requests page is displayed.
Figure 46: Current Leave Requests Page

Publication Category: T&A Processing
webTA 3.8 - Employee
64
3. Select the Edit button next to the premium pay request to be edited. The Edit/View
Premium Pay Request page with the applicable premium request displayed.
Figure 47: Edit/View Premium Pay Request Page
4. Make the applicable changes.
5. Select the Save button to save the changes. After you save your changes, the premium
pay is displayed on the T&A Data page.

Publication Category: T&A Processing
webTA 3.8 - Employee
65
OR
Select the Cancel button to cancel and return to the Current Premium Pay Requests page.
Deleting a Premium Pay Request
To Delete a Premium Pay Request:
1. Select the Leave/Prem Pay button from the Employee Main Menu. The Leave/Prem
Request & Donations page is displayed.
Figure 48: Leave/Prem Request & Donations Menu
2. Select the Prem. Pay button. The Current Premium Pay Requests page is displayed and
lists current and future pay period premium pay requests.
Figure 49: Current Leave Requests Page
3. Select the Del button next to the appropriate premium pay request. The premium pay
request is removed from the request list.
Note: The request is removed when you select the Del button. There is no warning/confirmation
before the request is deleted.

Publication Category: T&A Processing
webTA 3.8 - Employee
66
Viewing Your Premium Pay Request History
To View Your Premium Pay Request History:
1. Select the Leave/Prem Pay button from the Employee Main Menu. The Leave/Prem
Request & Donations menu is displayed.
Figure 50: Leave/Prem Request & Donations Menu
2. Select the Prem. Pay button. The Current Premium Pay Requests page is displayed.
Figure 51: Current Premium Pay Requests Page
3. Select the View History button. The Premium Pay Request History page is displayed
listing past premium pay information.

Publication Category: T&A Processing
webTA 3.8 - Employee
67
Note: The Premium Pay Request History page only displays leave requests that have been
approved or denied, not those that are pending.
Figure 52: Premium Pay Request History Page
4. Select the premium pay request to view.

Publication Category: T&A Processing
webTA 3.8 - Employee
68
5. Select the View button. The applicable Edit/View Premium Request page is displayed.
This is a view-only page.
Figure 53: Edit/View Premium Pay Request Page
6. Review the request.

Publication Category: T&A Processing
webTA 3.8 - Employee
69
7. Select the Return button. The Premium Pay Request History page is displayed.
Viewing Your Premium Pay Requests in a Calendar View
To View Your Premium Pay Request(s) in a Calendar View:
1. Select the Leave/Prem Pay button from the Employee Main Menu. The Leave/Prem
Request & Donations menu is displayed.
Figure 54: Leave/Prem Request & Donations Menu
2. Select the Prem. Pay button. The Current Premium Pay Requests page is displayed with a
list of premium requests for the current and future pay periods.
Figure 55: Current Premium Pay Requests Page

Publication Category: T&A Processing
webTA 3.8 - Employee
70
3. Select the Calendar View button. The Premium Pay Request Calendar View page is
displayed.
Figure 56: Premium Pay Request Calendar View Page
4. Navigate to the applicable month to view the approved and pending premium request(s).
5. Select the Return button. The Current Premium Pay Requests page is displayed.

Publication Category: T&A Processing
webTA 3.8 - Employee
71
Leave Donations
Donation is used to:
Donate leave
Edit leave donations
Delete leave donations
These functions apply to both the the Voluntary and Emergency Leave Transfer Programs.
This section includes the following topics:
Donating Leave .......................................................................................................... 71
Editing a Leave Donation Request for the Current or Future Pay Periods ........... 74
Deleting a Leave Donation Request ......................................................................... 77
Donating Leave
To Donate Leave:
1. Select the Leave/Prem Pay button on the Employee Main Menu. The Leave/Prem Request
& Donations menu is displayed.
Figure 57: Leave/Prem Request & Donations Menu

Publication Category: T&A Processing
webTA 3.8 - Employee
72
2. Select the Donation button. The Leave Donations page is displayed.
Figure 58: Leave Donations Page

Publication Category: T&A Processing
webTA 3.8 - Employee
73
3. Select the New Donation button. The Edit Leave Donation page is displayed.
Figure 59: Edit Leave Donation Page
4. Complete the fields as follows:
Field
Description/Instruction
User ID
Populated with your user ID.
Leave Account
If you know the name of the account to which you wish to donate, type
it in this field.
If you do not know the name of the account to which you wish to
donate, select the Search button and select the applicable account
from the list provided.
After you select the applicable account, select the Return button to
return to the Edit Leave Donation page.
Donor Position
Type your position.
Donor Grade
Type your grade.
Step
Type your step.
Hours
Type the number of hours that you wish to donate.

Publication Category: T&A Processing
webTA 3.8 - Employee
74
Field
Description/Instruction
Account
Select the down arrow to select the applicable accounting code for the
leave to be donated.
Type of Leave
Select the down arrow to select the type of leave to be donated.
Remarks
Enter any remarks, if applicable.
Approved
Populated with the status of the donation request.
5. Select the Save button to save the request.
OR
Select the Cancel button to cancel the request and return to the Leave Donations page.
Note: Once you save the donation, its status will remain as Pending until a Human Resources
Administrator reviews and approves it. As long as it is in Pending status, it can be changed or deleted.
Editing a Leave Donation Request for the Current or Future Pay Periods
To Edit a Leave Donation Request for the Current or Future Pay Periods:
1. Select the Leave/Prem Pay button on the Employee Main Menu. The Leave/Prem Request
& Donations menu is displayed.
Figure 60: Leave/Prem Request & Donations Menu

Publication Category: T&A Processing
webTA 3.8 - Employee
75
2. Select the Donation button. The Leave Donations page is displayed.
Figure 61: Leave Donations Page

Publication Category: T&A Processing
webTA 3.8 - Employee
76
3. Select the Edit button next to the leave donation request to be edited. The Edit Leave
Donation page with the applicable donation request is displayed.
Figure 62: Edit Leave Donation Page (with the applicable donation request selected)
4. Make the applicable changes.
5. Select the Save button to save your changes.
OR
6. Select the Cancel button to cancel. The Leave Donations page is displayed.

Publication Category: T&A Processing
webTA 3.8 - Employee
77
Deleting a Leave Donation Request
To Delete a Leave Donation:
1. Select the Leave/Prem Pay button on the Employee Main Menu. The Leave/Prem Request
& Donations menu is displayed.
Figure 63: Leave/Prem Request & Donations Menu
2. Select the Donation button. The Leave Donations page is displayed.
Figure 64: Leave Donations Page
3. Select the Del button next to the request to be deleted. The leave request is removed from
the request list.
Note: The request is removed when you select the Del button. There is no warning/confirmation
before the request is deleted. If the donation has already been approved, it cannot be deleted.

Publication Category: T&A Processing
webTA 3.8 - Employee
78
Default Schedule
Default Schedule is used to set up/change your regular work schedule. The default schedule is
used if your T&A data changes little from one pay period to the next. By using a default
schedule, you can avoid having to reenter all of your time each pay period.
There are two types of default schedules in webTA. These are set up by your timekeeper. They
are:
Restore from Default - The time entered on the default schedule is automatically
populated on your time sheet each pay period. If you work your normal schedule with no
changes, then no changes to your T&A are necessary. If something other than your
default schedule occurs, then you must make the necessary changes on the T&A Data
page.
Exception Processing - The rows of time entered on the default schedule will
automatically be included on your T&A record unless you supplement it with entries
from the T&A Data page. (For example, if a day contains 8 hours on the Default
Schedule, but you use 4 hours of annual leave, only the annual leave must be entered on
the T&A.)
Note: The default schedule lines are not displayed on the T&A Data page, only the changes
(exceptions) to the default schedule.
For more information see:
Editing Your Default Schedule ................................................................................. 78
Editing Your Default Schedule
Your default schedule must be established by your timekeeper, but you can edit your default
schedule at any time.

Publication Category: T&A Processing
webTA 3.8 - Employee
79
To Edit Your Default Schedule:
1. Select the Default Schedule button on the Employee Main Menu page. The T&A Data :
Default Schedule page is displayed.
Figure 65: T&A Data : Default Schedule Page
2. Make the applicable changes to your schedule. Your can edit the following fields:
Time In
Time Out
Daily Time
3. Select the Update button to save your change(s) and remain on the T&A Data : Default
Schedule page.
OR
Select the Save/Return button to save your change(s) and return to the Employee Main
menu.
OR
Select the Cancel button to cancel.

Publication Category: T&A Processing
webTA 3.8 - Employee
80
To Delete a Line on Your Default Schedule:
1. Select the Default Schedule button on the Employee Main Menu page. The T&A Data :
Default Schedule page is displayed.
Figure 66: T&A Data : Default Schedule Page
2. Select the Del button next to the line that you wish to delete. The line is removed from
your default schedule.
Note: The line is removed when you select the Del button. There is no warning/confirmation
before the line is deleted.

Publication Category: T&A Processing
webTA 3.8 - Employee
81
Certified T&As
Certified T&As allows you to view a list of your certified T&As.
To View Your Certified T&As:
1. Select the Certified T&As button from the Employee Main Menu page. The Certified T&A
Summaries page is displayed.
Figure 67: Certified T&A Summaries Page
2. Select the pay period of the T&A you wish to view.
3. Select the View Certified Summary button. The T&A Summary for the selected pay period
is displayed.

Publication Category: T&A Processing
webTA 3.8 - Employee
83
Accounts
Accounts allows you to add and/or delete accounting codes for use on your T&A.
To Add an Accounting Code:
1. Select the Accounts button from the Employee Main Menu. The Account Tables page is
displayed.
Figure 68: Account Tables Page
2. Select the Get Account button. The Search for Account page is displayed.
Figure 69: Search for Account Page
3. Complete the fields as follows:
Field
Instruction

Publication Category: T&A Processing
webTA 3.8 - Employee
84
Field
Instruction
Fiscal Year
Type the fiscal year for the accounting that you are searching.
Program Code
Type the program code for the accounting that you are searching.
Function
Type the function information for the accounting that you are searching.
Description
Type the description for the accounting that you are searching.
Note: Enter as many characters of the account that you wish to match.
4. Select the Find Account button. The Browse for Account page is displayed with a list of
accounting codes meeting the search criteria.
Figure 70: Browse for Account Page

Publication Category: T&A Processing
webTA 3.8 - Employee
85
5. Select the Add button next to the accounting code to add. Listed is now displayed next
to the accounting code that you added.
6. Select the Return button. The Account Tables page (with the new accounting code listed)
is displayed.
To Delete an Accounting Code:
1. Select the Accounts button from the Employee Main Menu. The Account Tables page is
displayed.
Figure 71: Account Tables Page
2. Next to the account to be deleted, select the Del button. The account is removed from the
list.
Note: The account is removed when you select the Del button. There is no warning/confirmation
before the request is deleted.

Publication Category: T&A Processing
webTA 3.8 - Employee
87
Reports
Reports is used to run a leave error report which can be used to reconcile your historical leave
records. The report will display a separate line item for each pay period that you have certified
T&As.
Note: The Leave Audit report is the only report than an employee has access to and can run.
To Run the Leave Error Report:
1. Select the Reports button on the Employee Main Menu. The Employee Reports Menu is
displayed.
Figure 72: Employee Reports Menu

Publication Category: T&A Processing
webTA 3.8 - Employee
88
2. Select the Leave Audit button. The Leave Audit Report is displayed.
Figure 73: Leave Audit Report
3. Complete the fields as follows:
Field
Instruction
From
Select the down arrows to select the applicable year and pay period for
the beginning timeframe of the report.
To
Select the down arrows to select the applicable year and pay period for
the ending timeframe of the report.
Leave Type
Select the down arrow to select the applicable leave type to be
displayed on the report.
4. Select the Update button to update the information and display the report.

Publication Category: T&A Processing
webTA 3.8 - Employee
89
OR
Select the Download PDF button to display the report as a pdf. The Leave Audit report (as
a pdf) is displayed.
Figure 74: Leave Audit Report (pdf)
Publication Category: T&A Processing
webTA 3.8 - Employee
91
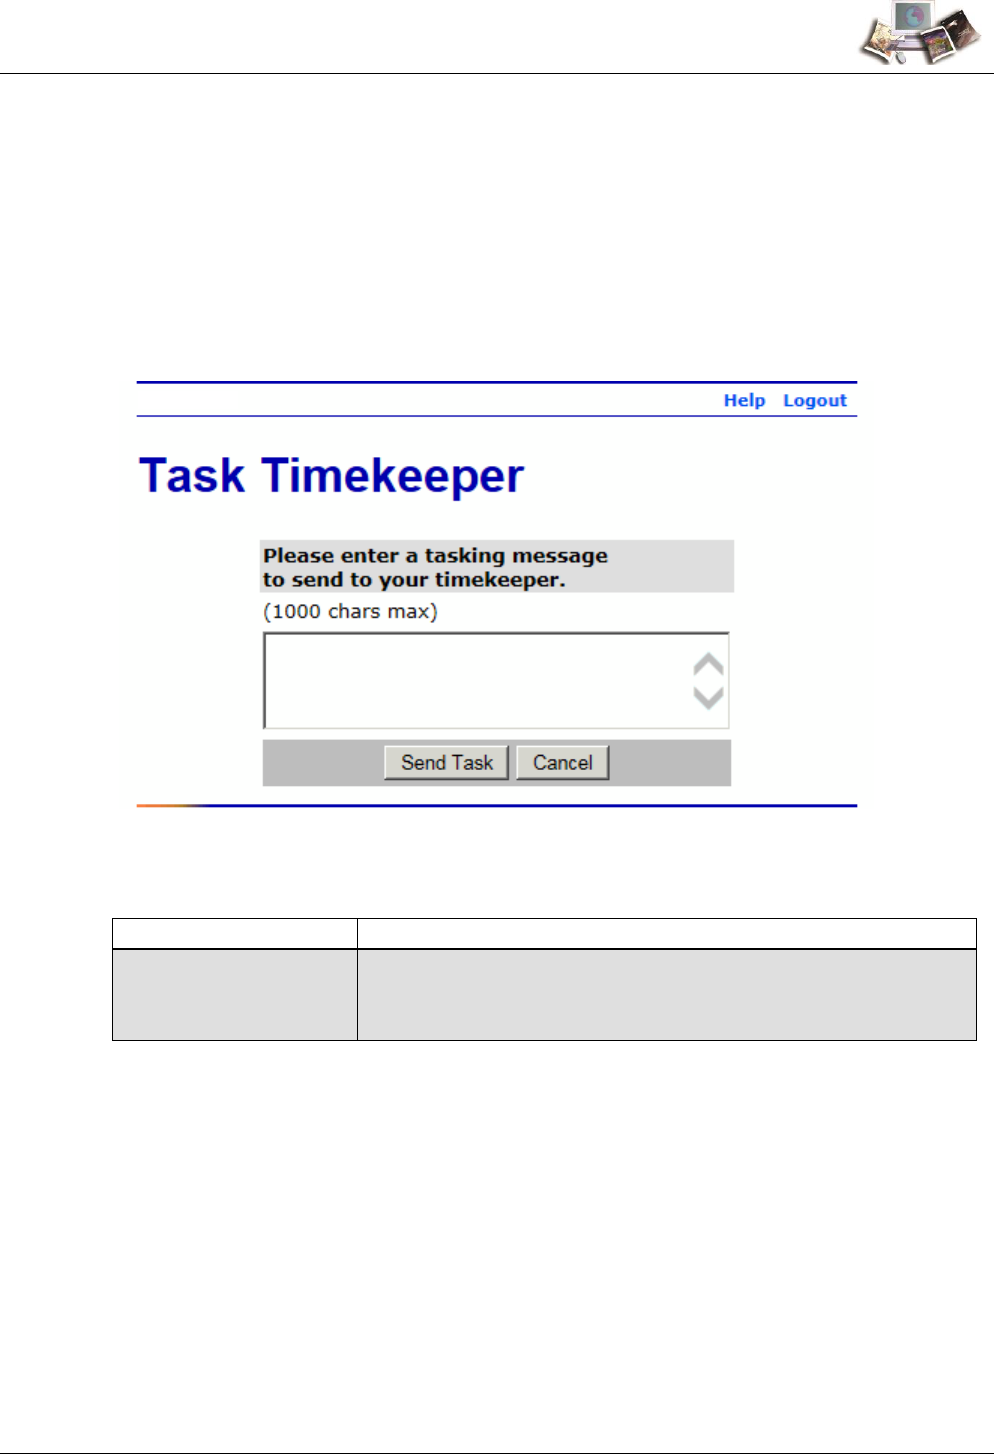
Send Task
Send Task is used to send a message to your timekeeper.
To Send a Message to Your Timekeeper:
1. Select the Send Task button on the Employee Main Menu. The Task Timekeeper page is
displayed.
Figure 75: Task Timekeeper Page
2. Complete the field as follows:
Field
Instruction
Please enter a tasking
message to send to your
timekeeper.
Type the message to be sent to your timekeeper.
3. Select the Send Task button. After you select the Send Task button, the message is sent,
and you are returned to the Employee Main Menu.
OR
Select the Cancel button to cancel. The Employee Main Menu is displayed.

Publication Category: T&A Processing
webTA 3.8 - Employee
92
View Tasks
View Tasks lists all functions performed by a user according to your role. A description of each
function and the corresponding date and time are displayed for each function listed.
The From column displays the source of the message.
The Date/Time column displays when the task was sent.
The Type column displays the type of message.
The Description column contains the content of the message.

Publication Category: T&A Processing
webTA 3.8 - Employee
93
To View Your Task(s)
1. Select the View Tasks button on the Employee Main Menu. The Task List page is
displayed.
Figure 76: Task List Page
The following fields are displayed on the Task List page.
Field
Description
From
Displays the source of the message.

Publication Category: T&A Processing
webTA 3.8 - Employee
94
Field
Description
Date/Time
Displays the date and time that the task was sent.
Type
Displays the type of message.
Description
Displays the content of the message.
1. Review the task(s).
2. Select the Clear button to delete an individual message after reviewing it.
OR
Select multiple messages and select the Clear Selected button to delete the selected
messages.
OR
Select the Clear All button to delete all messages.
OR
Select the Clear This Page button to delete all messages displayed on the current page.
1. After you are finished reviewing/deleting your message(s), select the Return button. The
Employee Main Menu is displayed.

Publication Category: T&A Processing
webTA 3.8 - Employee
95
Index
A
Accessibility for Users of Assistive Technology • 3
Accounts • 83
Adding a Leave Request • 47
Adding a Premium Pay Request • 59
C
Certified T&As • 81
Changing Your Password • 22
D
Default Schedule • 78
Deleting a Leave Donation Request • 77
Deleting a Leave Request • 53
Deleting a Premium Pay Request • 65
Donating Leave • 71
E
Editing a Leave Donation Request for the Current or
Future Pay Periods • 74
Editing a Leave Request for a New or Future Pay
Period • 51
Editing a Premium Pay Request for a New or Future
Pay Period • 62
Editing Your Default Schedule • 78
Employee • 27
Entering Dollar Transactions on Your T&A • 34
Entering Leave and Other Time on Your T&A • 32
Entering Your T&A • 29
F
Feedback • 6
G
Getting Started • 11
H
Help • 24
L
Latest Update Information • 1
Leave • 47
Leave Donations • 71
Logging In • 11
Logging Out • 22
O
Overview • 7

Publication Category: T&A Processing
webTA 3.8 - Employee
96
P
Premium Pay • 59
R
Related Systems • 8
Reports • 87
S
Send Task • 91
Sorting Lists • 23
T
T&A Data • 29
T&A Summary • 45
Typographical Conventions • 5
V
Validating Your T&A • 36
View Tasks • 92
Viewing Your Leave Request History • 54
Viewing Your Leave Requests in a Calendar View • 57
Viewing Your Premium Pay Request History • 66
Viewing Your Premium Pay Requests in a Calendar
View • 69
