Workfront Proofing Instructions for Campus Users
RECEIVE A PROOF TO REVIEW
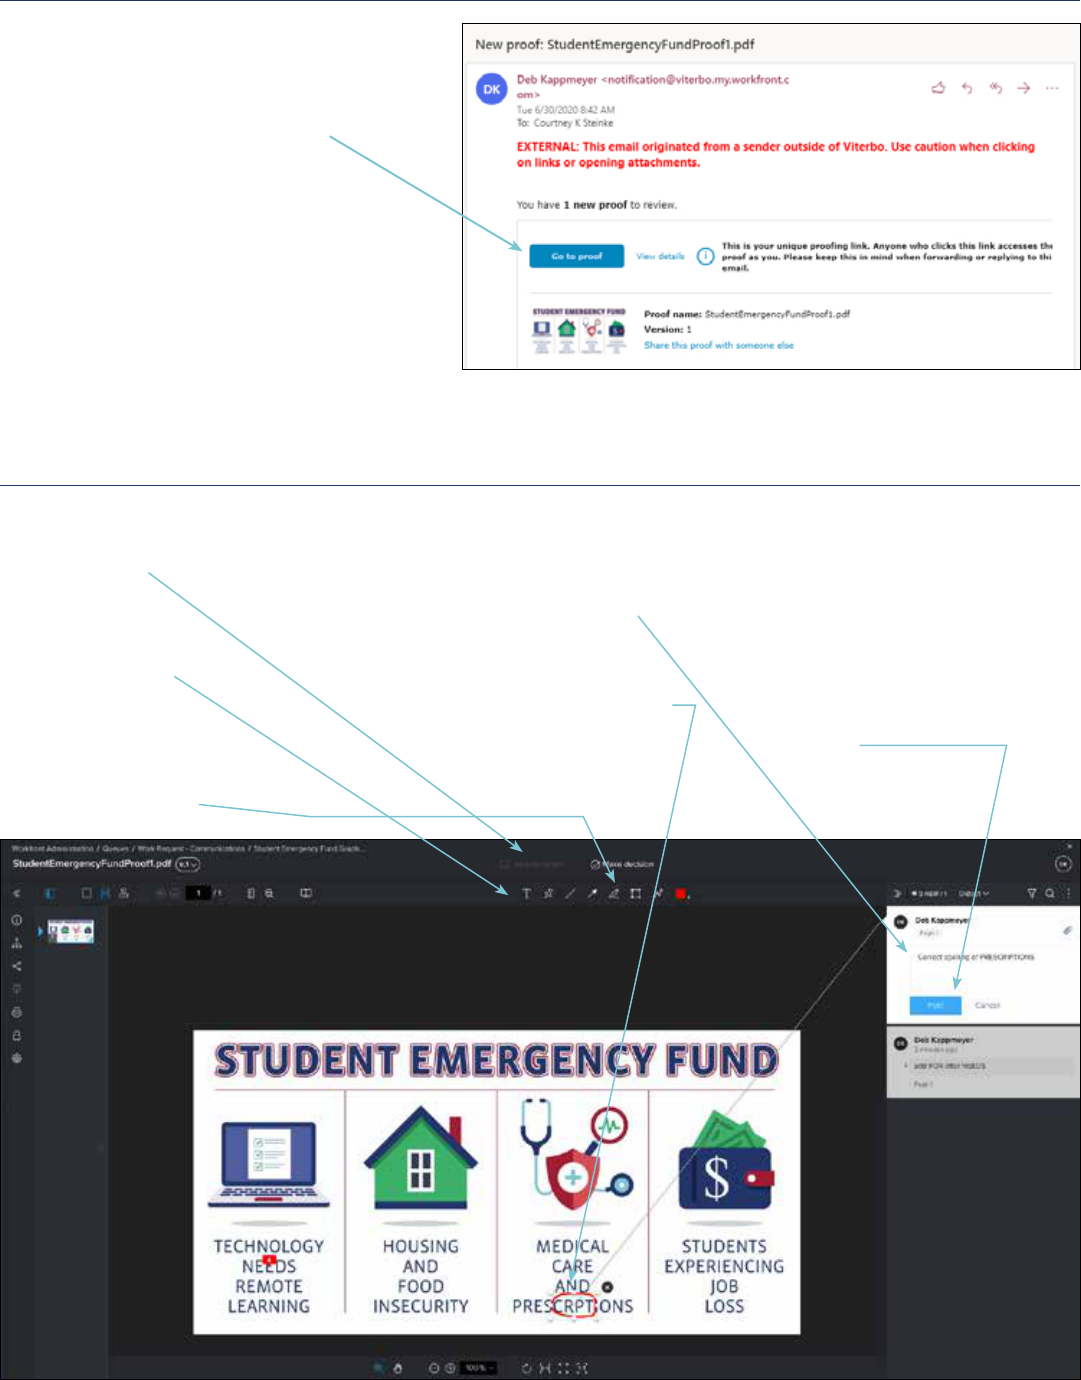
• Use the email notification you receive to
open the new proof into the proof viewer
by clicking on the blue Go to proof button.
• If you are comfortable working in Workfront,
you can also find the proof in Workfront
directly. Login with your Viterbo credentials
at https://viterbo.my.workfront.com. Go to
Requests I’ve Submitted and click on the
request.Click the Documents tab. Hover over
the proof and click on Open Proof.
• The proof viewer allows you to mark up
directly on the proof, indicating where
changes need to be made. Comments allow
you to offer instructions, such as changing text or altering imges.
WORKING IN THE PROOF VIEWER
1. Click Add comment at the top of the proof viewer window.
2. A comment box opens on the right side of the viewer. Enter your text for the comment (e.g., change/correct words,
alter image, add logo).
3. Select a markup tool from the toolbar.
4. Draw on the proof, indicating the area to which your comment pertains.
5. Click Post on the comment box. Continue making comments and marking proof until finished.
6. Click MAKE DECISION at the top. This step sends notification to Communications to proceed.
Continued on next page

7. A box with decision options will
open. Select the option that applies
and click Make decision.
8. Your decision will be sent to the
person who furnished the proof
to you. If Approved or Approved
with changes
are selected, the
project will proceed. If Changes
required
is selected, you will
be notified when a revised
proof is ready for your review.
PROOF VIEWER OVERVIEW
[A] Access previous versions of the proof.
[B] Hide/display the thumbnail view panel.
[C] Choose between single-page display, continuous
scroll, or magazine layout.
[D] Navigate through the pages of the proof.
[E] Measure an area of the proof.
[F] Search content of the document (available for
specific file types).
[G] Compare versions of the proof.
[H] Add comment and/or markup.
[I] Markup tools are available after clicking Add
comment.
[J] Make a decision on the proof.
[K] Collapse comments column.
[L] Sort comments.
[M] Filter comments.
[N] Search comments.
[O] Make a comment, reply to a comment, attach a file to
a comment, etc.
[P] Move the proof around within the window.
[Q] Change zoom percentage of the proof.
[R] Options for fitting the proof within the proof viewer
window.
[A]
[H]
[P] [Q] [R]
[J]
[B] [C] [D] [E] [F] [G] [I]
[K] [L] [M][N]
[O]

MARKUP TOOLS
Use markup to point to any section on the proof to help clarify a comment or question.
[A] Text – highlight text on the proof. The annotation
tools appear after you’ve highlighted text: highlight,
delete, replace, insert, bold, italics, underline.
[B] Freehand line – draw freehand on the proof.
[C] Line – Add a straight line on the proof.
[D] Arrow – draw an arrow to point to a selected area of
the poof. The point of the arrow draws at the end of
the line.
[E] Highlight – highlights selected area of the proof.
[F] Rectangle – draw a box around part of the proof.
[G] Polyline – draw a connected sequence of line
segments. You can alter the shape by moving the
points. Use to highlight an odd shape on the proof.
[H] For each of the tools, you can change the color of
the highlight or drawing. For the drawing tools (line,
arrow, box, etc.) you can also select the opacity of the
line and the thickness of the line. Select the tool, then
select the color options before you start to draw.
[A] [B] [C] [D] [E] [F] [G] [H]
