
2012+ Tacoma APEX Front Bumper Instructions
Important notices:
These instructions are intended only as a general guide for installing All-Pro products. For some items, specialized
mechanical skills, metal fabrication and/or welding skills may be needed for proper installation. If you have any
doubts or questions about installing these or other parts please call us at the shop 951-658-7077 or contact a
competent mechanic, fabricator, welder or other appropriate professional.
Aftermarket accessories are intended to modify and/or prepare a vehicle for uses that exceed conditions anticipated
by the vehicle manufacturer. These uses may include high performance demands and negotiation of rough terrain.
These conditions have extreme variance and cannot be controlled by the vehicle manufacturer or aftermarket
accessory manufacturer. Therefore, the safe control of your vehicle is entirely your responsibility. Do not purchase
parts from All-Pro Off Road unless you are willing to accept this responsibility. Do not install any All-Pro part that
you do not feel competent at installing without causing present or future injury to yourself or others; consult a
professional installer.
All parts sold by All-Pro Off Road are for off road racing use only and are not intended for use on the street.
Modification of your vehicle to enhance performance with the parts sold by All-Pro Off Road can result is dangerous
situations that may result in bodily harm. The buyer hereby assumes all risks associated with any such modifications.
All-Pro Off Road will not accept responsibility for personal injury or property damage arising from the failure of any
parts manufactured or sold by All-Pro Off Road.
In an effort to provide both durability and safety, All Pro Off Road recommends you carefully read the entire
installation procedure before beginning, then rigidly follow these instructions during installation. Also, it is
extremely important that you abide by proper safety procedures including the use of jack stands, setting the parking
brake, wearing eye protection, etc.
PARTS LIST:
A. 1) Main Bumper
B. 1) Lower Valance with Mounting Brackets
C. 2) Frame Inserts (Nut Plates)
D. 1) Solenoid Bracket
E. 1) Hardware Pack, Plated Grade 8
a. 14) 5/16-18 x 1.0”L Bolts
b. 28) 5/16 Flat Washers
c. 14) 5/16 Lock Washers
d. 14) 5/16 Nuts
e. 6) 3/8” Flat Washers (for adjustment)
f. 2) ½-13 x 1.0”L Bolts
g. 2) ½ Flat Washers
h. 2) ½ Lock Washers

All Pro Off Road 541 N Palm Ave Hemet CA 92543 951-658-7077
PROCEDURE:
1. CHECK PARTS
Remove bumper and hardware from packaging, verifying all components are accounted for before
proceeding.
2. DISCONNECT FACTORY FOG LIGHTS
If equipped, disconnect the wire from the factory fog lights, as shown below.
3. REMOVE RADIATOR GRILLE
Remove the 2 screws.
Using a clip remover, remove the 2 clips.
Disengage the 2 clips and remove the radiator grille.
4. REMOVE FRONT BUMPER COVER
Apply protective tape to the outer circumference of the front bumper cover, as shown in the illustration,
as well as over the tip of a standard screw driver.

All Pro Off Road 541 N Palm Ave Hemet CA 92543 951-658-7077
Remove the 6 screws.
Using a clip remover, remove the 7 clips.
Remove the 2 clips.
Disengage the 2 claws and remove the front bumper cover.

All Pro Off Road 541 N Palm Ave Hemet CA 92543 951-658-7077
5. REMOVE FRONT BUMPER REINFORCEMENT SUBASSEMBLY
Remove the 6 nuts and front bumper reinforcement with a 14mm socket, and retain the nuts.
6. REMOVE END CAPS AND BRACES
Remove the two end caps, and braces as shown below, retaining the hardware:
7. PREPARE NEW BUMPER
Now is the time to install lights and/or winch, if desired. Install the solenoid bracket (D) using a ½”
wrench/socket and 2) 5/16” bolts (a) with 2 flat washers (b), a lock washer (c), and nut (d) on each, mounting to
the holes on the inside of the bumper (pictured lower right). We recommend a 4” round light like the PIAA 510
Series we offer, but other models of similar size will work. The OEM fog lights were not designed to mount in the
All-Pro bumper. As for the winch, we recommend at least a Warn M8000 or equivalent with remote solenoid.

All Pro Off Road 541 N Palm Ave Hemet CA 92543 951-658-7077
8. INSTALL APEX BUMPER
Now you are ready to install the All-Pro APEX bumper onto the front of your vehicle. Lift the front
bumper (A) onto the 6 forward facing bolts, it helps to have another person lifting at this point. Check the vertical
alignment of the bumper with the body lines, and if needed use the 3/8” flat washers (e) to adjust but placing them
on the factory bolts, as pictured lower left. Once fitted, hand tighten all 6 factory nuts. Now check the horizontal
alignment, and once in place where you want it, use a 14mm socket & a 6 inch extension to tighten down the
factory nuts on the forward facing bolts.
9. ATTACH LOWER VALANCE BRACKET
Loosely attach the mounting bracket (B) to the bumper using 6) 5/16 bolts (a), each with 2 flat washers
(b) lock washer (c), and nut (d) per side. Attach the mounting bracket (B) to the frame by first inserting the nut
plates (C) into the ends of the frame as shown below. Hand tighten the two ½” bolts (f), each with a with a flat
washer (g) and lock washer (h), that go into the end cap tabs Then use the factory bolts to attach the bracket
farther back along the frame, as shown. Once all the bolts are in place, tighten down the ½” bolts first with a ¾”
wrench/socket, followed by the factory frame bolts with a 14mm wrench/socket, then the 5/16” bolts last with a
½” wrench/socket.
All Pro Off Road 541 N Palm Ave Hemet CA 92543 951-658-7077
10. FINAL TOUCHES
A. The factory inner wheel well plastic needs to be tucked into the sides of the bumper. B. Since the grille is no
longer attached at the bottom to the factory bumper cover, you will need to use cable ties in the two bottom holes to
attach it to the crossbar.
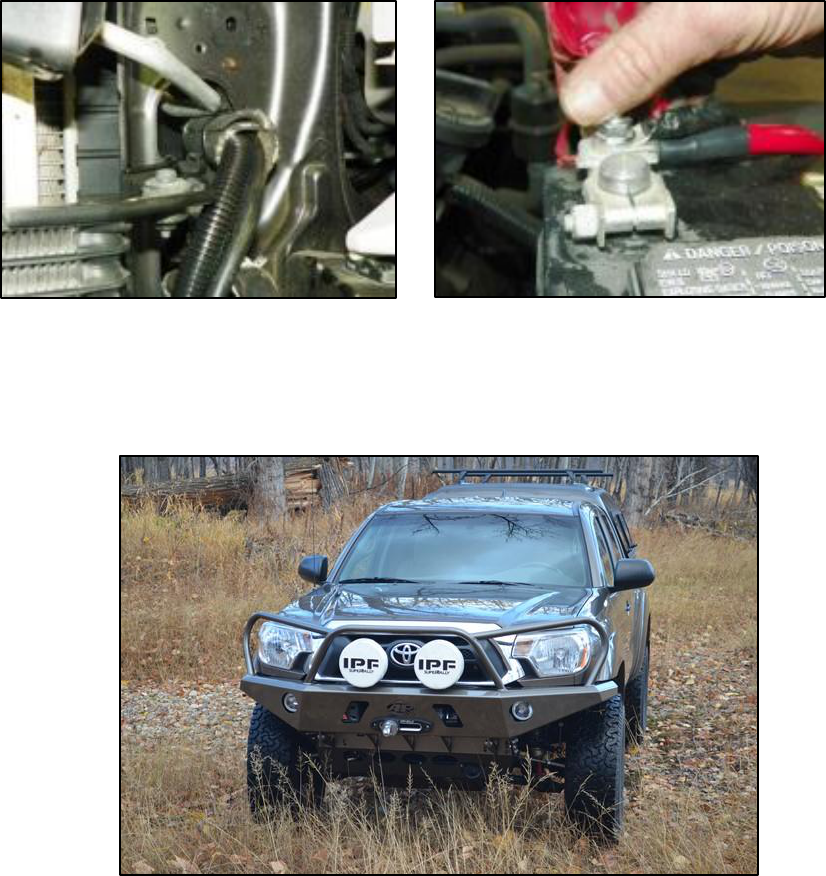
11. FINISH WIRING
We recommend running the wiring for the winch as shown below with a protective wrap. For the fog lights,
follow the manufacturer’s instructions or splice them into the factory fog switch wiring, if equipped.
Here is the bumper installed, pictured with the optional light bar hoop, headlight hoops, IPF lights on top, PIAA 510 fog
lights inside the bumper, Warn M8000 winch, Master-pull synthetic winch rope, Factor 55 thimble, All-Pro billet
aluminum fairlead. We also offer ¾” D-Ring shackles to fit in the recovery point mounts in the front lower section of the
bumper. If you require any help or would like to add on any of these parts, call our shop at 951-658-7077 and we will be
happy to assist you.
