
Name
Updated:9/6/2023
Creating Non-PO Invoices in Guided Buying
PURPOSE
HELPFUL HINTS
This Quick Reference Guide (QRG) is designed to show the steps needed to create a direct pay (non-
PO-based invoice) in SAP Ariba.
• Assemble all supporting documentation prior to beginning work in SAP Ariba.
• For the best experience, please use the following browsers:
P
ROCEDURE
1. Access SAP Ariba by clicking the “SAP Ariba – Procure to Pay” tile in Firefly.
2. Click the “Procurement and Payment Forms” tile.
1
Google Chrome (64-bit) Apple Safari (64-bit)
Microsoft Edge (32-bit) Microsoft Edge Chromium (32-bit and 64-bit)
Mozilla Firefox (64-bit)

Name
Updated:9/6/2023
Creating Non-PO Invoices
PROCEDURE (CONTINUED)
3. Click the “Direct Pay” tile.
4. The “Invoice Entry” screen displays. Complete the Header information as noted below. Required
fields are denoted by “ * “. NOTE: Additional fields may display as selections are made.
2
A. Attach invoice in PDF or image format.
The form cannot be submitted without
an attached invoice.
B. Validate the “On Behalf Of” as this
individual will need to approve the
invoice. The user’s name defaults.
C. Search for and select the supplier.
D. Enter the supplier invoice number.
E. Enter the invoice date.

Name
Updated:9/6/2023
5. Scroll to the “Line Items” section. Enter all information required on the line item.
6. Expand the “Accounting” section to change funding information and/or to add split funding. Search
for the desired cost center, WBS element, and/or GL account by clicking the dropdown arrow(s) and
selecting “Browse all”. Click the “Split Accounting” link to split funding between two or more cost
objects.
7. (optional) Add charges at the Header Level of the invoice (e.g., taxes). Click “Add” and select the
appropriate charge from the drop-down menu. Click “Update” to update the invoice total.
A. Enter item description.
B. Enter item quantity (total will
automatically calculate.
C. Enter unit price. Total will automatically
calculate.
D. (Optional) Click to add another line
item.
E. (Optional) Click to duplicate this item.
A. Select Percentage (default) or Amount.
B. Enter percentage (or amount).
C. Enter percentage (or amount).
D. Search for a G/L, cost center or WBS
element for the 2
nd
split.
Name
Updated:9/6/2023
Creating Non-PO Invoices
PROCEDURE (CONTINUED)
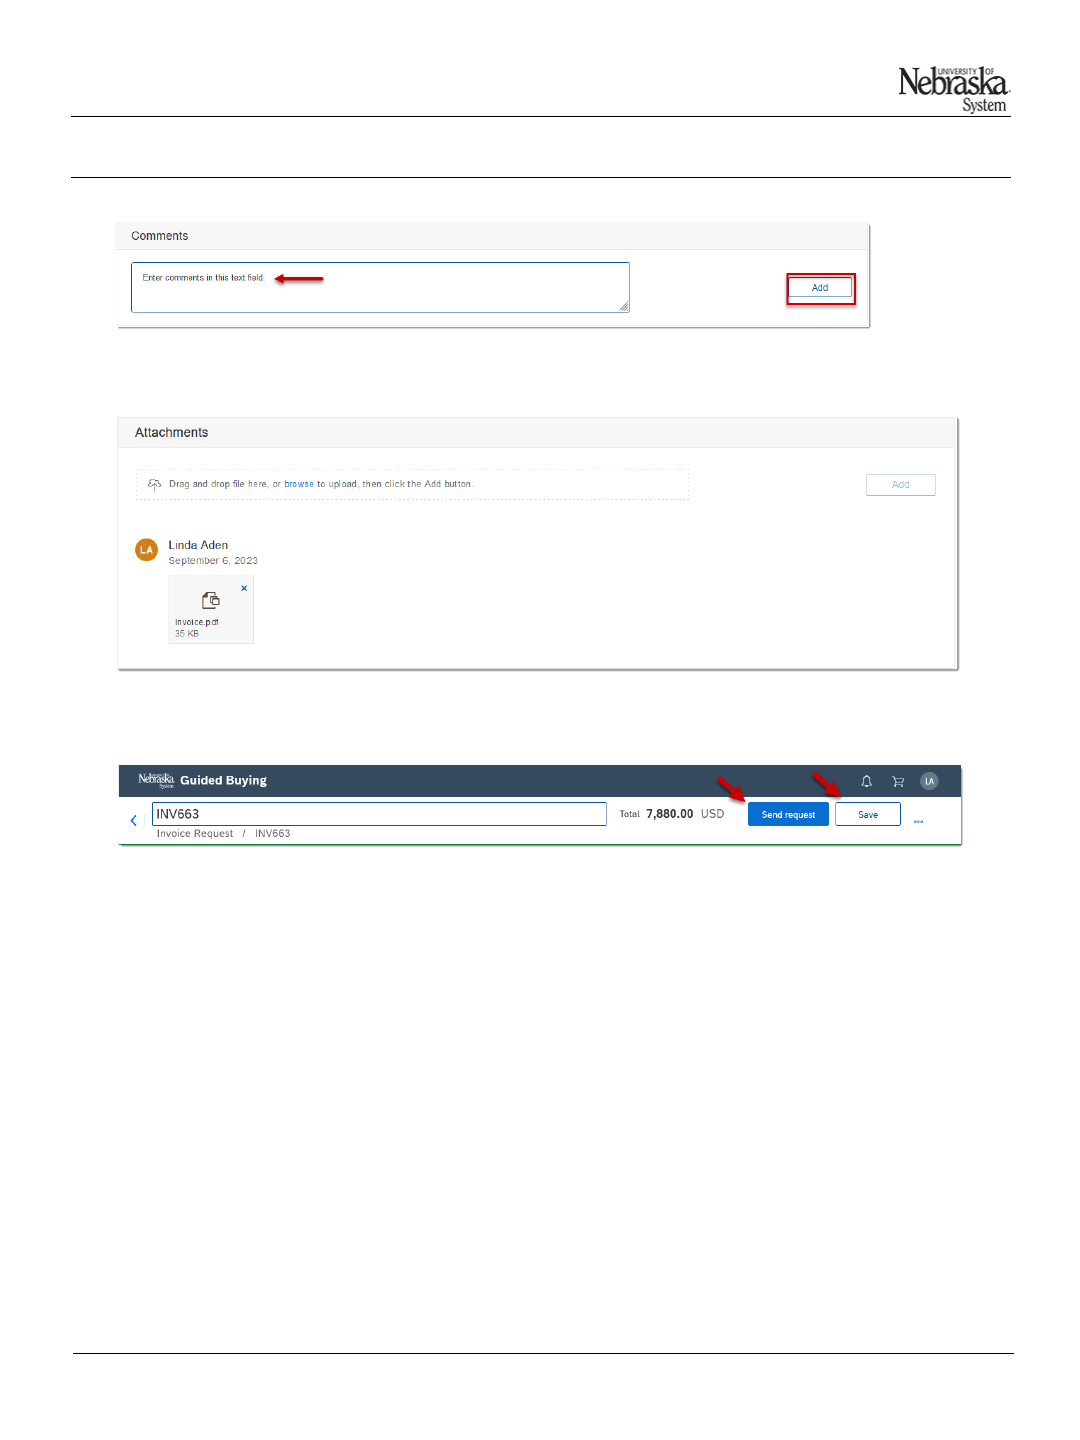
7. (Optional) Enter any comments and click “Add”.
9. If you haven’t already, attach the invoice and any other documentation by clicking the “browse” link
and browsing for the file(s).
10. Click Send request to begin the approval process (no changes can be made one sent) or click
Save to save your entries.
4

Name
Updated:9/6/2023
Creating Non-PO Invoices
PROCEDURE (CONTINUED)
9. Click the “Approval Flow” tab (top of page) to validate that no errors exist on the invoice and to
review/add approvers, if needed. Click “Submit” when complete.
10. The confirmation screen displays.
5
