
32-BIT FLOAT GUIDE | REAPER 6.75 (WINDOWS)
32-BIT FLOAT GUIDE | REAPER 6.75 | WINDOWS

32-BIT FLOAT GUIDE | REAPER 6.75 (WINDOWS)
STEP 1
Download and install the ASIO driver.
a. Close all other apps and programs,
even Windows control panels, that
may be accessing your sound
settings to ensure they don’t conflict
with the ASIO driver.
b. Connect your NT1 5th Generation
to your computer via the included
USB-C to USB-C cable. If your
computer doesn’t have a USB-C port,
you’ll need to use a USB-A to USB-C
cable such as the SC18 instead.

32-BIT FLOAT GUIDE | REAPER 6.75 (WINDOWS)
Open Reaper.
a. Navigate to ‘File’ > ‘Project Settings’
> ‘Media’ > ‘Recording’ and under the
‘WAV bit depth’ dropdown, select ’32
bit FP’.
STEP 2

32-BIT FLOAT GUIDE | REAPER 6.75 (WINDOWS)
STEP 3
Navigate to ‘Options’ > ‘Preferences’ >
‘Audio’ > ‘Device’.
a. Under the ‘Audio System’
dropdown, select ‘ASIO’.

32-BIT FLOAT GUIDE | REAPER 6.75 (WINDOWS)
STEP 3 CONTINUED
b. Under the ‘ASIO Driver’ dropdown,
select NT1 5th Gen (Float)’. If you
have multiple USB audio inputs
connected to your computer, they will
show up as options in the ‘first’ and
‘last’ dropdown menus.
c. To set your sample rate, ensure the
‘Request sample rate’ box is ticked
and type your desired sample rate in
the box next to it (type ‘48000’ for
48kHz, for instance).
NOTE: You can select up to 192kHz, but
many Windows computers and laptops
have integrated sound cards that can’t
play back sample rates higher than 48kHz.
This means that your audio will still be
recorded at this incredibly high sample
rate into your DAW, but you will not be
able to monitor or play back this audio
via headphones plugged into your device.
We suggest recording at a standard
48Khz, unless your project specifically
requires a higher sample rate.

32-BIT FLOAT GUIDE | REAPER 6.75 (WINDOWS)
STEP 3 CONTINUED
d. Click ‘ASIO Configuration’
and, under the ‘Output
Device’ dropdown, select your
headphones or other monitoring
output. Here, you can also adjust
the microphone’s input gain and
buffer size.

32-BIT FLOAT GUIDE | REAPER 6.75 (WINDOWS)
STEP 4
Create an audio track by navigating
to ‘Track’ > ‘Insert New Track’.
32-BIT FLOAT GUIDE | REAPER 6.75 (WINDOWS)
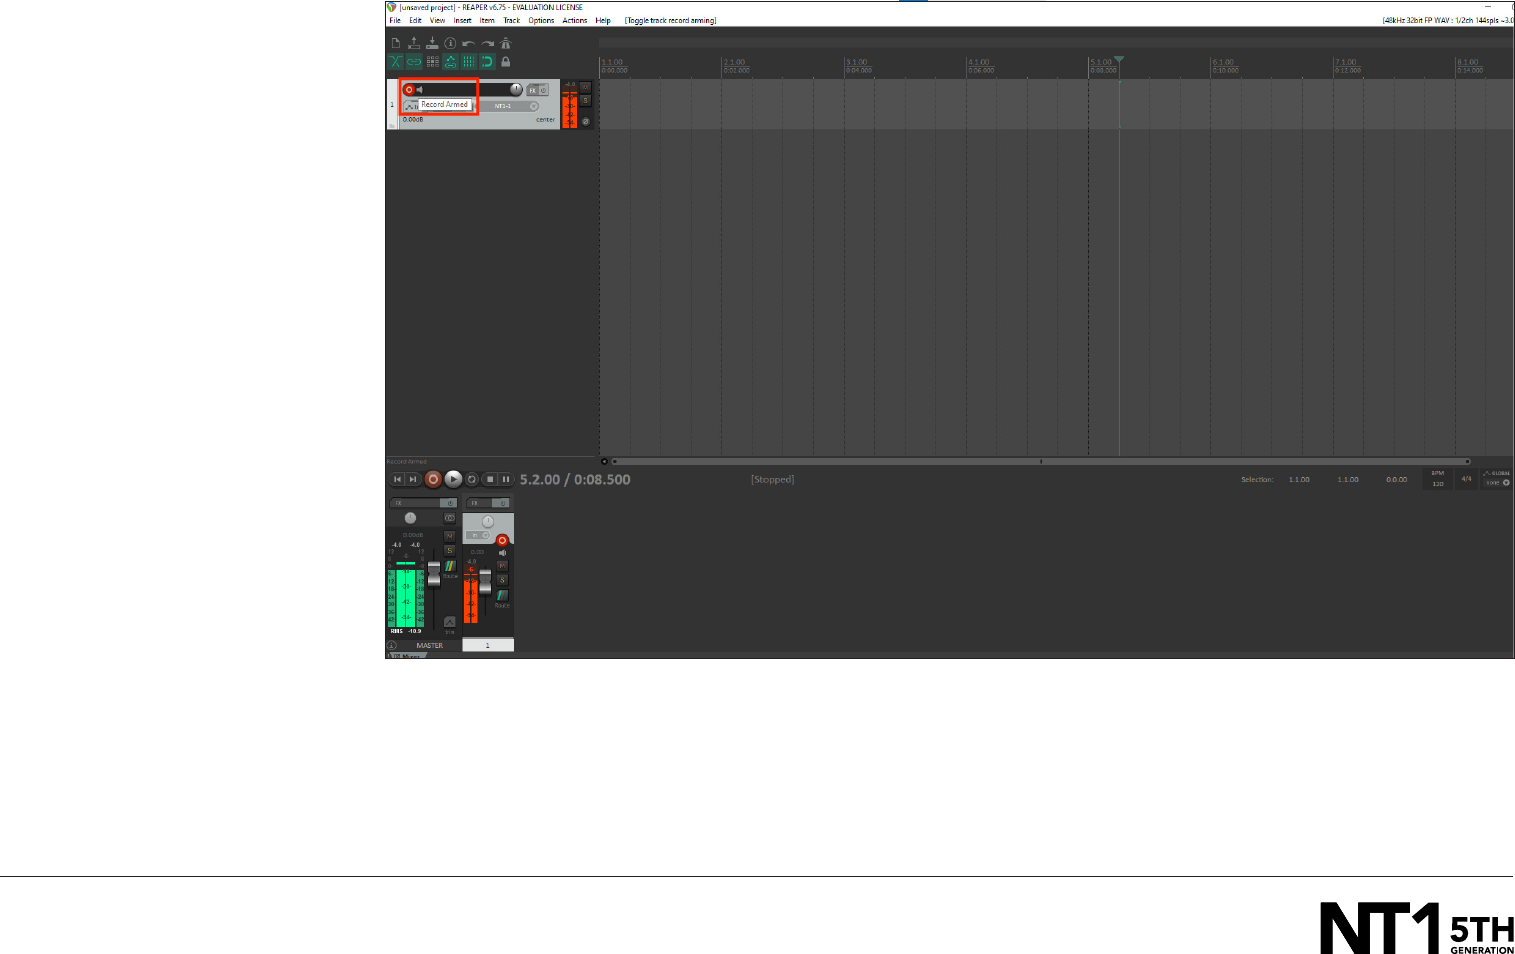
STEP 4 CONTINUED
a. On your Audio Track, on the far
left of the screen, click the ‘Record
Arm/Disarm’ button.

32-BIT FLOAT GUIDE | REAPER 6.75 (WINDOWS)
STEP 5
Click on the ‘Record’ button near the
bottom left of the screen to begin
recording your performance. Hit ‘Stop’
to end your recording.

32-BIT FLOAT GUIDE | REAPER 6.75 (WINDOWS)
If your audio clipped while recording,
rather than having to re-record the
track, you can simply adjust it afterwards
to the appropriate level. This is the
key benefit of 32-bit float recording.
To do this, right-click the waveform
of the audio you just recorded, select
‘Item Properties’ and navigate to
‘Take Properties’ > ‘Volume/pan’ >
‘Normalize’ and click ‘OK’.
NOTE: If you’d like the loudest section
of your audio to be below 0dB, you
can adjust this in the ‘Normalize Media
Items’ pop-up window by changing the
‘0.0dB’ value to a lower value (-3.0dB,
for instance).
STEP 6

32-BIT FLOAT GUIDE | REAPER 6.75 (WINDOWS)
STEP 7
After normalizing, you will notice the
track’s waveform has decreased in size and
the previously ‘clipped’ audio information
is still intact.
NOTE: This post-recording gain adjustment
can also be applied to tracks that are too
quiet by following the same process.
