
Sage 100 2021
Installation and System Administrator’s
Guide
March 2021
© 2021 The Sage Group plc or its licensors. All rights reserved. Sage, Sage logos, and Sage product and service names
mentioned herein are the trademarks of The Sage Group plc or its licensors. All other trademarks are the property of their
respective owners.
Business Objects® and the Business Objects logo, BusinessObjects®, and Crystal Reports® are trademarks or registered
trademarks of Business Objects Software Ltd. in the United States and in other countries. Business Objects is an SAP
company.
Microsoft® and Microsoft SQL Server® are either registered trademarks or trademarks of the Microsoft Corporation in the
United States and/or in other countries.
The names of all other products and services are property of their respective owners.
Contents
Installation and System Administrator’s Guide Page i
Chapter 1 — Introduction 1
How to Use This Manual 1
Graphic Conventions 1
Text Conventions 2
Installation Overview 2
Contents of Installation Programs 3
General Installation Tips 3
Chapter 2 — Installing Sage 100 Standard 4
Installation Requirements 4
Pre-Installation Tasks 4
Installation Process 5
Post-Installation Tasks 7
Workstation Setup 8
Workstation Setup Requirements 8
Running Workstation Setup 9
Sage 100 Payroll 9
Sage Intelligence Reporting 9
Installing Sage Intelligence Reporting 10
Setting Up Sage Intelligence Reporting 10
Considerations for Installing on a Windows Server 11
Chapter 3 — Installing Sage 100 Advanced 13
Installation Requirements 13
Pre-Installation Tasks 13
Installation Process 15
Post-Installation Tasks 16
Workstation Setup 18
Workstation Setup Requirements 18
Running Workstation Setup 18
Multiple Installations 19
Adding a Server to Existing Workstation 19
Selecting a Server 19
Editing, Adding, and Removing Servers 20
Aliasing a Server 20
Setting a Default Server 20
Sage 100 Payroll 20
Sage Intelligence Reporting 21
Installing Sage Intelligence Reporting 21

Contents
Installation and System Administrator’s Guide Page ii
Setting Up Sage Intelligence Reporting 21
Chapter 4 — Installing Sage 100 Premium 23
Installation Requirements 23
Microsoft SQL Server Runtime Edition 23
SQL Server Installation Types 24
Microsoft SQL Server Runtime Edition Installation Process 24
Pre-Installation Tasks 25
Sage 100 Premium Installation Process 26
Post-Installation Tasks 27
Workstation Setup 29
Workstation Setup Requirements 29
Running Workstation Setup 30
Multiple Installations 31
Adding a Server to Existing Workstation 31
Selecting a Server 31
Editing, Adding, and Removing Servers 31
Aliasing a Server 31
Setting a Default Server 32
Sage 100 Payroll 32
Sage Intelligence Reporting 32
Installing Sage Intelligence Reporting 32
Setting Up Sage Intelligence Reporting 33
Chapter 5 — Installing Sage CRM 34
Pre-Installation Tasks 34
Installation Process 35
Post-Installation Tasks 35
Upgrading Sage CRM 36
Upgrading From Sage CRM 7.3 or Later 36
Upgrading From Earlier Versions of Sage CRM 37
Upgrading from Extended Enterprise Suite 1.4 38
Upgrading from Extended Enterprise Suite 1.3 or prior 38
Resetting the Tomcat Port Number for Quick Order Entry 38
Integrating Sage CRM 2021 R1 39
Installing Quick Order Entry 39
Chapter 6 — Uninstalling and Reinstalling 41
Overview of Uninstalling Process 41
Uninstalling Sage 100 41
Uninstalling the Workstation Component 43

Contents
Installation and System Administrator’s Guide Page iii
Uninstalling Sage CRM 43
Reinstalling Sage 100 44
Reinstalling Sage CRM 45
Changing an Existing Sage CRM Installation 45
Reinstalling the Workstation 45
Chapter 7 — Using the Application Server 47
Application Server Overview 47
Configuring the Application Server 47
Turning Off the Application Server 48
Configuring as a Service 48
Advanced Features 50
Session Tracking 50
SSL Encryption 50
Generating an SSL Certificate 51
Chapter 8 — Configuring the Client/Server ODBC Driver 52
Server-Side Configuration 52
Running as an Application or Service 52
Configuring the Server 52
Workstation Configuration 54
Sharing Permissions 55
Chapter 9 — Installing SAP Crystal Reports Designer 56
Installing SAP Crystal Reports Designer to the Workstation 56
Modifying SAP Crystal Reports in Sage 100 Premium 57
Set up an OLE DB (ADO) Connection 57
Converting SAP Crystal Reports from a Prior Version 57
Converting Reports 57
Converting Reports for Sage 100 Premium 59
Chapter 10 — Installing Federal and State Tax Reporting 61
Overview 61
Installing Federal and State Tax Reporting on a Workstation 61
Share and NT File System (NTFS) Permissions 62
Chapter 11 — Setting Up Credit Card and ACH Payment Processing 63
Installing Paya Connect Desktop 63
Considerations for Using Paya Connect Desktop 63
Enabling Credit Card and ACH Payment Processing 64

Contents
Installation and System Administrator’s Guide Page iv
Chapter 12 — Performing System Startup 65
Starting the Software 65
Performing Administrative Tasks 65
Creating and Activating Companies 65
Copying a Company 66
Upgrading and Converting Data 67
Setting Up Security 67
Setting Up Roles and Users for Security 67
Defining Roles 67
Creating Users and Assigning Roles 70
Copying a User 71
Setting Additional User Preferences for Security 71
Setting a Workstation to Automatically Log Off 71
Locking Users Out 72
Setting System Preferences 72
Requiring a Password 72
Setting Accounting Date Preferences 74
Setting a Prompt for the Accounting Date 74
Setting the Accounting Date from the System Date 74
Restricting the Accounting Date to Current and One Future Period 75
Changing Your Administrator Password 75
Setting Up Security for Sage CRM 75
Logging On as the Administrator 76
User Authentication / Password Setup 76
Security Profiles and Territories 76
Field Security 76
Company Team Restrictions 77
Restricting Updates 77
Server Security 77
Database Security 78
Firewalls 78
SSL (Secure Sockets Layer) 78
Application Security 79
Chapter 13 — System Administrator Tasks 80
Determining Who is Accessing the System/Modules 80
Modifying Company Preferences 81
Uninstalling Modules 81
Chapter 14 — Advanced Features and Troubleshooting 83
Remote Access 83
Routing and Remote Access Service (RRAS) 83

Contents
Installation and System Administrator’s Guide Page v
Wide Area Networks (WAN) 84
Performance Over RRAS/WAN 84
Virtual Private Network (VPN) 84
Pinging to a Server or Workstation 85
Configuring the Workstation for the ODBC Driver Service 85
Hanging Processes 85
Detecting Existing Processes 85
Ending Processes 85
Increasing Default Limits Set by Windows Server 86
Appendix A — Sage 100 Security Permissions 87
Setting NTFS and Share Permissions 87
Sage 100 Server Minimum Permission Settings 87
Permissions for the Local User Running the Sage 100 Server 88
Permissions for Other Users accessing the Sage 100 Server 89
Sage 100 Workstation Permission Settings 91
Installation Security for Workstations 91
Report Security for Sage 100 Advanced Workstations 91
NTFS Permissions for Sage 100 Advanced and Premium Workstations 91
Appendix B — TCP/IP Protocol 92
Basic Configuration 92
Testing the Configuration for Sage 100 Advanced and Premium 93
Appendix C — Running in a Remote Desktop Services or Citrix Environment
94
Installing the Sage 100 Server 94
Installing on the Workstation 94
Remote Desktop Services Considerations 95
Appendix D — Running Sage Intelligence Reporting outside of Sage 100 96
Appendix E — Sage Configured Installation for SQL Server 98
Appendix F — Default Database Properties 100

Installation and System Administrator’s Guide Page 1
Chapter
1
Introduction
Chapter 1
How to Use This Manual
This manual provides the information necessary for installing Sage 100. This manual
also contains information and troubleshooting tips on the configuration of the various
operating systems and environments in which the Sage 100 software is supported.
The instructions contain detailed technical information on the configuration of
operating systems and environments.
The screens used in this manual are from Sage 100 Advanced; similar screens
appear in Sage 100 Standard and Sage 100 Premium. Note that Business Insights
Reporter and the eBusiness Manager, Material Requirements Planning, TimeCard,
and Work Order modules are not available for Sage 100 Premium.
For a complete list of system requirements, refer to the Supported Platform Matrix.
To access the matrix, see article ID 47649 in the Sage Knowledgebase at
support.na.sage.com.
Graphic Conventions
The following icons are used throughout this manual to indicate different types of
information.
The NOTE symbol is followed by additional information about
a topic.
The WARNING symbol is followed by information to help you
avoid costly mistakes.
The INFORMATION symbol is used when a chapter does not
apply to all three Sage 100 products. The symbol is followed
by the product(s) to which the section does apply.

Installation and System Administrator’s Guide Page 2
Installation Overview
Text Conventions
The following table describes the text conventions used in this manual.
Installation Overview
Read this guide completely before installing or upgrading your Sage 100 system.
Before installing your Sage product, your hardware must be properly configured, and
the appropriate operating system software must be fully installed and operational.
Incorrect configurations of protocols and services running on the server can cause
major delays in the implementation of your Sage 100 system.
The installation procedures in this document address Windows® environments. For
a complete list of system requirements, refer to the Supported Platform Matrix. To
access the matrix, see article ID 47649 in the Sage Knowledgebase at
support.na.sage.com.
In some parts of this guide, the Sage 100 Integration Engine is referred to simply as
the Integration Engine.
Text Convention Explanation
Menus Menus are shown in this format:
Select menu > menu task name.
Examples:
Select File menu > Change
Company.
Select General Ledger Budget
menu > Budget Maintenance.
Bold font Indicates text entered at a field or text
selected at a field.
Examples:
At the Value field, type a search
value, such as
01, for the
lookup.
In the Filter window, to delete a
filter, select
<none> at a filter's
Column field.
Italic font Indicates references to other manuals.
Example:
For more information, refer to
your Getting Started Guide.

Installation and System Administrator’s Guide Page 3
Installation Overview
Contents of Installation Programs
The Sage 100 installation programs are divided into two separate self-extracting
executable files. The Sage 100 2021 file contains the following:
Installation programs for Sage 100. To access these programs, select a product
from the Autorun screen.
Installation programs for Sage Intelligence Reporting, which is automatically
installed with Sage 100 Standard and when running Workstation Setup for all
versions of the product.
Documentation for Sage 100 products, which includes this guide, as well as the
Getting Started Guide and the Customer Upgrade Guide. To access the
documentation, select a product from the Autorun screen, and then click
Documentation from the product screen.
Additional programs, such as SAP Crystal Reports® Designer and Acrobat
Reader, available on the Productivity Applications screen.
A link to download the Production Management module, available on the
Productivity Applications screen.
The Sage 100 2021 CRM file contains installation programs or Sage CRM.
General Installation Tips
Keep the following in mind when installing your Sage 100 system:
If your serial number includes leading zeros, be sure to include all zeros when
typing the number.
When specifying where to install Sage 100, do not nest a destination folder in
folders named MAS90 or SOA.
Installing SAP Crystal Reports Designer is optional; however, it must be installed
on the workstation if you want to create new reports and modify existing ones.
For more information, see Installing SAP Crystal Reports Designer on page 56.
You can install modules that have not been purchased and access most of them
for 45 days before you are required to purchase and register them. The 45-day
trial period begins the first time the module is accessed. The eBusiness
Manager, Custom Office, and Visual Integrator modules must be registered
before they can be accessed. Modules that have been purchased are
automatically selected for installation.
The Customer Relationship Management module and the Sage 100 Integration
Engine are installed along with Sage 100.
If you are upgrading, all modules installed on your source system must be
installed on the destination installation. After you have upgraded to the current
version, you can uninstall modules that are no longer needed.
NOTE
The Sage 100
installation
programs include
setup programs
for three
Sage 100
products;
however, you will
be able to install
only the product
for which your
product key is
valid.
WARNING
Do not integrate
your purchased
modules with
nonregistered
modules unless
you plan to
purchase those
modules.

Installation and System Administrator’s Guide Page 4
Chapter
2
Installing Sage 100 Standard
Chapter 2
Read this guide completely before installing and setting up Sage 100 Standard. A
series of procedures must be completed for new installations. For more information,
read the Getting Started Guide, which is available in the Documentation folder within
the Sage 100 installation program.
When upgrading a system, there are additional pre- and post-installation instructions
for converting to the current version. For more information, read the Customer
Upgrade Guide. To access this guide, select a product from the Autorun screen, and
then click Documentation on the product screen.
Installation Requirements
All prerequisites must be installed before installing Sage 100 Standard; any
prerequisite that is not on your system will be installed by the Sage 100 2021
installation program.
For a complete list of system requirements, refer to the Supported Platform Matrix.
To access the matrix, see article ID 47649 in the Sage Knowledgebase at
support.na.sage.com.
Pre-Installation Tasks
Perform these tasks before beginning the installation process.
If you are upgrading from a prior version, read the Customer Upgrade Guide,
which is available on the Sage Customer Portal and in the Documentation folder
within the Sage 100 installation program.
Verify that you have your Sage Download Notification e-mail, which includes the
serial number, customer number, user key, and product key, which are required
to install Sage 100 Standard for the correct number of users and to register the
modules. This information is also available on the Sage Customer Portal under
Products > Details.
Depending on your Internet connection speed, downloading the installation files
may take several hours; therefore, you may want to download the files in
advance. The installation files should be downloaded directly onto the server
where Sage 100 will be installed.
Test and validate all of the hardware and network configurations using the
following resources, which can be found in the Sage Knowledgebase at
support.na.sage.com.
The Supported Platform Matrix (article ID 47649)
The Integrated Solutions Compatibility Matrix (article ID 48274)
WARNING
If you are
upgrading from a
prior version, you
must install Sage
100 version 2021
to a new location
and perform a
parallel
installation.
NOTE
If you use the
Payroll module,
you must enter
your new product
key when
installing
Sage 100 2021. If
you enter a
product key
obtained when
purchasing a
previous version
of the program,
you will not be
able to open any
Payroll tasks.

Installation and System Administrator’s Guide Page 5
Installation Process
If you plan to use Sage Intelligence Reporting, open Microsoft Excel to ensure
that it has been licensed and activated.
If you will be installing the Sage Web Engine, refer to the eBusiness Manager
Installation Guide.
If a prior version of the Sage Web Engine is installed for the eBusiness Manager
module, back up any customized templates in the IW folder to another location,
and then uninstall the Sage Web Engine. After version 2021 of the Sage Web
Engine is installed, move the templates back to the IW folder.
Third-party applications used with Sage 100 Standard may require a drive
mapping or UNC path to the server where the data files are located. This drive
must be mapped to a share point on the server above the MAS90 folder. Any
application written to access the data files (including third-party or Sage
developer partner applications) must have a valid logon to the server and may
require a logical drive mapping or UNC path.
If you are installing on a Windows server, review Considerations for Installing on
a Windows Server on page 11.
If you are installing Sage CRM and using the Integrated Logon for SQL Server,
create a Windows user account with permissions to access both the server
where Sage 100 Standard will be installed and the SQL Server database. This
account is used by the Integration Engine to send data between the
Sage 100 Standard server and the Sage CRM server. You are asked to provide
this information during the Sage 100 Standard installation. For more information,
see Installing Sage CRM on page 34.
Installation Process
Run the Sage 100 Standard installation wizard to install a new instance of
Sage 100 Standard or to upgrade your system from a prior version. The installation
wizard guides you through the installation.
To install Sage 100 Standard
1 Log on to the server where Sage 100 will be installed using the Administrator
account. Please note:
We strongly recommend using the Administrator account rather an account
with administrator rights.
You must run the Setup program on the Windows server, not from a
workstation connected to the server.
2 Close down other programs. Do not close antivirus, antispyware, and
script-blocking software unless it is actually interfering with the installation.
3 Download the Sage 100 2021.exe file from the location specified in your
Download Notification e-mail from Sage.
WARNING
If you install
Sage 100 on a
server with an
unsupported
operating system,
Sage 100
Customer
Support will be
unable to assist
you if you
encounter any
problems.
NOTE
Save the
download file in a
folder located
directly beneath
the root directory.
For example:
C:\temp.

Installation and System Administrator’s Guide Page 6
Installation Process
The installation program must be saved on the server where you are installing
Sage 100.
4 If you aren’t automatically asked to extract the installation files, click the Sage
100 2021.exe file to extract them. The Sage 100 2021 folder, which contains the
installation files, will be extracted.
5 In the Sage 100 2021 folder, right-click Autorun.exe, and then select "Run as
administrator."
You must start the installation program using the Autorun.exe file. Starting the
program by running a different file may result in installation errors.
6 On the Autorun screen, click Sage 100 Standard, and then click Install
Sage 100 Standard to begin the installation.
7 Follow the steps in the installation wizard to install a new instance or upgrade an
existing installation.
If you’re installing on a computer running a 64-bit version of Windows, you’ll
have the option to install either the 64-bit or 32-bit version of Sage 100.
Important!
If you’re installing on a computer with an earlier 32-bit version of Sage 100
installed, the 32-bit version will no longer work if you install the 64-bit
version.
If you install the 64-bit version of Sage 100 then only workstations with the
64-bit version of Windows will be able to run Sage 100.
We recommend installing the 32-bit version, migrating your data, and then
running the 32-bit/64-bit Switch Utility to convert version 2021 from 32-bit to
64-bit. For more information, see the Sage 100 2021 Upgrade Guide.
When you reach the Sage 100 Integration Engine Service screen, keep the
following notes in mind:
If you’re integrating Sage 100 with Sage CRM, the user account that you
enter must have access to run the Sage 100 Integration Engine service and
also the server where Sage CRM is installed.
The service is disable by default. For more information, see Installing Sage
CRM on page 34.
The time required to install depends on the number of modules selected. If several
modules are installed, this process may take several minutes.
If you receive a message stating that no installation of Adobe Acrobat Reader was
detected, click OK to continue with the installation. To install the application, on the
Sage 100 Standard screen, click Productivity Applications, and then click Install
Acrobat Reader.
NOTE
When specifying
where to install
Sage 100, do not
nest a destination
folder in folders
named MAS90 or
SOA.
NOTE
If a message
appears asking
you to restart the
computer, you
must do so
before the
installation will be
fully functional.

Installation and System Administrator’s Guide Page 7
Post-Installation Tasks
After the Sage 100 installation is completed, the Upgrade Checklist automatically
appears if Acrobat Reader is installed. To manually access this document, click
Documentation on the Sage 100 Standard screen.
Post-Installation Tasks
Perform the following tasks after installing Sage 100 Standard.
1 Create a backup of the MAS90 folder created when you installed Sage 100. The
backup will be useful in case you need to reverse any changes; you may be
able to do so without reinstalling the product.
2 If you are upgrading, refer to the Customer Upgrade Guide, which is available in
the Documentation folder within the Sage 100 installation program.
Review the changes that have been made in Sage 100, and follow instructions in
the upgrade checklist to migrate and convert your data.
3 Install any Sage 100 2021 product updates available on the Sage Customer
Portal at: https://customers.sagenorthamerica.com
4 To run Microsoft Script links, you must have the Microsoft Windows Script Host
processor on your system. For information on installing the Microsoft Windows
Script Host processor, refer to the Microsoft Download Center Web site.
5 Install Sage CRM if you plan to use that product (see Installing Sage CRM on
page 34).
6 Run Workstation Setup on all workstations that will access the
Sage 100 Standard installation (see Workstation Setup on page 8).
Workstations used to process credit card transactions or set up credit card
processing require a working Internet connection.
Add www.sageexchange.com to the list of trusted websites for any
workstations that will be using the Paya Connect Desktop to set up credit
card related data.
7 If you process credit cards or ACH payments through Paya (formerly Sage
Payment Solutions), you must install Paya Connect Desktop.
For more information, see Installing Paya Connect Desktop on page 63.
8 If you plan to use Sage Intelligence reporting, see Installing Sage Intelligence
Reporting on page 10.
9 Install optional productivity applications, such as SAP Crystal Reports Designer,
on each workstation as needed. Installing SAP Crystal Reports Designer is
necessary only if you plan to create or modify reports.
10 If you are installing Federal and State Tax Reporting, you must install it on each
Sage 100 workstation. For more information, see Installing Federal and State
Tax Reporting on page 61.

Installation and System Administrator’s Guide Page 8
Workstation Setup
11 If you're using the Payroll module, to ensure that your system can communicate
with the tax calculation engine, add the following URL to your browser's trusted
sites list: sap.na.sage.com
Complete this step on all workstations that will be used to process payroll, and
also on the server where Sage 100 is installed if the Process Tax Calculation on
the Server check box is selected in System Configuration.
If you are upgrading from an earlier version of Sage 100, you can skip the remaining
steps.
12 Create companies and activate modules (see Creating and Activating
Companies on page 65).
13 Create roles and user codes, and set up system preferences (see Setting Up
Roles and Users for Security on page 67).
14 Set up the modules for your companies. If you are converting your existing
business management system to Sage 100 Standard, assemble the data you
need to set up each module. For more information, refer to the Getting Started
Guide.
Workstation Setup
The Workstation Setup wizard installs the required software, common programs, and
Help files to the workstations that will access the Sage 100 Standard installation.
The workstation installation wizard copies all of the necessary Dynamic Link
Libraries, ActiveX controls, and other components to the local Windows\System
folder and sets up the initialization files for the workstation.
Workstation Setup Requirements
For a complete list of system requirements, refer to the Supported Platform Matrix.
To access the matrix, see article ID 47649 in the Sage Knowledgebase at
support.na.sage.com.
Workstations used to process credit card transactions or set up credit card
processing require a working Internet connection.
Add www.sageexchange.com to the list of trusted websites for any workstations that
will be using Paya Connect Desktop to process credit card and ACH payments.
If you have installed Sage 100 Standard on only one computer, it is not necessary to
run Workstation Setup to access Sage 100 Standard on that computer; Workstation
Setup is necessary only for additional workstations that will be accessing the
installation.
NOTE
Run the
Workstation
Setup program
after every
Sage 100
Standard
software
upgrade.

Installation and System Administrator’s Guide Page 9
Sage 100 Payroll
Running Workstation Setup
To install Workstation Setup, you must access the program using the shared location
or UNC path for the server where Sage 100 is installed.
To run Workstation Setup
1 Log onto the workstation using the Administrator account.
We strongly recommend using the Administrator account rather an account with
administrator rights.
2 Close down other programs. Do not close antivirus, antispyware, and
script-blocking software unless it is actually interfering with the installation.
3 Map a drive letter to a share at least one folder above the MAS90 folder where
the Sage 100 Standard server component is installed.
4 Use Windows Explorer to attach to the server share point where
Sage 100 Standard is installed, and locate the MAS90\Wksetup folder.
5 Double-click Autorun.exe to run the program; it takes a few seconds to launch.
6 Follow the steps in the Workstation Setup wizard.
If you receive a message stating that no installation of Adobe Acrobat Reader was
detected, click OK to continue with the installation. To install Acrobat Reader, start
the Sage 100 installation program, and select your product from the Autorun screen.
Click Productivity Applications, and then click Install Acrobat Reader.
If Sage Intelligence Reporting will be used on this workstation, see Setting Up Sage
Intelligence Reporting on page 10.
To create a Workstation Setup DVD, copy the contents of the MAS90\WKSETUP
folder to the root folder of a blank DVD. For detailed information on creating a DVD,
refer to your DVD burner software.
Sage 100 Payroll
If you plan to use the Sage 100 Payroll module, it must be installed separately. The
Sage 100 Payroll Installation and Upgrade Guide is available on the Sage 100
Product Documents page at:
http://cdn.na.sage.com/docs/en/customer/100erp/Documentation.htm
Sage Intelligence Reporting
Sage Intelligence Reporting is selected by default on the Module Selection screen
when installing Sage 100 Standard; therefore, it is automatically installed unless you
change the default selection.
NOTE
If a message
appears asking
you to restart the
computer, you
must do so
before the
installation will be
fully functional.

Installation and System Administrator’s Guide Page 10
Sage Intelligence Reporting
For additional workstations that will access the Sage 100 Standard installation, Sage
Intelligence Reporting is automatically installed when running Workstation Setup if
you select the Recommended setup type.
If you select the Custom setup type, Sage Intelligence Reporting is installed unless
you change the default options on the Custom Setup screen.
Installing Sage Intelligence Reporting
If you change the default installation options so that Sage Intelligence Reporting is
not included when you first install Sage 100 or run Workstation Setup, you can install
it later by running Workstation Setup.
To install Sage Intelligence Reporting
1 Make sure that Microsoft Excel is installed and activated, and then close Excel.
2 Start the Workstation Setup wizard. For details, see Running Workstation Setup
on page 9.
3 Proceed through the wizard to the Program Maintenance screen.
4 Select the Add Components option.
5 Select the Sage Intelligence Reporting option and proceed through the rest of
the wizard.
After the installation is complete, follow the steps under Setting Up Sage Intelligence
Reporting on page 10.
Setting Up Sage Intelligence Reporting
Before using Sage Intelligence Reporting, follow the steps below to set up a
repository and register the product.
The repository will be used to store Sage Intelligence Reporting data, reporting
trees, report templates and other settings. Centralizing this information in one folder
has the following advantages:
Using a single folder makes it easier to back up and restore the information.
Multiple users can access the information.
To set up Sage Intelligence Reporting
1 Create a shared folder to serve as the repository. The folder can be created
locally or on a network; however, you must use a UNC format when entering the
repository path:
\\server\share name\repository folder name
If you are upgrading from a previous version of Sage 100, you must create a
new repository. If you have custom reports that you want to use in version 2021,
export them from your preexisting repository and import them into the new one.

Installation and System Administrator’s Guide Page 11
Considerations for Installing on a Windows Server
For more information, see the Upgrading Sage Intelligence Reporting section in
the Sage 100 Customer Upgrade Guide.
2 Grant Sage Intelligence Reporting users read and write permissions to the
folder.
3 Open the Report Manager from within Sage 100. Select Sage Intelligence
Reporting > Reports > Report Manager.
4 When the window appears asking for the path to the repository, enter the UNC
path to the shared folder that you created, and click OK.
5 When a window appears asking you to run the license manager, click Yes.
6 In the License Manager window, enter your Sage customer account number and
serial number, and then click Apply.
7 Click Perform Registration.
Click the Help button on any Sage Intelligence Reporting window for detailed
information about the product’s features.
For instructions on running Sage Intelligence Reporting outside of Sage 100, see
page 96.
Considerations for Installing on a Windows Server
The following are special considerations to be aware of before installing or
upgrading Sage 100 Standard on a Windows network.
For a complete list of system requirements, refer to the Supported Platform Matrix.
To access the matrix, see article ID 47649 in the Sage Knowledgebase at
support.na.sage.com.
Perform the installation on Sage 100 Standard directly on the server.
When installing, close down all other visible desktop applications (for example,
Microsoft Office applications). Do not shutdown antivirus and antispyware
software unless it is actually interfering with the installation.
At the server, create a share at least one folder above the MAS90 folder. Do not
create the share directly at the MAS90 folder. Every workstation will access
Sage 100 through this share point.
Each workstation must recognize the network drive on which Sage 100 Standard
is loaded using a mapped drive letter. Using Universal Naming Convention
(UNC) paths is not supported.
If company data is moved to a different data location using Library Master
Company Maintenance, the same drive letter must be used from all workstations
to point to the alternate folders, including the server if it is used as a workstation.

Installation and System Administrator’s Guide Page 12
Considerations for Installing on a Windows Server
Make sure the drive mapping is created so it remains persistent after restarting
the workstation. Generally this is accomplished either through a logon script or
by selecting the Reconnect at Logon check box in the Map Network Drive
window on the workstation.

Installation and System Administrator’s Guide Page 13
Chapter
3
Installing Sage 100 Advanced
Chapter 3
Read this guide completely before installing and setting up Sage 100 Advanced. A
series of procedures must be completed for new installations. For more information,
read the Getting Started Guide, which is available in the Documentation folder within
the Sage 100 installation program.
When upgrading a system, there are additional pre- and post-installation instructions
for converting to the current version. For more information, read the Customer
Upgrade Guide. To access this guide, select a product from the Autorun screen, and
then click Documentation on the product screen.
Installation Requirements
Sage 100 Advanced uses the TCP/IP protocol for all communications between the
workstation and server. To run Sage 100 Advanced, TCP/IP must be properly
configured on both the Windows Server and all workstations that will run
Sage 100 Advanced on the server. For more information, see TCP/IP Protocol on
page 92.
If you are installing Sage 100 Advanced on a Windows Server with Terminal
Services enabled, see Remote Desktop Services Considerations on page 95.
For a complete list of system requirements, refer to the Supported Platform Matrix.
To access the matrix, see article ID 47649 in the Sage Knowledgebase at
support.na.sage.com.
All prerequisites must be installed before installing Sage 100 Advanced; any
prerequisite that is not on your system will be installed by the Sage 100 2021
installation program.
Pre-Installation Tasks
Perform these tasks before beginning the installation process.
If you are upgrading from a prior version, read the Customer Upgrade Guide,
which is available on the Sage Customer Portal and in the Documentation folder
within the Sage 100 installation program.
Verify that you have your Sage Download Notification e-mail, which includes the
serial number, customer number, user key, and product key, which are required
to install Sage 100 Advanced for the correct number of users and to register the
modules. This information is also available on the Sage Customer Portal under
Products > Details.
WARNING
If you are
upgrading from a
prior version, you
must install Sage
100 version 2021
to a new location
and perform a
parallel
installation.
NOTE
If you use the
Payroll module,
you must enter
your new product
key when
installing
Sage 100 2021. If
you enter a
product key
obtained when
purchasing a
previous version
of the program,
you will not be
able to open any
Payroll tasks.

Installation and System Administrator’s Guide Page 14
Pre-Installation Tasks
Depending on your Internet connection speed, downloading the installation files
may take several hours; therefore, you may want to download the files in
advance. The installation files should be downloaded directly onto the server
where Sage 100 Advanced will be installed.
Test and validate all of the hardware and network configurations using the
following resources, which can be found in the Sage Knowledgebase at
support.na.sage.com.
The Supported Platform Matrix (article ID 47649)
The Integrated Solutions Compatibility Matrix (article ID 48274)
If you will be installing the Sage 100 Web Engine, verify that IIS is installed and
running.
If a prior version of the Sage 100 Web Engine is installed for the eBusiness
Manager module, back up any customized templates in the IW folder to another
location, and then uninstall the Sage Web Engine. After version 2021 of the Sage
Web Engine is installed, move the templates back to the IW folder.
Configure TCP/IP as a protocol on your server and workstations. All workstations
must be able to ping the server and vice versa. For information on pinging the
server, see Basic Configuration on page 92.
Verify that the Application Server port ID is open, and create an inbound rule, if
necessary.
Third-party applications used with Sage 100 Advanced may require a drive
mapping or UNC path to the server where the data files are located. This drive
must be mapped to a share point on the server above the MAS90 folder.
Although Sage 100 Advanced itself does not require a logical drive mapping, any
application written to access the data files (including third-party or Sage
developer partner applications) must have a valid logon to the server and may
require a logical drive mapping or UNC path.
If you are installing Sage CRM and using the Integrated Logon for SQL Server,
create a Windows user account with permissions to access both the server
where Sage 100 Advanced will be installed and the SQL Server database. This
account is used by the Integration Engine to send data between the
Sage 100 Advanced server and the Sage CRM server. You are asked to provide
this information during the Sage 100 Advanced installation. For more
information, see Installing Sage CRM on page 34.

Installation and System Administrator’s Guide Page 15
Installation Process
Installation Process
Run the Sage 100 Advanced installation wizard program to install a new instance of
Sage 100 Advanced or to upgrade your system from a prior version. The installation
wizard guides you through the installation.
To install Sage 100 Advanced
1 Log on to the server where Sage 100 will be installed using the Administrator
account. Please note:
We strongly recommend using the Administrator account rather an account
with administrator rights.
You must run the Setup program on the Windows server, not from a
workstation connected to the server.
2 Close down other programs. Do not close antivirus, antispyware, and
script-blocking software unless it is actually interfering with the installation.
3 Download the Sage 100 2021.exe file from the location specified in your
Download Notification e-mail from Sage.
The installation program must be saved on the server where you are installing
Sage 100.
4 If you aren’t automatically asked to extract the installation files, click the Sage
100 2021.exe file to extract them. The Sage 100 2021 folder, which contains the
installation files, will be extracted.
5 In the Sage 100 2021 folder, right-click Autorun.exe, and then select "Run as
administrator."
You must start the installation program using the Autorun.exe file. Starting the
program by running a different file may result in installation errors.
6 On the Autorun screen, click Sage 100 Advanced, and then click Install
Sage 100 Advanced to begin the installation.
7 Follow the steps in the installation wizard to install a new instance or upgrade an
existing installation.
If you’re installing on a computer running a 64-bit version of Windows, you’ll
have the option to install either the 64-bit or 32-bit version of Sage 100.
Important!
If you’re installing on a computer with an earlier 32-bit version of Sage 100
installed, the 32-bit version will no longer work if you install the 64-bit
version.
If you install the 64-bit version of Sage 100 then only workstations with the
64-bit version of Windows will be able to run Sage 100.
WARNING
If you install
Sage 100 on a
server with an
unsupported
operating system,
Sage 100
Customer
Support will be
unable to assist
you if you
encounter any
problems.
NOTE
Save the
download file in a
folder located
directly beneath
the root directory.
For example:
C:\temp.
NOTE
When specifying
where to install
Sage 100, do not
nest a destination
folder in folders
named MAS90 or
SOA.

Installation and System Administrator’s Guide Page 16
Post-Installation Tasks
We recommend installing the 32-bit version, migrating your data, and then
running the 32-bit/64-bit Switch Utility to convert version 2021 from 32-bit to
64-bit. For more information, see the Sage 100 2021 Upgrade Guide.
When you reach the Sage 100 Integration Engine Service screen, keep the
following notes in mind:
If you’re integrating Sage 100 with Sage CRM, the user account that you
enter must have access to run the Sage 100 Integration Engine service and
also the server where Sage CRM is installed.
The service is disable by default. For more information, see Installing Sage
CRM on page 34.
The default port number is used only for the integration with Sage CRM, not
for the Sage 100 Application Server.
The time required for installing depends on the number of modules selected. If
several modules are installed, this process may take several minutes.
If you receive a message stating that no installation of Adobe Acrobat Reader was
detected, click OK to continue with the installation. To install the application, click
Productivity Applications, and then click Install Acrobat Reader.
After the Sage 100 installation is completed, the Upgrade Checklist automatically
appears if Acrobat Reader is installed. To manually access this document, click
Documentation on the Sage 100 Advanced screen.
Post-Installation Tasks
Perform the following tasks after installing Sage 100 Advanced.
1 Create a backup of the MAS90 folder created when you installed Sage 100. The
backup will be useful in case you need to reverse any changes; you may be
able to do so without reinstalling the product.
2 If you are upgrading, refer to the Customer Upgrade Guide, which is available in
the Documentation folder within the Sage 100 installation program.
Review the changes that have been made in Sage 100, and follow instructions
in the upgrade checklist to migrate and convert your data.
3 Install any Sage 100 2021 product updates available on the Sage Customer
Portal at: https://customers.sagenorthamerica.com
4 Create a share at least one folder above the MAS90 folder. This is required
before running Workstation Setup. For more information, see Sage 100 Security
Permissions on page 87.
5 Set up and start the Application Server (see Using the Application Server on
page 47).
NOTE
If a message
appears asking
you to restart the
computer, you
must do so
before the
installation will be
fully functional.

Installation and System Administrator’s Guide Page 17
Post-Installation Tasks
6 Install Sage CRM if you plan to use that product (see Installing Sage CRM on
page 34).
7 To run Microsoft Script links, you must have the Microsoft Windows Script Host
processor on your system. For information on installing the Microsoft Windows
Script Host processor, refer to the Microsoft Download Center Web site.
8 Run Workstation Setup on all workstations that will access the
Sage 100 Advanced installation (see Workstation Setup on page 18).
Workstations used to process credit card transactions or set up credit card
processing require a working Internet connection.
Add www.sageexchange.com to the list of trusted websites for any
workstations that will be using the Paya Connect Desktop to set up credit
card related data.
9 If you process credit cards or ACH payments through Paya (formerly Sage
Payment Solutions), you must install Paya Connect Desktop.
For more information, see Installing Paya Connect Desktop on page 63.
10 If you plan to use Sage Intelligence reporting, see Installing Sage Intelligence
Reporting on page 21.
11 Install optional productivity applications, such as SAP Crystal Reports Designer,
on each workstation as needed. Installing SAP Crystal Reports Designer is
necessary only if you plan to create or modify reports.
12 If you are installing Federal and State Tax Reporting, you must install it on each
Sage 100 workstation. For more information, see Installing Federal and State
Tax Reporting on page 61.
13 If you're using the Payroll module, to ensure that your system can communicate
with the tax calculation engine, add the following URL to your browser's trusted
sites list: sap.na.sage.com
Complete this step on all workstations that will be used to process payroll, and
also on the server where Sage 100 is installed if the Process Tax Calculation on
the Server check box is selected in System Configuration.
If you are upgrading from an earlier version of Sage 100, you can skip the remaining
steps.
14 Create companies and activate modules (see Creating and Activating
Companies on page 65).
15 Create roles and user codes, and set up system preferences (see Setting Up
Roles and Users for Security on page 67).
16 Set up the modules for your companies. If you are converting your existing
business management system to Sage 100 Standard, assemble the data you
need to set up each module. For more information, refer to the Getting Started
Guide.

Installation and System Administrator’s Guide Page 18
Workstation Setup
Workstation Setup
The Workstation Setup wizard installs the required software, common programs, and
Help files to the workstations that will access the Application Server installation. The
workstation installation wizard copies all of the necessary Dynamic Link Libraries,
ActiveX controls, and other components to the local Windows\System folder and
sets up the initialization files for the workstation.
Workstation Setup Requirements
Each workstation must have its own set of workstation components on a local hard
drive. Installing Workstation Setup on the server is helpful for testing and
troubleshooting, but using a server operating system as a Sage 100 workstation is
not supported.
Workstations used to process credit card or ACH payment transactions or set up
credit card and ACH payment processing require a working Internet connection.
Add www.sageexchange.com to the list of trusted websites for any workstations that
will be using the Sage Exchange Desktop to set up credit card and ACH payment
related data.
If you are running Sage 100 through Remote Desktop Services (RDS) or Citrix, do
not run the workstation installation wizard directly at the Terminal Server or Citrix
server. Instead, run the workstation installation wizard only once through a remote
session. Running the workstation installation wizard from an RDS session will set up
the correct registry entries for Crystal forms and reports access and copy the
multi-user activation file from the Application Server to the Terminal or Citrix server.
For more information, see Running in a Remote Desktop Services or Citrix
Environment on page 94.
Running Workstation Setup
To install Workstation Setup, you must access the program using the shared location
or UNC path for the server where Sage 100 is installed.
To run Workstation Setup
1 Log onto the workstation using the Administrator account.
We strongly recommend using the Administrator account rather an account with
administrator rights.
2 Close down other programs. Do not close antivirus, antispyware, and
script-blocking software unless it is actually interfering with the installation.
3 Connect to the server using the UNC path to the share point where
Sage 100 Advanced is installed.
4 Use Windows Explorer to attach to the server share point where
Sage 100 Advanced is installed, and locate the MAS90\Wksetup folder.
5 Double-click Autorun.exe to run the program; it takes a few seconds to launch.
NOTE
Run the
Workstation
Setup program
after every Sage
100 Advanced
software
upgrade.
NOTE
If you have
multiple
installations of
the same version
of Sage 100
Advanced, see
Multiple
Installations on
page 19.

Installation and System Administrator’s Guide Page 19
Workstation Setup
6 Follow the steps in the Workstation Setup wizard.
If you receive a message stating that no installation of Adobe Acrobat Reader was
detected, click OK to continue with the installation. To install Acrobat Reader, start
the Sage 100 installation program, and select your product from the Autorun screen.
Click Productivity Applications, and then click Install Acrobat Reader.
If you are running through Remote Desktop Services or Citrix, you are prompted to
indicate whether Sage 100 Advanced will be accessed through the Terminal Server.
Click Yes to copy the activation key file. This allows multiple Remote Desktop
Services/Citrix sessions to access Sage 100 Advanced at the same time. Click No to
leave the activation set for a single user. If you typed NO ACCESS at the Server field
in the Sage 100 Advanced Server Path page, this message does not appear.
If you click Yes to copy the activation key file but receive a message indicating the
copy was not successful, you must manually copy the file to the
MAS90/Home/Lib/Keys folder.
To create a Workstation Setup DVD, copy the contents of the MAS90\WKSETUP
folder to the root folder of a blank DVD. For detailed information on creating a DVD,
refer to your DVD burner software.
Multiple Installations
A Sage 100 Advanced workstation can attach to multiple servers. For example, if
your site has three servers and Sage 100 Advanced is installed on each server, you
can connect to the appropriate server by clicking a single icon rather than having a
separate icon for each installation.
Adding a Server to Existing Workstation
To add a server to an existing workstation, launch the Install Sage 100 Advanced
Workstation program from the Sage 100 Advanced server installation folder and
double-click Autorun.exe to run the program. Click Add on the Program Maintenance
page and enter the server name, path, and port ID associated with the server you
want to add. After Workstation is run, click Finish.
Selecting a Server
If the Workstation Setup wizard has been run for only one server, your system is
configured automatically for that server. Running the Workstation Setup wizard
again (from a different server path) allows you to select from multiple servers using
the same workstation files.
If multiple servers are found in your local configuration file, a dialog box appears
which lists both the server name and the socket number on which the program is
running. Select the server and socket number pair to which to attach and click OK. If
you do not want to start Sage 100 Advanced, click Cancel to terminate the program.
You cannot have multiple installations for the same version of the
Sage 100 Advanced server component on the same server.
NOTE
If a message
appears asking
you to restart the
computer, you
must do so
before the
installation will be
fully functional.
NOTE
Only one current
version on a
server is
supported.

Installation and System Administrator’s Guide Page 20
Sage 100 Payroll
Editing, Adding, and Removing Servers
Use the Select Server window to edit, add, or remove entries in the window by
clicking the appropriate button. Clicking Add displays a window in which you can
enter a server name, alias, and socket number.
After all the information is entered, click Accept to save the entry or click Cancel to
return to the main selection window without adding this server entry.
The Edit feature functions similarly to the Add feature, except that the window
contains all of the current information about the server and port ID. The Edit Server
window can be used to modify existing data or change the socket number, if
necessary. Click Remove in the Select Server window to remove the server entry
from the configuration file.
Aliasing a Server
It may be practical to assign an alias to the server and socket number pairs. For
example, you can label one installation as “Accounting” and a second installation as
“Payroll.” You can assign an alias to any server and socket number pair in the list of
installed servers by clicking Alias in the Select Server window.
Select the server and socket number pair to alias by selecting the line and clicking
Alias. Type the name of the alias to use for this server and socket number, and click
Accept. If you do not want to alias this server, click Cancel.
The aliases associated with servers are local to each individual workstation. The
configuration information is stored in the SOTA.INI file located in the
\MAS90\Launcher folder. To use the same configuration files on multiple
workstations, copy the SOTA.INI file to each workstation's \MAS90\Launcher folder.
Setting a Default Server
When multiple servers are present, you may want to set a default server and port ID
to start up. Even if the server and port are set to Default, the Select Server window
always appears; however, the selected server is the one chosen as the default. Click
OK to start Sage 100 Advanced on the default server.
To set a server and socket number as the default, select the server and socket
number pair by clicking the line, and selecting the Default check box. When
Sage 100 Advanced is started from this workstation, the server and socket number
selected as the defaults are highlighted.
Sage 100 Payroll
If you plan to use the Sage 100 Payroll module, it must be installed separately. The
Sage 100 Payroll Installation and Upgrade Guide is available on the Sage 100
Product Documents page at:
http://cdn.na.sage.com/docs/en/customer/100erp/Documentation.htm

Installation and System Administrator’s Guide Page 21
Sage Intelligence Reporting
Sage Intelligence Reporting
Sage Intelligence Reporting is automatically installed when running Workstation
Setup if you select the Recommended setup type.
If you select the Custom setup type and clear the Sage Intelligence Reporting
option, you can install the program at a later time by rerunning Workstation Setup.
Installing Sage Intelligence Reporting
To install Sage Intelligence Reporting
1 Make sure that Microsoft Excel is installed and activated, and then close Excel.
2 Start the Workstation Setup wizard. For details, see Running Workstation Setup
on page 18.
3 Proceed through the wizard to the Setup Type screen.
4 Perform one of the following steps.
Select the Recommended setup type.
Select the Custom setup type and then select Sage Intelligence Reporting
on the next screen.
5 Proceed through the rest of the wizard.
After the installation is complete, follow the steps under Setting Up Sage Intelligence
Reporting on page 21.
Setting Up Sage Intelligence Reporting
Before using Sage Intelligence Reporting, follow the steps below to set up a
repository and register the produThe repository will be used to store Sage
Intelligence Reporting data, reporting trees, report templates and other settings.
Centralizing this information in one folder has the following advantages:
Using a single folder makes it easier to back up and restore the information.
Multiple users can access the information.
To set up Sage Intelligence Reporting
1 Create a shared folder to serve as the repository. The folder can be created
locally or on a network; however, you must use a UNC format when entering the
repository path:
\\server\share name\repository folder name
If you are upgrading from a previous version of Sage 100, you must create a
new repository. If you have custom reports that you want to use in version 2021,
export them from your preexisting repository and import them into the new one.

Installation and System Administrator’s Guide Page 22
Sage Intelligence Reporting
For more information, see the Upgrading Sage Intelligence Reporting section in
the Sage 100 Customer Upgrade Guide.
2 Grant Sage Intelligence Reporting users read and write permissions to the
folder.
3 Open the Report Manager from within Sage 100. Select Sage Intelligence
Reporting > Reports > Report Manager.
4 When the window appears asking for the path to the repository, enter the UNC
path to the shared folder that you created, and click OK.
5 When a window appears asking you to run the license manager, click Yes.
6 In the License Manager window, enter your Sage customer account number and
serial number, and then click Apply.
7 Click Perform Registration.
Click the Help button on any Sage Intelligence Reporting window for detailed
information about the product’s features.
For instructions on running Sage Intelligence Reporting outside of Sage 100, see
page 96.

Installation and System Administrator’s Guide Page 23
Chapter
4
Installing Sage 100 Premium
Chapter 4
Chapter 4
Read this guide completely before installing and setting up Sage 100 Premium. A
series of procedures must be completed for new installations. For more information,
read the Getting Started Guide, which is available in the Documentation folder within
the Sage 100 installation program.
When upgrading a system, there are additional pre- and post-installation instructions
for converting to the current version. For more information, read the Customer
Upgrade Guide. To access this guide, select a product from the Autorun screen, and
then click Documentation on the product screen.
Installation Requirements
Microsoft SQL Server must be installed before installing Sage 100 Premium. Sage
supports the installation of Sage 100 Premium and Microsoft SQL Server on the
same server as well as the installation of the two products on separate servers. For
information on the version of Microsoft SQL Server available through Sage, see
Microsoft SQL Server Runtime Edition on page 23.
Sage 100 Premium uses the TCP/IP protocol for all communications between the
workstation and server. To run Sage 100 Premium, TCP/IP must be properly
configured on both the Windows Server and all workstations that will run Sage 100
Premium on the server. For more information, see TCP/IP Protocol on page 92.
If you are installing Sage 100 Premium on a Windows Server with Terminal Services
enabled, see Remote Desktop Services Considerations on page 95.
For a complete list of system requirements, refer to the Supported Platform Matrix.
To access the matrix, see article ID 47649 in the Sage Knowledgebase at
support.na.sage.com.
All prerequisites must be installed before installing Sage 100 Premium; any
prerequisite that is not on your system will be installed by the Sage 100 2021
installation program.
Microsoft SQL Server Runtime Edition
If you purchased SQL Server directly from Sage, you will install Microsoft SQL
Server Runtime Edition. The only difference between this version and the standard
edition of SQL Server is that Microsoft SQL Server Runtime Edition can be used only
with Sage products. The performance of the two versions is the same, both come
with the same database administration tools, and neither have restrictions on the
database size.
WARNING
If you are
upgrading from a
prior version, you
must install Sage
100 version 2021
to a new location
and perform a
parallel
installation.

Installation and System Administrator’s Guide Page 24
Microsoft SQL Server Runtime Edition
SQL Server Installation Types
There are two installation types available: Sage Configured and Advanced. The
Sage Configured option allows you to bypass the Microsoft SQL Server Setup
program; SQL Server will automatically be optimally configured for Sage 100
Premium. For information on how parameters are defined, see Sage Configured
Installation for SQL Server on page 98.
If you select the Advanced installation option, you will exit the Sage installation
wizard. The Microsoft SQL Server Setup program’s Autorun screen will appear, and
you can use that program to configure and install SQL Server.
If the installation wizard detects an existing SQL Server installation, you will have
only the Advanced installation option.
Microsoft SQL Server Runtime Edition Installation Process
If you purchased SQL Server from Sage, follow the steps below to perform the
installation.
To install SQL Server
1 Log onto the server where SQL Server will be installed using the Administrator
account.
We strongly recommend using the Administrator account rather an account with
administrator rights.
2 Close down other programs. Do not close antivirus, antispyware, and
script-blocking software unless it is actually interfering with the installation.
3 Download the Microsoft SQL Server installation file from the location specified in
your Download Notification e-mail from Sage.
4 Are you aren’t automatically asked to extract the installation files, click the
executable file to extract them. The Microsoft SQL Server folder, which contains
the installation files, will be extracted.
5 In the Microsoft SQL Server folder, right-click Autorun.exe, and then select "Run
as administrator."
6 On the Autorun screen, click Install Microsoft SQL Server Runtime Edition.
A message appears if SQL Server is already installed on your system. The
Sage Configured installation type will be unavailable; you must use the
Advanced SQL Server Installation option.
If no installation is encountered, the Sage Configured SQL Server Installation is
available. This is the recommended option.
7 Follow the steps in the installation wizard to install SQL Server. If you select the
Advanced SQL Server Installation, you will use the Microsoft SQL Server Setup
program to configure and install SQL Server.
NO TE
For information
on the configured
options for
installing SQL
Server, see Sage
Configured
Installation for
SQL Server on
page 98.
NOTE
Save the
download file in a
folder located
directly beneath
the root directory.
For example:
C:\temp.

Installation and System Administrator’s Guide Page 25
Pre-Installation Tasks
If one or more of the required components are missing from your server, a
message appears. Click Yes to install the missing components, or click No to
exit the installation process.
8 If you are asked to restart your system after components are installed, restart the
computer, and then resume the installation.
Pre-Installation Tasks
Perform these tasks before installing Sage 100 Premium.
If you are upgrading from a prior version, read the Customer Upgrade Guide,
which is available on the Sage Customer Portal and in the Documentation folder
within the Sage 100 installation program.
Verify that you have your Sage Download Notification e-mail, which includes the
serial number, customer number, user key, and product key, which are required
to install Sage 100 Premium for the correct number of users and to register the
modules. This information is also available on the Sage Customer Portal under
Products > Details.
Depending on your Internet connection speed, downloading the installation files
may take several hours; therefore, you may want to download the files in
advance. The installation files should be downloaded directly onto the server
where Sage 100 Premium will be installed.
Test and validate all of the hardware and network configurations using the
following resources, which can be found in the Sage Knowledgebase at
support.na.sage.com.
The Supported Platform Matrix (article ID 47649)
The Integrated Solutions Compatibility Matrix (article ID 48274)
Configure TCP/IP as a protocol on your server and workstations. All workstations
must be able to ping the server and vice versa. For information on pinging the
server, see Basic Configuration on page 92.
Verify that the Application Server port ID is open, and create an inbound rule, if
necessary.
Third-party applications used with Sage 100 Premium may require a drive
mapping or UNC path to the server where the data files are located. This drive
must be mapped to a share point on the server above the MAS90 folder.
Although Sage 100 Premium itself does not require a logical drive mapping, any
application written to access the data files (including third-party or Sage
developer partner applications) must have a valid logon to the server and may
require a logical drive mapping or UNC path.
NOTE
The SQL Server
Setup window
appears during
the installation,
which may take
up to an hour.

Installation and System Administrator’s Guide Page 26
Sage 100 Premium Installation Process
If you are installing Sage CRM and using the Integrated Logon for SQL Server,
create a Windows user account with permissions to access both the server
where Sage 100 Premium will be installed and the SQL Server database. This
account is used by the Integration Engine to send data between the Sage 100
Premium server and the Sage CRM server. You are asked to provide this
information during the Sage 100 Premium installation. For more information, see
Installing Sage CRM on page 34.
Sage 100 Premium Installation Process
Run the Sage 100 Premium installation wizard program to install a new instance of
Sage 100 Premium or to upgrade your system from a prior version. The installation
wizard guides you through the installation.
To install Sage 100 Premium
1 Log on to the server where Sage 100 will be installed using the Administrator
account. Please note:
We strongly recommend using the Administrator account rather an account
with administrator rights.
You must run the Setup program on the Windows server, not from a
workstation connected to the server.
If you plan to select the Windows authentication option when running the
installation wizard, the account must be a member of the sysadmin role on
the server. This is necessary to ensure that the MAS_SYSTEM SQL
database is created correctly.
2 Close down other programs. Do not close antivirus, antispyware, and
script-blocking software unless it is actually interfering with the installation.
3 Download the Sage 100 2021.exe file from the location specified in your
Download Notification e-mail from Sage.
The installation program must be saved on the server where you are installing
Sage 100.
4 If you aren’t automatically asked to extract the installation files, click the Sage
100 2021.exe file to extract them. The Sage 100 2021 folder, which contains the
installation files, will be extracted.
5 In the Sage 100 2021 folder, right-click Autorun.exe, and then select "Run as
administrator."
You must start the installation program using the Autorun.exe file. Starting the
program by running a different file may result in installation errors.
6 On the Autorun screen, click Sage100 Premium, and then click Install Sage 100
Premium to begin the installation.
WARNING
If you install
Sage 100 on a
server with an
unsupported
operating system,
Sage 100
Customer
Support will be
unable to assist
you if you
encounter any
problems.
NOTE
Save the
download file in a
folder located
directly beneath
the root directory.
For example:
C:\temp.

Installation and System Administrator’s Guide Page 27
Post-Installation Tasks
7 Follow the steps in the installation wizard to install a new instance or upgrade an
existing installation.
If you’re installing on a computer running a 64-bit version of Windows, you’ll
have the option to install either the 64-bit or 32-bit version of Sage 100.
Important!
If you’re installing on a computer with an earlier 32-bit version of Sage 100
installed, the 32-bit version will no longer work if you install the 64-bit
version.
If you install the 64-bit version of Sage 100 then only workstations with the
64-bit version of Windows will be able to run Sage 100.
We recommend installing the 32-bit version, migrating your data, and then
running the 32-bit/64-bit Switch Utility to convert version 2021 from 32-bit to
64-bit. For more information, see the Sage 100 2021 Upgrade Guide.
When you reach the Sage 100 Integration Engine Service screen, keep the
following notes in mind:
If you’re integrating Sage 100 with Sage CRM, the user account that you
enter must have access to run the Sage 100 Integration Engine service and
also the server where Sage CRM is installed.
The service is disable by default. For more information, see Installing Sage
CRM on page 34.
The default port number is used only for the integration with Sage CRM, not
for the Sage 100 Application Server.
The time required for installing depends on the number of modules selected. If
several modules are installed, this process may take several minutes.
If you receive a message stating that no installation of Adobe Acrobat Reader was
detected, click OK to continue with the installation. To install the application, click
Productivity Applications, and then click Install Acrobat Reader.
After the Sage 100 installation is completed, the Upgrade Checklist automatically
appears if Acrobat Reader is installed. To manually access this document, click
Documentation on the Sage 100 Premium screen.
Post-Installation Tasks
Perform the following tasks after installing Sage 100 Premium.
1 Create a backup of the MAS90 folder created when you installed Sage 100. The
backup will be useful in case you need to reverse any changes; you may be
able to do so without reinstalling the product.
2 If you are upgrading, refer to the Customer Upgrade Guide, which is available in
the Documentation folder within the Sage 100 installation program.
NOTE
When specifying
where to install
Sage 100, do not
nest a destination
folder in folders
named MAS90 or
SOA.
NOTE
If a message
appears asking
you to restart the
computer, you
must do so
before the
installation will be
fully functional.
WARNING
Changes to the
default properties
for Sage 100
Premium
company and
MAS_SYSTEM
databases may
cause the product
to work
incorrectly. For
more information,
see Default
Database
Properties on
page 100.

Installation and System Administrator’s Guide Page 28
Post-Installation Tasks
Review the changes that have been made in Sage 100, and follow instructions
in the upgrade checklist to migrate and convert your data.
3 Install any Sage 100 2021 product updates available on the Sage Customer
Portal at: https://customers.sagenorthamerica.com
4 Create a share at least one folder above the MAS90 folder. This is required
before running Workstation Setup. For more information, see Sage 100 Security
Permissions on page 87.
5 Set up and start the Application Server (see Using the Application Server on
page 47).
6 Install Sage CRM if you plan to use that product (see Installing Sage CRM on
page 34).
7 To run Microsoft Script links, you must have the Microsoft Windows Script Host
processor on your system. For information on installing the Microsoft Windows
Script Host processor, refer to the Microsoft Download Center Web site.
8 Run Workstation Setup on all workstations that will access the Sage 100
Premium installation (see Workstation Setup on page 29).
Workstations used to process credit card transactions or set up credit card
processing require a working Internet connection.
Add www.sageexchange.com to the list of trusted websites for any
workstations that will be using the Paya Connect Desktop to set up credit
card related data.
9 If you process credit cards or ACH payments through Paya (formerly Sage
Payment Solutions), you must install Paya Connect Desktop.
For more information, see Installing Paya Connect Desktop on page 63.
10 If you plan to use Sage Intelligence reporting, see Installing Sage Intelligence
Reporting on page 32.
11 Install optional productivity applications, such as SAP Crystal Reports Designer,
on each workstation as needed. Installing SAP Crystal Reports Designer is
necessary only if you plan to create or modify reports.
12 If you are installing Federal and State Tax Reporting, you must install it on each
Sage 100 workstation. For more information, see Installing Federal and State
Tax Reporting on page 61.
13 If you're using the Payroll module, to ensure that your system can communicate
with the tax calculation engine, add the following URL to your browser's trusted
sites list: sap.na.sage.com
Complete this step on all workstations that will be used to process payroll, and
also on the server where Sage 100 is installed if the Process Tax Calculation on
the Server check box is selected in System Configuration.

Installation and System Administrator’s Guide Page 29
Workstation Setup
If you are upgrading from an earlier version of Sage 100, you can skip the remaining
steps.
14 Create companies and activate modules (see Creating and Activating
Companies on page 65).
15 Create roles and user codes, and set up system preferences (see Setting Up
Roles and Users for Security on page 67).
16 Set up the modules for your companies. If you are converting your existing
business management system to Sage 100 Standard, assemble the data you
need to set up each module. For more information, refer to the Getting Started
Guide.
Workstation Setup
The Workstation Setup wizard installs the required software, common programs, and
Help files to the workstations that will access the Application Server installation. The
workstation installation wizard copies all of the necessary Dynamic Link Libraries,
ActiveX controls, and other components to the local Windows\System folder and
sets up the initialization files for the workstation.
Workstation Setup Requirements
Each workstation must have its own set of workstation components on a local hard
drive. Installing Workstation Setup on the server is helpful for testing and
troubleshooting, but using a server operating system as a Sage 100 workstation is
not supported.
Workstations used to process credit card or ACH payment transactions or set up
credit card and ACH payment processing require a working Internet connection.
Add www.sageexchange.com to the list of trusted websites for any workstations that
will be using the Sage Exchange Desktop to set up credit card and ACH payment
related data.
If you are running Sage 100 through Remote Desktop Services (RDS) or Citrix, do
not run the workstation installation wizard directly at the Terminal Server or Citrix
server. Instead, run the workstation installation wizard only once through a remote
session. Running the workstation installation wizard from an RDS session will set up
the correct registry entries for Crystal forms and reports access and copy the
multi-user activation file from the Application Server to the Terminal or Citrix server.
For more information, see Running in a Remote Desktop Services or Citrix
Environment on page 94.
NOTE
Run the
Workstation
Setup program
after every Sage
100 Premium
software
upgrade.

Installation and System Administrator’s Guide Page 30
Workstation Setup
Running Workstation Setup
To install Workstation Setup, you must access the program using the shared location
or UNC path for the server where Sage 100 is installed.
To run Workstation Setup
1 Log onto the workstation using the Administrator account.
We strongly recommend using the Administrator account rather an account with
administrator rights.
2 Close down other programs. Do not close antivirus, antispyware, and
script-blocking software unless it is actually interfering with the installation.
3 Connect to the server using the UNC path to the share point where Sage 100
Premium is installed.
4 Use Windows Explorer to attach to the server share point where Sage 100
Premium is installed, and locate the MAS90\Wksetup folder.
5 Double-click Autorun.exe to run the program; it takes a few seconds to launch.
6 Follow the steps in the Workstation Setup wizard.
If you receive a message stating that no installation of Adobe Acrobat Reader was
detected, click OK to continue with the installation. To install Acrobat Reader, start
the Sage 100 installation program, and select your product from the Autorun screen.
Click Productivity Applications, and then click Install Acrobat Reader.
If you are running through Remote Desktop Services (RDS) or Citrix, you are
prompted to indicate whether Sage 100 Premium will be accessed through the
Terminal Server. Click Yes to copy the activation key file. This allows multiple
Remote Desktop Services or Citrix sessions to access Sage 100 Premium at the
same time. Click No to leave the activation set for a single user. If you typed NO
ACCESS at the Server field in the Sage 100 Premium page, this message does not
appear.
If you click Yes to copy the activation key file but receive a message indicating the
copy was not successful, you must manually copy the file to the
MAS90/Home/Lib/Keys folder.
To create a Workstation Setup DVD, copy the contents of the MAS90\WKSETUP
folder to the root folder of a blank DVD. For detailed information on creating a DVD,
refer to your DVD burner software.
NOTE
If you have
multiple
installations of
the same version
of Sage 100
Premium, see
Multiple
Installations on
page 31.
NOTE
If a message
appears asking
you to restart the
computer, you
must do so
before the
installation will be
fully functional.

Installation and System Administrator’s Guide Page 31
Workstation Setup
Multiple Installations
A Sage 100 Premium workstation can attach to multiple servers. For example, if your
site has three servers and Sage 100 Premium is installed on each server, you can
connect to the appropriate server by clicking a single icon rather than having a
separate icon for each installation.
Adding a Server to Existing Workstation
To add a server to an existing workstation, launch the Install Sage 100 Premium
Workstation program from the Sage 100 Premium server installation folder and
double-click Autorun.exe to run the program. Click Add on the Program Maintenance
page and enter the server name, path, and port ID associated with the server you
want to add. After Workstation is run, click Finish.
Selecting a Server
If the Workstation Setup wizard has been run for only one server, your system is
configured automatically for that server. Running the Workstation Setup wizard
again (from a different server path) allows you to select from multiple servers using
the same workstation files. If multiple servers are found in your local configuration
file, a dialog box appears which lists both the server name and the socket number on
which the program is running. Select the server and socket number pair to which to
attach and click OK. If you do not want to start Sage 100 Premium, click Cancel to
terminate the program. You cannot have multiple installations for the same version of
the Sage 100 Premium server component on the same server.
Editing, Adding, and Removing Servers
Use the Select Server window to edit, add, or remove entries in the window by
clicking the appropriate button. Clicking Add displays a window in which you can
enter a server name, alias, and socket number.
After all the information is entered, click Accept to save the entry or click Cancel to
return to the main selection window without adding this server entry.
The Edit feature functions similarly to the Add feature, except that the window
contains all of the current information about the server and port ID. The Edit Server
window can be used to modify existing data or change the socket number, if
necessary. Click Remove in the Select Server window to remove the server entry
from the configuration file.
Aliasing a Server
It may be practical to assign an alias to the server and socket number pairs. For
example, you can label one installation as “Accounting” and a second installation as
“Payroll.” You can assign an alias to any server and socket number pair in the list of
installed servers by clicking Alias in the Select Server window.
Select the server and socket number pair to alias by selecting the line and clicking
Alias. Type the name of the alias to use for this server and socket number, and click
Accept. If you do not want to alias this server, click Cancel.
NOTE
Only one current
version on a
server is
supported.

Installation and System Administrator’s Guide Page 32
Sage 100 Payroll
The aliases associated with servers are local to each individual workstation. The
configuration information is stored in the SOTA.INI file located in the
\MAS90\Launcher folder. To use the same configuration files on multiple
workstations, copy the SOTA.INI file to each workstation's \MAS90\Launcher folder.
Setting a Default Server
When multiple servers are present, you may want to set a default server and port ID
to start up. Even if the server and port are set to Default, the Select Server window
always appears; however, the selected server is the one chosen as the default. Click
OK to start Sage 100 Premium on the default server.
To set a server and socket number as the default, select the server and socket
number pair by clicking the line, and selecting the Default check box. When Sage
100 Premium is started from this workstation, the server and socket number
selected as the defaults are highlighted.
Sage 100 Payroll
If you plan to use the Sage 100 Payroll module, it must be installed separately. The
Sage 100 Payroll Installation and Upgrade Guide is available on the Sage 100
Product Documents page at:
http://cdn.na.sage.com/docs/en/customer/100erp/Documentation.htm
Sage Intelligence Reporting
Sage Intelligence Reporting is automatically installed when running Workstation
Setup if you select the Recommended setup type.
If you select the Custom setup type and clear the Sage Intelligence Reporting
option, you can install the program at a later time by rerunning Workstation Setup.
Installing Sage Intelligence Reporting
To install Sage Intelligence Reporting
1 Make sure that Microsoft Excel is installed and activated, and then close Excel.
2 Start the Workstation Setup wizard. For details, see Running Workstation Setup
on page 30.
3 Proceed through the wizard to the Setup Type screen.
4 Perform one of the following steps.
Select the Recommended setup type.
Select the Custom setup type and then select Sage Intelligence Reporting
on the next screen.
5 Proceed through the rest of the wizard.

Installation and System Administrator’s Guide Page 33
Sage Intelligence Reporting
After the installation is complete, follow the steps under Setting Up Sage Intelligence
Reporting on page 33.
Setting Up Sage Intelligence Reporting
Before using Sage Intelligence reporting, follow the steps below to set up a
repository and register the product.The repository will be used to store Sage
Intelligence Reporting data, reporting trees, report templates and other settings.
Centralizing this information in one folder has the following advantages:
Using a single folder makes it easier to back up and restore the information.
Multiple users can access the information.
To set up Sage Intelligence Reporting
1 Create a shared folder to serve as the repository. The folder can be created
locally or on a network; however, you must use a UNC format when entering the
repository path:
\\server\share name\repository folder name
If you are upgrading from a previous version of Sage 100, you must create a
new repository. If you have custom reports that you want to use in version 2021,
export them from your preexisting repository and import them into the new one.
For more information, see the Upgrading Sage Intelligence Reporting section in
the Sage 100 Customer Upgrade Guide.
2 Grant Sage Intelligence Reporting users read and write permissions to the
folder.
3 Open the Report Manager from within Sage 100. Select Sage Intelligence
Reporting > Reports > Report Manager.
4 When the window appears asking for the path to the repository, enter the UNC
path to the shared folder that you created, and click OK.
5 When a window appears asking you to run the license manager, click Yes.
6 In the License Manager window, enter your Sage customer account number and
serial number, and then click Apply.
7 Click Perform Registration.
Click the Help button on any Sage Intelligence Reporting window for detailed
information about the product’s features.
For instructions on running Sage Intelligence Reporting outside of Sage 100, see
page 96.

Installation and System Administrator’s Guide Page 34
Chapter
5
Installing Sage CRM
Chapter 5
The Sage CRM server(s) host the Sage CRM program files, Internet Information
Services (IIS) Web Server, and SQL Server database. These components should be
installed on a separate server from the one with Sage 100 installed. Depending on
the number of users accessing the Sage CRM server, it may be necessary to split
the Sage CRM SQL Server database and the IIS Web server across two or more
servers.
For Sage CRM hardware and software requirements, refer to the Sage CRM Sage
CRM 2021 R1 Software Requirements guide, available in the Sage CRM Help
Center at: http://help.sagecrm.com/
If you’re not upgrading from an earlier version of Sage CRM, start with
Pre-Installation Tasks on this page
If you’re upgrading from an earlier version of Sage CRM, see Upgrading Sage
CRM on page 36.
If you already have Sage CRM 2021 R1 installed and need to integrate it with
Sage 100 2021, see Integrating Sage CRM 2021 R1 on page 39.
Pre-Installation Tasks
Perform these tasks before beginning the installation process.
Ideally, Sage 100 should be installed before installing Sage CRM.
If you are upgrading from a prior version of Sage CRM, third-party
customizations may be overwritten. Contact your Sage business partner for
assistance. For more information, see Upgrading Sage CRM on page 36.
Determine the name of the database server you will install to and the port
number that SQL Server is using for TCP/IP connectivity.
When installing an additional instance of Microsoft SQL Server, you must enter a
specific port number and make note of that port number so that you can enter it
in CRM Company Options.
Depending on your Internet connection speed, downloading the installation files
may take several hours; therefore, you may want to download the files in
advance.
NOTE
Microsoft SQL
Server Express is
not supported in
a production
environment.

Installation and System Administrator’s Guide Page 35
Installation Process
Installation Process
Perform this installation at the IIS Web server. This section refers only to a new
installation. For information on upgrading, see Upgrading Sage CRM on page 36.
To install Sage CRM
1 Log on to the IIS Web server where you are installing the Sage CRM software.
2 Close down other programs. Do not close antivirus, antispyware, and
script-blocking software unless it is actually interfering with the installation.
3 Download the Sage 100 2021 CRM 2021 R1.exe file from the location specified
in your Download Notification e-mail from Sage.
To avoid errors when extracting the installation program from the download file,
save the file in a folder located directly beneath the root directory. For example:
C:\temp
4 If you’re not automatically asked to extract the files, click the .exe file to extract
them. The folder that contains the installation files is extracted.
5 In the folder, click Autorun.exe.
6 On the Autorun screen, click Install Sage CRM 2021 R1 or Upgrade from Sage
CRM 7.3 R3 or Later. The installation program may take a few seconds to start.
7 Follow the steps in the installation wizard to install Sage CRM.
Note the name of the Sage CRM SQL Server database and logon information. When
setting up the Customer Relationship Management module in Sage 100, you will be
required to provide this information.
If Internet Information Services (IIS) is running on the server, you are asked to stop
IIS before the installation process begins. Click OK to stop the IIS server and
perform the installation. After the installation has completed, IIS will be restarted
automatically.
Post-Installation Tasks
Perform the following tasks after installing Sage CRM and Sage 100.
1 The Integration Engine must be started before setting up Sage CRM. Perform
the following steps to start the Integration Engine:
a Select Windows Start menu > Control Panel > Administrative Tools >
Services.
b Right-click Sage 100 Integration Engine and click Properties.
c In the Startup Type drop-down field, select Automatic, and then click Apply.
Close the Properties window.
d Right-click Sage 100 Integration Engine and click Start.
NOTE
Save the
download file in a
folder located
directly beneath
the root directory.
For example:
C:\temp.
WARNING
Stopping the IIS
server
disconnects all
users who are
currently using
any Web site
connected to the
IIS server.

Installation and System Administrator’s Guide Page 36
Upgrading Sage CRM
2 Set up and create users, territories, and security profiles in Sage CRM. One
Sage CRM user must be created for each Sage 100 user who will be creating
quotes and orders or maintaining customer information.
For more information, refer to the Sage CRM System Administrator Guide.
3 Set up the Customer Relationship Management module in your Sage 100
installation. Sage 100 and Sage CRM will not be integrated until you set up the
module in CRM Server Options and CRM Company Options.
For more information, see Set Up Customer Relationship Management for a
new Company in the Sage 100 help.
Upgrading Sage CRM
If you are upgrading from a previous version of Sage CRM, refer to the Sage CRM
2021 R1 System Administrator Guide for full details on completing the upgrade. The
guide is available online at: http://help.sagecrm.com
The steps provided in this chapter are an overview of the upgrade process. This
chapter is not a substitute for the Sage CRM 2021 R1 System Administrator Guide.
The Upgrading chapter in that guide should serve as your reference.
There is one important exception to the information provided in the Upgrading
chapter. The Licensing section suggests using a trial license key to create a test
installation. However, the mirror installation that you will create is the one that will be
upgraded and integrated with your Sage 100 2021 installation; therefore, you must
use a valid Sage CRM Sage CRM 2021 R1 license key. You can use the same 2021
R1 license key for two installations as long as they are not on the same server.
If your existing installation has third-party customizations, they may be overwritten.
Contact your Sage business partner for assistance. After completing the upgrade
process and migrating your data, you can simultaneously run your 2021 installation
and your previous installation for a test period.
Upgrading From Sage CRM 7.3 or Later
Follow these steps if you are using Sage CRM version 7.3 or later.
1 Create a backup of your Sage CRM database.
2 Create a fully functioning duplicate copy of your existing Sage CRM installation.
This mirror copy must be set up exactly the same as your production installation.
This is the Sage CRM installation that will be integrated with Sage 100 2021.
3 Restore the backup of your Sage CRM database to the mirror installation
created in the prior step.
4 Upgrade the mirror installation to Sage CRM 2021 R1.
a Close down other programs. Do not close antivirus, antispyware, and
script-blocking software unless it is actually interfering with the installation.
NOTE
If your Sage 100
2021 installation
is on the same
server as the
Sage 100 system
you are
upgrading, you
must use a
different
Integration
Engine port ID for
your version
2021 installation.

Installation and System Administrator’s Guide Page 37
Upgrading Sage CRM
b Download the Sage 100 2021 CRM 2021 R1.exe file from the location
specified in your Download Notification e-mail from Sage.
To avoid errors when extracting the installation program from the download
file, save the file in a folder located directly beneath the root directory. For
example: C:\temp
The Sage Download Manager window will appear and indicate the amount of
time remaining to download the file.
c Click the .exe file to extract the installation files. The folder that contains the
installation files will be extracted.
d In the folder, click Autorun.exe.
e On the Autorun screen, click Install Sage CRM 2021 R1 or Upgrade from
Sage CRM 7.3 or Later.
f Proceed through the steps in the wizard to update your mirror installation,
and to install the components necessary for integration with Sage 100.
g If you’ve not yet migrated your Sage 100 data, complete that process before
completing the next step.
After migrating your data, log into Sage 100 and check the settings in CRM
Server Options. Update the settings as needed. For more information, see
the CRM Server Options help.
For information on migrating your data, see the Upgrade Checklist in the
Sage 100 Customer Upgrade Guide.
h If you are using Quick Order Entry, see Resetting the Tomcat Port Number
for Quick Order Entry on page 38.
Upgrading From Earlier Versions of Sage CRM
If you are upgrading from a version of Sage CRM released earlier than 7.3, you must
follow this upgrade path before upgrading to Sage CRM 2021 R1, beginning with
your current version.
1 Upgrade to Sage CRM 7.1 SP1.
2 Upgrade to Sage CRM 7.2b.
3 Upgrade to Sage CRM 7.3.
Important: After upgrading Sage CRM, you must log on to Sage CRM as a system
administrator at least once before upgrading to the next version. This is required to
update the Sage CRM database correctly.
For information on obtaining prior versions of Sage CRM to complete the upgrade
path, contact Sage 100 Customer Support.
NOTE
Save the
download file in a
folder located
directly beneath
the root directory.
For example:
C:\temp.

Installation and System Administrator’s Guide Page 38
Upgrading Sage CRM
After you’ve upgraded to Sage CRM 2021 R1, follow the steps under Upgrading
From Sage CRM 7.3 or Later on page 36.
Upgrading from Extended Enterprise Suite 1.4
If you are upgrading from Sage Extended Enterprise Suite version 1.4, you must
follow this upgrade path before upgrading to Sage CRM 2021 R1.
1 Upgrade to Sage CRM 7.0 D2.
2 Upgrade to Sage CRM 7.1 SP1.
3 Upgrade to Sage CRM 7.2.b.
4 Upgrade to Sage CRM 7.3.
Important: After upgrading Sage CRM, you must log on to Sage CRM as a system
administrator at least once before upgrading to the next version. This is required to
update the Sage CRM database correctly.
For information on obtaining prior ver2021 R1sions of Sage CRM to complete the
upgrade path, contact Sage 100 Customer Support.
After you’ve upgraded to Sage CRM 2021 R1, follow the steps under Upgrading
From Sage CRM 7.3 or Later on page 36.
Upgrading from Extended Enterprise Suite 1.3 or prior
Sage does not support upgrading from versions of Extended Enterprise Suite prior to
version 1.4. If you are on version 1.3 or prior, you must upgrade to version 1.4 and
then follow the steps under Resetting the Tomcat Port Number for Quick Order Entry
on this page.
Resetting the Tomcat Port Number for Quick Order Entry
Upgrading Sage CRM may change the Tomcat port number that is used for Quick
Order Entry. If you use Quick Order Entry, follow these steps to reset the port
number.
To reset the Tomcat port number
1 On the server where Sage CRM is installed, open the Windows Control Panel.
2 Select Administrative Tools > Internet Information Services (IIS) Manager.
3 In the Connections pane, under Sites > Default Web Site, select the Sage CRM
installation that you need to update.
4 In the pane on the right, click Features View.
5 In the IIS area, click URL Rewrite.
6 In the URL Rewrite window, select sage100erp_rwc.
WARNING
You must
upgrade
Sage 100 before
you can log into
Sage CRM.

Installation and System Administrator’s Guide Page 39
Integrating Sage CRM 2021 R1
7 On the Actions menu, click Edit.
8 In the Edit window, scroll to the Action area.
9 In the Rewrite URL field, change the port number to the value used for the Sage
CRM instance that you’ve upgraded.
If you aren’t sure of the port number, you can find it by executing the following
command in SQL Server Manager on the server where the Sage CRM instance
that’s you’ve upgraded is installed:
select parm_name, parm_value from custom_sysparams where parm_name=
'CRMTomcatPort'
10 Restart IIS and the Tomcat service.
Integrating Sage CRM 2021 R1
If you already have Sage CRM 2021 R1 installed, and you need to integrate it with
Sage 100 2021, follow the steps below.
1 In the folder containing the installation files used to install Sage CRM, click
Autorun.exe.
2 On the Autorun screen, click Integrate Existing Sage CRM 2021 R1 Installation
with Sage 100 2021.
3 Follow the steps in the wizard to set up the integration.
Installing Quick Order Entry
To use Quick Order Entry for entering orders and quotes within Sage CRM, you must
install the Quick Order Entry Component. Quick Order Entry is available for use only
with Sage 100 Advanced and Premium.
To install Quick Order Entry
1 In the folder containing the installation files used to install Sage CRM, click
Autorun.exe.
2 On the Autorun screen, click Install Quick Order Entry Component, and follow
the steps in the wizard to complete the installation.
3 If you have Sage CRM and Sage 100 installed on two different servers, or if they
are on the same server and you are not using the default port number (10000),
edit the web.xml file:
a On the server, browse to the following location within the Sage CRM
installation folder: ..\tomcat\webapps\richwebclient_swt\WEB-INF

Installation and System Administrator’s Guide Page 40
Installing Quick Order Entry
b Right-click the web.xml file and select Edit to edit the file in Notepad. You
must run Notepad as the administrator. If you are not logged in as the
administrator, open Notepad by right-clicking it on the Windows programs
menu and selecting Run as administrator.
c Review the settings in the table below and update them as needed.
d Stop and then restart the Tomcat service on the server where Sage CRM is
installed.
Setting Note
pvx host name The name of the server where Sage 100 is installed.
The default value is localhost, which is applicable
only if Sage 100 is installed on the same server as
Sage CRM.
pvx host socket The port number used by the Sage 100 server to
listen for client connections. The default host socket
value is 10000.

Installation and System Administrator’s Guide Page 41
Chapter
6
Uninstalling and Reinstalling
Chapter 6
Uninstalling Sage 100 requires uninstalling each component separately. The server
and workstation uninstall routines will remove all program files and registry entries
made by the Sage 100 installation routines.
The program does not remove your Sage 100 data files. To remove these files, you
must manually delete the MAS90 folder. All Sage 100 client workstation files are
removed automatically by the workstation uninstall program.
Overview of Uninstalling Process
The installation process below describes all the procedures that must be performed
to uninstall Sage 100.
1 If you are using Sage Fixed Assets, uninstall Sage Fixed Assets from the server
and each workstation.
2 Uninstall Sage 100 from the Application Server and each workstation (see
Uninstalling Sage 100 on this page).
3 Uninstall the Sage CRM software, if it is installed (see Uninstalling Sage CRM on
page 43).
4 If you are using Web Services, uninstall it.
5 If you are using the Web Engine, uninstall it.
6 If you have no other Sage products installed, uninstall Sage Advisor. Do not
uninstall Sage Advisor if you have other Sage products installed that use Sage
Advisor to receive updates.
Uninstalling Sage 100
The uninstall program performs a complete deletion of all Sage 100 related files
other than the data files; they must be manually removed by deleting the MAS90
folder.
If your system is integrated with Sage CRM, and you plan to continue using Sage
CRM after uninstalling Sage 100, delete the linked Sage 100 companies before
uninstalling. This will remove references to those companies from the Sage CRM
database. For more information, see Delete a Company in the Help System.
To uninstall the server component
1 Ensure that all users are logged out of the system.
2 In the Windows Control Panel, double-click the Programs and Features icon.
NOTE
If the Integration
Engine is
running, stop the
engine before
uninstalling
Sage 100.

Installation and System Administrator’s Guide Page 42
Uninstalling Sage 100
3 Select the Sage 100 server component from the list. Click Uninstall to start the
uninstall process. If you have more than one installation of Sage 100 on your
server, each installation will be identified by its version or installation path.
4 The uninstall splash screen appears briefly and is replaced by the Confirm
Uninstall dialog box. Click OK.
5 The Uninstall Options page appears. Select the type of uninstall to perform. If
you choose to remove a registry entry, you will be removing the registry entry
from all installations of Sage 100. Click Next.
The uninstall program will begin removing the components of the server
application according to what is contained in the Uninstallation Log. This
includes the following components:
All system files installed by Sage 100. This reduces the usage count of the
shared system files, except for core components.
All files copied during installation
The program folder and program items created during installation
6 If you want to remove your Sage 100 data files, manually delete the MAS90
folder.
If you selected the check box to remove all registry entries, all data folders will
remain in the MAS90 folder. If you select the Remove Company Data check box, the
entire MAS90 folder structure will be deleted.
If there are any files that the uninstall program was unable to delete, a message
appears stating that you can click the Details button to view a listing of the files
and/or registry entries that could not be removed; otherwise, a message stating that
the uninstallation process was successful appears.
If you’re uninstalling Sage 100 as troubleshooting step and plan to reinstall, verify
that the following files were uninstalled. Delete them if they remain on the system.
Important: If you have other instances of Sage 100 on the same server, deleting
these files will cause problems with those instances.
In the C:\WINDOWS\SYSWOW64\ folder:
pvxio.dll
pvxsec32.dll
pvxodbc.dll
IN the C:\Program Files (x86) Common Files\Sage\ folder:
Common Components
MAS Fixed Assets
NOTE
When uninstalling
Sage 100
Premium from
the server, the
SQL database is
not removed. Use
the Microsoft
database tools to
remove the SQL
database.

Installation and System Administrator’s Guide Page 43
Uninstalling the Workstation Component
Uninstalling the Workstation Component
The uninstall process for the Sage 100 workstation component is similar to the
server component uninstall process.
To uninstall the workstation component
1 In the Windows Control Panel, double-click the Programs and Features icon.
2 Select the Sage 100 workstation component from the list. Click Uninstall to start
the uninstall process.
3 You are prompted to confirm your selection. Click Yes to confirm that you want to
remove the indicated software application. Click No to cancel this operation.
4 Some registry entries may be needed by other installations of the Sage 100
workstation; therefore, the uninstall program will prompt you before removing
those entries. If the message dialog box appears, click Yes to remove the
registry entries that are shared with other installations of Sage 100 on this
workstation. Click No to keep those registry entries.
If there are any files or registry entries that the uninstall program was unable to
delete, a message appears stating that you can click Details to view a listing of those
files and/or registry entries; otherwise, a message stating that the uninstallation
process was successful appears.
Uninstalling Sage CRM
Before uninstalling, verify that all users are logged out of Sage CRM, and shut down
Internet Information Services (IIS). The Sage CRM uninstallation program removes
the Sage CRM program files.
To uninstall Sage CRM
1 In the Windows Control Panel, double-click the Programs and Features icon.
2 Select Sage CRM 200, and then click Uninstall.
3 Follow the steps in the wizard to uninstall Sage CRM.
4 When the uninstallation is complete, select the View Uninstall Log File check box
to view logging information. Click Finish.
5 The log file is displayed. If you need to manually delete any files, details are
specified in the log. Review the log file to make sure there are no errors. Resolve
any errors listed in the log file before reinstalling Sage CRM. Unresolved errors
may prevent future installations of Sage CRM from functioning correctly.

Installation and System Administrator’s Guide Page 44
Reinstalling Sage 100
Reinstalling Sage 100
If you previously installed the 2021 version of the software, you can install over the
existing 2021 installation or install a new copy of the software. Installing over an
existing 2021 version of the software streamlines the installation process.
Before reinstalling Sage 100, if the Sage Web Engine is installed for the eBusiness
Manager module, back up any customized templates in the IW folder to another
location, and then uninstall the Sage Web Engine. After version 2021 of the Sage
Web Engine is installed, move the templates back to the IW folder.
To reinstall Sage 100
1 In the Sage 100 installation program Autorun screen, select a product.
2 On the product screen, select the option to install that product.
3 Select whether to add, reinstall, or uninstall all modules.
Select Add to install modules that have not been purchased and access
most of them for 45 days before you are required to purchase and register
them. The 45-day trial period begins the first time the module is accessed.
The eBusiness Manager, Custom Office, Electronic Reporting, and Visual
Integrator modules must be registered before they can be accessed.
Select Reinstall to reinstall all previously installed modules. The product key
information from the selected installation is used unless the information is
invalid or has expired. You will not be able to enter new product key
information using this option. Proceed to step 4.
Select Uninstall to completely uninstall Sage 100. To uninstall modules
individually, use the System Configuration task on the Library Master Setup
menu. For further information, see Uninstalling Modules on page 81.
4 Select Reinstall and click Next. If the Integration Engine is running, a message
appears stating that you must stop the Integration Engine before continuing.
Stop the Integration Engine using the following steps:
a Select Windows Start menu > Control Panel > Administrative Tools >
Services.
b In the Services window, select the Integration Engine. Click the Stop Service
button.
5 In the message dialog box, click OK.
6 Proceed through the remaining steps in the installation wizard to complete the
reinstallation.
7 When the reinstallation is complete, restart the Integration Engine using the
following steps:
a Select Windows Start menu > Control Panel > Administrative Tools >
Services.

Installation and System Administrator’s Guide Page 45
Reinstalling Sage CRM
b In the Services window, select the Sage 100 Integration Engine. Click the
Start Service button.
Reinstalling Sage CRM
If you previously installed the Sage CRM software, after the License Agreement
page, the Sage CRM 200 Setup page appears that provides you setup options to
install, upgrade, change, or reinstall the Sage CRM software.
To reinstall Sage CRM
1 Select the Complete Reinstall installation option to reinstall over a Sage CRM
installation, and then proceed to the next step.
2 If you have more than one Sage CRM installation, select the installation to
reinstall. Click Next.
3 Follow the steps in the installation wizard to complete the reinstallation. For more
information, see Installing Sage CRM on page 34.
Changing an Existing Sage CRM Installation
The Sage CRM installation wizard allows you to change specific components in
Sage CRM without performing a full reinstallation. Components you can reinstall are
the database, registry, program files, IIS aliases, and license key. Changing the
license key allows you to add features or increase the number of licensed users.
To change an existing installation of Sage CRM
1 Select the Change existing install of CRM option.
2 If you have more than one Sage CRM installation, select the installation to
reinstall. Click Next.
3 Follow the steps in the installation wizard to complete the reinstallation. For more
information, see Installing Sage CRM on page 34.
If you selected options other than the license key, you are prompted to back up
components that will be affected. Perform the backup before you proceed.
Reinstalling the Workstation
If you previously installed the 2021 version of the software, you can install over the
existing 2021 installation or install a new copy of the software. Installing over an
existing 2021 version of the software streamlines the installation process.
WARNING
Selecting the
Complete
Reinstall option
will remove all
data from the
database.

Installation and System Administrator’s Guide Page 46
Reinstalling the Workstation
To reinstall the workstation
1 Use Windows Explorer to attach to the server share point where the Application
Server is installed and browse to the MAS90\Wksetup folder.
2 In the Wksetup folder, double-click WkSetup.exe to run the workstation
installation wizard. It takes the workstation installation wizard a few seconds to
launch.
3 Follow the steps in the installation wizard to reinstall the workstation.

Installation and System Administrator’s Guide Page 47
Chapter
7
Using the Application
Server
Chapter 7
Application Server Overview
Sage 100 Advanced and Premium are powered by the Application Server, a
powerful program that allows multiple users to remotely access the server using
TCP/IP. Users can be connected on an internal LAN or externally through an intranet
or WAN. The Application Server also allows for encryption using SSL to protect your
data if operating in an environment that is not secure, such as over the Internet.
Configuring the Application Server
Before you can start Sage 100 Advanced or Premium, you must first configure the
Application Server. The Application Server can be configured to run as a service; it
must be configured using the following steps to access the Sage 100 server.
To configure the Application Server
1 On the server where Sage 100 is installed, from the Windows Start menu, run
the Application Server Configuration program. This program should be a
shortcut in the Sage program group.
2 In the Application Server Configuration window, click the Server tab.
The server selected in the Server field is the logical name to identify the
Application Server. This does not refer to the physical machine name of the
server.
Verify the KeepAlives check box is cleared.
3 For security purposes, the first setting you should change is the socket number
on which the Application Server listens for requests. By default, this is set to
10000, but can be any valid socket (port) between 9000 and 10000. Make sure
the socket you choose is not being used by another service or application on this
server.
4 Click Start to start the Application Server. In the upper-right corner, the Status
field changes from Stopped to Running. Click Exit to exit the Application Server
Configuration program. Users can now access Sage 100 after performing
workstation setup.
The Application Server continues to run and will service incoming requests from
Sage 100 clients, even though you have exited the Application Server Configuration
program.
This chapter applies to:
Sage 100 Advanced
Sage 100 Premium

Installation and System Administrator’s Guide Page 48
Application Server Overview
In this current configuration, a user must remain logged onto the server where the
Application Server is running. The user logged on to this server must have access to
all resources required by Sage 100 (all rights to all program and data folders in
Sage 100).
After the Application Server has been configured once, you do not need to re-run the
Application Server Configuration program to start the Application Server. You can
start the Application Server by selecting the Application Server Startup menu item
from the Windows Start menu. This starts the Application Server which will continue
to run until the user is logged off or the server is shut down.
To view users currently running Sage 100 and the tasks that users are running, click
the Sessions tab.
Turning Off the Application Server
There may be instances when you want to turn off the Application Server, such as
before installing an operating system update.
To turn off the Application Server
1 Run the Application Server Configuration program.
2 Click the Servers tab and then click Stop. The Status field changes from Running
to Stopped.
You can also turn off the Application Server by closing the Application Server task
that appears on the Task Bar of the server. To do this, right-click the task and click
Close from the pop-up menu. The Application Server will shut down after a few
seconds.
Configuring as a Service
Depending on your needs, you may want to start the Application Server as a service
of the operating system. Running as a service has a number of advantages:
The Application Server can be configured to start automatically so that if the
server is rebooted, you do not have to re-start the Application Server.
It is more secure because someone does not need to be logged onto the server
in order for the Application Server to run.
To configure the Application Server as a service
1 Configure the Application Server. For instructions, see Configuring the
Application Server on page 47.
2 Exit the Application Server Configuration program after the Application Server
has been configured.

Installation and System Administrator’s Guide Page 49
Application Server Overview
3 If you already have a Windows domain user account set up to run the
Application Server, skip this step; otherwise, create a new domain user on your
server that has appropriate access rights to run all the functions and features of
Sage 100. This should include the Modify permission to the application folder,
any folders where Sage 100 data is located, the Windows folder, and access to
the Registry. This account must also be granted the Log On as a Service right.
If you are not running in a domain environment, create and use a local computer
account for your workgroup; however, you must ensure this account can
execute a UNC path to the MAS90 folder. Test this by entering the UNC path in
Windows Explorer. If you are prompted for a user name and password, the
account is not set up properly.
4 After a user is created, on the Windows Start menu, select All Programs > Sage
> Application Server Service Setup. A dialog box appears.
5 Select the path of the Sage 100 installation, if it is different than the default
Sage 100 installation path. The Application Server Service installation wizard
installs the service components necessary to run the Application Server as a
service.
6 Use the Services applet to configure the service.
a Right-click the Computer shortcut on the system's Desktop, and then select
Manage. The Server Manager window appears.
b In the left pane of the Server Manager window, select Configuration. The
Services item appears in the right pane of the window.
c Double-click Services. All of the services available on the server appear in
the right pane of the window.
d Double-click either Sage 100 Advanced Service or Sage 100 Premium
Service, depending on which product you are using. The properties window
for the service opens.
There are two settings you may want to change:
The startup type, by default, is set to Manual. To have the service start
automatically whenever the system is restarted, change the startup method
to Automatic. If the service is set to Manual, you will need to launch this
window to start up the service each time the server is reset. You may want to
set the service to Manual if you plan on performing maintenance on the
server and do not want the Application Server service to start up after
restarting.
Change the logon user to the domain user that was created previously to run
the Sage 100 Application Server. Provide the user logon and password
information where specified.
7 Click Apply to save any changes.
8 On the General tab, click Start to begin the service. The Service Status message
changes to Started, and users can now access Sage 100.
NOTE
Your screens
may vary slightly
depending on the
version of
Windows you are
using.
WARNING
Do not run the
Sage 100
Application
Server service
under the Local
System account.
The Local System
account does not
have access to
certain network
resources that
Sage 100
requires.

Installation and System Administrator’s Guide Page 50
Advanced Features
Advanced Features
The Application Server has a number of additional features that can be useful for
system administrators. You can enable some of these features for added security or
logging purposes; however, these are not required to run Sage 100. To enable these
features, you must log on to the server and start the Application Server Configuration
program.
Session Tracking
In the Application Server Configuration window, on the Sessions tab, you can view a
list of all the users who are currently in the system and which program they are
running. This window also provides you with more detailed information about the
machine name, IP address, and connection time for each process. This is useful
when trying to find users on the system or people in a particular application. Master
Console in Sage 100 can also be used for this purpose.
Individual sessions can also be terminated if they appear to be locked up or become
unresponsive. Terminating a process in this manner can cause data corruption
issues and should only be done as a last resort. To terminate a session, select the
session from the list and then click Terminate.
SSL Encryption
The Application Server can be configured to use SSL to encrypt data being sent to
and from the Application Server. This can be extremely useful when using the
Internet or any other unsecure medium to connect workstations to the server;
however, SSL does add extra overhead in terms of performance. This feature should
be enabled only if it is necessary. Using SSL in a secured, intranet environment or
over an already protected tunneling protocol (like VPN) is not recommended due to
the potential performance impact.
The SSL component of the Application Server uses the OpenSSL protocol and
drivers. To use SSL, you must first configure the Sage 100 Application Server to use
SSL and then generate an SSL certificate. For more information, See Generating an
SSL Certificate on page 51.
To configure the Sage 100 Application Server to use SSL
1 Make sure all users are out of Sage 100. After SSL is enabled, a different
connection string is required for each of the workstations connecting to the
server. Workstations that do not have this additional information will not be
allowed to connect to Sage 100.
2 Run the Application Server Configuration program.
3 In the Application Server Configuration window, click the Server tab and select
the Encrypt check box. The Certificate field becomes enabled and allows you to
type the path to the SSL certificate.
4 Provide the full path to the certificate relative to the server where Sage 100 is
installed. After the certificate is entered and validated, the server automatically
updates its configuration.

Installation and System Administrator’s Guide Page 51
Advanced Features
5 On each workstation that will be connecting to Sage 100, change the Sage 100
shortcut as follows: in the Target command line, add -SSL to the end of the
parameter list.
If you receive an error trying to connect to the server after configuring SSL, perform
the following:
Verify that the workstation startup shortcut was modified.
Verify which startup icon the user used when trying to connect to the server, and
verify that the -SSL argument is in the target command line. Users may have
more than one shortcut connecting them to the server that need to be modified.
Generating an SSL Certificate
To use the SSL capabilities of the Application Server, create a .pem file that contains
both the certificate and your private key in X509 format.
For information on generating an SSL certificate, use the Knowledgebase on the
Sage Customer Portal at https://customers.sagenorthamerica.com to search for the
following text: How to generate an SSL certificate.
NOTE
If you are
unfamiliar with
generating a
certificate for
secure
transactions,
consult a network
consultant or
business partner.

Installation and System Administrator’s Guide Page 52
Chapter
8
Configuring the
Client/Server ODBC Driver
Chapter 8
The Sage 100 Advanced server installs client/server ODBC driver components,
which allow remote workstations to process worktables using server-side ODBC
processing. Report rendering is completed using a locally cached copy of the form or
report and a local SAP Crystal Reports print engine.
Server-Side Configuration
Set up the client/server ODBC driver to run as an application or as a service before
configuring the server.
Running as an Application or Service
Determine whether to run the client/server ODBC driver as an application or as a
service, and perform one of the following:
To run the client/server ODBC driver as an application, in Windows Explorer,
locate and double-click the pvxiosvr.exe file in the following location:
..\MAS90\Home\pvxiosvr.exe
To run the client/server ODBC driver as a service, select File > Run on the server
and enter the server’s local path to pvxiosvr.exe followed by the -i parameter. For
example:
X:\Sage\Sage 100 Advanced\MAS90\Home\pvxiosvr.exe -i
To uninstall previous versions of the client/server ODBC driver as a service,
select File > Run on the server and enter the server’s local path to pvxiosvr.exe
followed by the -u parameter. For example:
X:\Sage\Sage 100 Advanced\MAS90\Home\pvxiosvr.exe -u
Configuring the Server
If you set up the client/server ODBC driver to run as a service, follow the procedure
for your server’s operating system to configure the server.
To configure a server running Windows Server 2012
1 From the Sage 100 Advanced server, right-click Server Manager on the
system’s Desktop.
2 In the Server Manager window, on the Tools menu, click Services. The services
appear in the right pane of the window.
This chapter applies to:
Sage 100 Advanced

Installation and System Administrator’s Guide Page 53
Server-Side Configuration
3 Double-click the Sage 100 Client Server ODCB Driver Service item.
4 In the Sage 100 Client Server ODCB Driver Service Properties window, at the
Startup type field, select Automatic, and then click the Log On tab.
5 Click the General tab, and then click Apply.
6 Click Start and verify that the service starts successfully.
7 Click OK.
To configure a server running Windows Server 2008
1 From the Sage 100 Advanced server, right-click My Computer on the system's
Desktop, and then select Manage.
2 In the left pane of the Server Manager window, select Configuration. The
Services item appears in the right pane of the window
3 Double-click the Services item. All of the services available on the server appear
in the right pane of the window.
4 Double-click the Sage 100 Client Server ODCB Driver Service item.
5 In the Sage 100 Client Server ODCB Driver Service Properties window, at the
Startup type field, select Automatic, and then click the Log On tab.
6 Click the General tab, and then click Apply.
7 Click Start and verify that the service starts successfully.
8 Click OK.
To configure a server running Windows Server 2003
1 From the Sage 100 Advanced server, right-click My Computer on the system's
Desktop, and then select Manage.
2 In the left pane of the Computer Management window, select Services and
Applications. The Services item appears in the right pane of the window.
3 Double-click the Services item. All of the services available on the server appear
in the right pane of the window.
4 Double-click the Sage 100 Client Server ODCB Driver Service item.
5 In the Sage 100 Client Server ODCB Driver Service Properties window, at the
Startup type field, select Automatic, and then click the Log On tab.
6 Click the General tab, and then click Apply.
7 Click Start and verify that the service starts successfully.
8 Click OK.

Installation and System Administrator’s Guide Page 54
Workstation Configuration
Workstation Configuration
Use the Library Master System Configuration task to configure the workstation and
then test the ODBC data source.
To configure the workstation
1 On the Sage 100 Advanced Desktop, select Library Master Setup menu >
System Configuration. The System Configuration window appears.
2 Click the ODBC Driver tab, and then select the Enable C/S ODBC Driver check
box.
3 At the ODBC Server Name field, enter the server name or IP address where the
client/server ODBC application or service is running.
4 At the ODBC Server Port field, enter an accessible server port or leave the field
blank to use the default port, 20222.
5 Perform one of the following:
If all users (both LAN and remote) will be using the client/server ODBC
driver, select the Enable for All Users check box.
To enable the ODBC driver for an individual user, select Library Master Main
menu > User Maintenance. On the Preferences tab, select the Enable C/S
ODBC Driver check box.
6 Close and restart the workstation client.
7 Access and test the ODBC data source.
If running a 32-bit system, perform the following steps:
a Select Windows Start menu > Control Panel and double-click the
Administrative Tools item.
b Double-click Data Sources (ODBC). The ODBC Data Source
Administrator window appears.
c On the User DSN tab, double-click the SOTAMAS90 item. The ProvideX
ODBC Driver Setup window appears. Click the Debug tab, and then click
Test Connection.
If a message appears stating that the connection was successful, the
client/server ODBC service is running correctly.
If running on a 64-bit system, perform the following steps:
a On the Windows desktop, double-click the Computer icon.
b In the Computer window, locate the c:\windows\SysWOW64 folder.
c Double-click Odbcad32.exe. The ODBC Data Source Administrator
window appears.
NOTE
If you encounter
problems
connecting to the
client/server
ODBC service,
see
Configuring the
Workstation for the
ODBC Driver Service
on page 85
.

Installation and System Administrator’s Guide Page 55
Sharing Permissions
d On the User DSN tab, double-click the SOTAMAS90 item. The ProvideX
ODBC Driver Setup window appears. Click the Debug tab, and then click
Test Connection.
If a message appears stating that the connection was successful, the
client/server ODBC service is running correctly.
Sharing Permissions
On the Sage 100 Advanced server, you can set the share permissions to allow users
to print server reports. You can grant permissions at the share point to allow for
Read, Change, or Full Control access. When printing a version 4.x form or report,
the user can print to any valid Windows printer, defer reports, or export or e-mail.
Users with no access to the Sage 100 Advanced share point on the server will be
able to print to Deferred. To print or preview from Deferred Printing, users must have
a minimum of Read access to the Sage 100 Advanced server share point.
NOTE
For more
information about
setting
permissions, see
Sage 100 Security
Permissions on
page 87
.

Installation and System Administrator’s Guide Page 56
Chapter
9
Installing SAP Crystal Reports Designer
Chapter 9
Chapter 9
SAP Crystal Reports Designer is a powerful, graphics-oriented reporting program
that allows users to customize their graphical forms. SAP Crystal Reports Designer
is fully integrated with Sage 100. Sage 100 provides a number of customizable SAP
Crystal Reports forms as part of the standard installation.
The Workstation Setup program for Sage 100 installs the standard SAP Crystal
Reports Run-Time Engine on each workstation, which allows all users to view and
print reports created through SAP Crystal Reports; however, to modify the standard
forms included with Sage 100, or to create your own reports, you must install the
SAP Crystal Reports Designer.
SAP Crystal Reports Designer is licensed for use with the Sage 100 ODBC driver as
well as the standard Microsoft SQL Server ODBC driver.
If you are using Sage 100 Premium, you will need read access to the applicable
database. For information, See Modifying SAP Crystal Reports in Sage 100
Premium on page 57.
Installing SAP Crystal Reports Designer to the
Workstation
To modify or create SAP Crystal Reports forms and reports, install SAP Crystal
Reports Designer to the workstation and select the Typical installation option, which
uses pre-assigned settings.
To install SAP Crystal Reports Designer to the workstation
1 Click a product from the Sage 100 installation Autorun screen, and then on the
product screen, click Productivity Applications.
2 On the Productivity Applications screen, click Install SAP Crystal Reports
Designer.
3 The SAP Crystal Reports 2016 for Sage Setup page appears. Follow the steps
in the installation wizard to install SAP Crystal Reports Designer. A progress
meter appears while the installation is in progress.
NOTE
Select the Typical
installation type.

Installation and System Administrator’s Guide Page 57
Modifying SAP Crystal Reports in Sage 100 Premium
Modifying SAP Crystal Reports in Sage 100
Premium
To modify reports in Sage 100 Premium using SAP Crystal Reports Designer, you
must either be logged on using a Windows account that has read access to the
applicable SQL Server database, or you must have a separate SQL Server
authenticated logon ID and password. Integrated Security is used by default; if your
Windows account does not have rights to the database, a logon dialog box appears,
allowing you to enter a different logon ID and password for database access.
Set up an OLE DB (ADO) Connection
In addition to using SAP Crystal Reports Designer to modify reports, you can also
modify the reports through the operating system by setting up an OLE DB (ADO)
connection to the SQL Server database. Only modifications such as moving items
around on the report, changing font information, and hiding or showing information
already in the database is supported.
To set up an OLE DB (ADO) connection
1 In Windows Explorer, browse to the .rpt file to modify in the MAS90\Reports
folder, and open the file.
2 Select Database menu > Database Expert.
3 Expand Create New Connection and then expand OLE DB (ADO) to open the
OLE DB (ADO) window.
4 From the Provider list, select Microsoft OLE DB Provider for SQL Server and
click Next.
5 Type the server name where the database is installed, select the database, and
select the Integrated Security check box.
6 Click Finish and then, at the Database Expert window, click OK.
7 Save the report. The report is now linked to the SQL Server database. Any
dictionary changes that have been made to the table are now available in SAP
Crystal Reports Designer.
Converting SAP Crystal Reports from a Prior
Version
When upgrading from a prior version of Sage 100, any custom SAP Crystal reports
and forms must be converted to run in version 2021.
Converting Reports
The Sage 100 Crystal Report Conversion Wizard converts prior versions of
Sage 100 Crystal Reports forms and reports to the latest data dictionary revisions
and SAP Crystal Reports format.
NOTE
For information
on converting
reports for that
product, see
Converting
Reports for Sage
100 Premium on
page 59.

Installation and System Administrator’s Guide Page 58
Converting SAP Crystal Reports from a Prior Version
To convert reports
1 In the MAS90\Home folder, locate and double-click mascrcw.exe. The Sage 100
Crystal Report Conversion Wizard appears. Click Next.
2 In the Select Reports page, verify the connection type.
3 In the User Name field, type the user logon and type the password in the
Password field.
4 In the Company field, type your company code in uppercase. Verify that the
company selected has the appropriate modules installed. For example, do not
convert Manufacturing Crystal reports (W/O or B/M) for demo company code
ABC. Those modules do not exist in company ABC, and the conversion will not
complete on the reports.
5 In the Directory field, verify that the path is correct. Click Next.
6 In the Reports Path field, enter the path, or click Browse and select the folder to
search for reports that require conversion. All forms and reports that have been
previously converted and those that contain the current Sage 100 version as a
keyword will not be selected for conversion.
7 Click Search to generate a list of reports. Click Cancel to stop the search. You
can select individual or multiple reports within the listing to convert. Select the
report, or press CTRL to make multiple selections. Click Select All to convert all
reports within the listing. Click Clear to clear the listing. To complete the
conversion, click Next.
8 In the Completing the Sage 100 Crystal Report Conversion Wizard page,
perform one of the following:
Click Finish to initiate the conversion process.
Click Back to return to the previous wizard or page.
Click Cancel to exit the wizard.
9 If you clicked Finish, the Converting Reports window appears. Click Save to
save the listing of the selected reports and the conversion status of each report.
The listing can be printed to the default Windows printer.
If a field name used within the report or form no longer exists in the data source, it
will be noted on the listing and removed from the report or form. If the removed field
is contained in a formula, a SAP Crystal Reports error in printing message will
appear when printing.
Successfully converted reports generate an unconverted backup file in the same
folder with a file extension of .rp_. If Status:Complete appears, the report is
successfully converted. If Status:Failed appears, note the error message and verify
that the company you are logged onto using ODBC contains application data files for
the selected report. If the conversion wizard cannot convert that report, the report
must be manually converted. If errors are encountered during the conversion, the
wizard will skip the report and continue with the next selected report.
NOTE
This wizard runs
the first time you
access a SAP
Crystal Report
created using a
level of Sage 100
prior to version
2021.

Installation and System Administrator’s Guide Page 59
Converting SAP Crystal Reports from a Prior Version
Converting Reports for Sage 100 Premium
Follow the steps below to convert customized Crystal forms and reports from a prior
version for Sage 100 Premium.
1 In the form or report printing window, click the drop-down arrow in the top-right
corner, and then click Designer.
2 In the SAP Crystal Reports Designer window, on the File menu, select Summary
Info.
3 In the Document Properties window, in the Keywords field, verify the version that
appears is the current version, and then click OK.

Installation and System Administrator’s Guide Page 60
Converting SAP Crystal Reports from a Prior Version
4 On the Database menu, select Verify Database. The OLE DB (ADO) window
appears.
5 Perform one of the following:
If your Windows logon account has Read access to the database, click
Finish.
If your Windows logon account does not have Read access to the database,
clear the Integrated Security check box, enter a user ID with access to the
database and its password, and then click Finish.
If it is necessary to remap any fields, follow the instructions in the SAP
Crystal Reports Designer Help system. Complete these steps for all forms
and reports that were customized in the previous version.

Installation and System Administrator’s Guide Page 61
Chapter
10
Installing Federal and State Tax Reporting
Chapter 10
Chapter 10
Overview
Federal and State Tax Reporting software allows you to print and electronically file
your payroll tax forms and 1099 forms using signature-ready plain paper tax forms.
Every report is saved in its own history or draft file for easy retrieval.
Installing Federal and State Tax Reporting on a Workstation
You must install Federal and State Tax Reporting separately on each Sage 100
workstation. Do not install the program on the server.
To install Federal and State Tax Reporting on a workstation
1 Log on to the workstation as a user with Administrator rights.
2 Start the Sage 100 installation program by clicking the Autorun.ext file, and then
select your edition of the product.
3 Click Productivity Applications.
4 On the Productivity Applications screen, click Install Federal and State Tax
Reporting.
To begin the installation process from a server installation of
Sage 100 Standard, map a drive letter to a share point on the server above
the MAS90 folder. In the MAS90\Wksetup folder, double-click Autorun.exe,
and then click Install Federal and State Tax Reporting on the Autorun
screen.
To begin the installation process from a server installation of Sage 100
Advanced or Premium, use Windows Explorer to attach to the server share
point where Sage 100 is installed. In the MAS90\Wksetup folder,
double-click Autorun.exe, and then click Install Federal and State Tax
Reporting on the Autorun screen.
5 Proceed through the steps in the Federal and State Tax Reporting installation
wizard to complete the installation.
6 Click Accept to accept the terms of the license agreement. You must accept the
agreement to continue with the installation. A progress meter appears while the
installation is in progress.

Installation and System Administrator’s Guide Page 62
Overview
Share and NT File System (NTFS) Permissions
For Sage 100 Advanced and Premium, on the server where Sage 100 is installed,
you must set the share permissions to Change. For users that will generate eFiling
forms and reports, set the Write permissions to the following folders (where XXX is
the company code):
...\MAS_XXX\APXXX\eFilingReporting
...\MAS_XXX\PRXXX\eFilingReporting
The share permissions and folder NTFS permission must be set up before users can
use Federal and State Tax Reporting.
NOTE
For more
information about
setting
permissions, see
Sage 100 Security
Permissions on
page 87
.

Installation and System Administrator’s Guide Page 63
Chapter
11
Setting Up Credit Card and ACH Payment
Processing
Chapter 11
Use the credit card and ACH payment processing feature to authorize credit card
and ACH payment transactions. You must have the Accounts Receivable module
installed and have a valid merchant account with Paya (formerly Sage Payment
Solutions).
Installing Paya Connect Desktop
You must install Paya Connect Desktop on each workstation that will be used to
access credit card or ACH payment information in Sage 100.
The first step is to install Paya Connect Desktop. Then when you start the program,
you’ll be asked to upgrade to Paya Connect Desktop.
Considerations for Using Paya Connect Desktop
Workstations used to process credit card and ACH payment transactions or set
up credit card and ACH payment processing require a working internet
connection.
Add www.sageexchange.com to the list of trusted websites for any workstations
that will be using Paya Connect Desktop to set up credit card and ACH payment
features.
To install Paya Connect Desktop
1 Use Windows Explorer to browse to the server where Sage 100 is installed, and
locate the MAS90\Wksetup folder.
If you’re using a stand-along installation of Sage 100 Standard, browse to the
MAS90\Wksetup folder on the computer.
2 Double-click Autorun.exe to open the Workstation Setup program; it takes a few
seconds to launch.
3 Click Install Paya Connect Desktop.
4 Proceed through the steps in the Paya Connect Desktop installation wizard to
install the program.
5 When the installation is complete, a window appears to let you know that a
software update is available.
Follow the prompts to install Paya Connect Desktop.

Installation and System Administrator’s Guide Page 64
Installing Paya Connect Desktop
Enabling Credit Card and ACH Payment Processing
The simplest way to enable credit card and/or ACH payment processing is to use the
setup wizard. The wizard guides you through enabling the feature and creating
payment types.
You will need to enter the merchant ID and merchant key for your Paya account, so
have that available before you start the wizard.
To start the wizard, select Accounts Receivable > Setup > Payment Setup Wizard.
For information on setting up credit card and ACH payment processing without using
the wizard, see Set Up Credit Card and ACH Payment Processing in the Help.

Installation and System Administrator’s Guide Page 65
Chapter
12
Performing System Startup
Chapter 12
After installing Sage 100, you are ready to set up companies, security, and system
preferences. One company must be created in Sage 100 before anyone can access
the system.
During the installation, a program group is added to the Windows Start > All
Programs menu. Click the Sage 100 Desktop icon in this program group to start the
software.
Starting the Software
When first starting Sage 100, you are prompted to enter the Administrator password
that you entered during the installation.
After entering your Administrator password, the Administrative Tools screen
appears.
Logging on as Administrator does not give you full access to the software. Only
certain Library Master tasks are available. To access the software, you must set up a
user logon (other than the Administrator logon) and password in User Maintenance.
For more information, See Setting Up Security on page 67.
Performing Administrative Tasks
You can perform the following tasks from the Administrative Tools screen:
Create and activate companies for new installations (see Creating and Activating
Companies on this page)
Define user roles, create users, and assign roles to users (See Setting Up Roles
and Users for Security on page 67)
Set up system preferences (See Setting System Preferences on page 72)
Change your administrator password (See Changing Your Administrator
Password on page 75)
Change your participation in the Sage Product Enhancement Program.
Creating and Activating Companies
You must create and activate the companies for which data will be processed. Many
systems are set up with multiple companies to keep financial records for individual
companies separate, and to separate real company data from test company data.
Each company is identified using a three-character company code. Within the
modules, you can set up data files for each company.
NOTE
You must create
and activate
companies and
then create user
roles before
creating users.

Installation and System Administrator’s Guide Page 66
Performing Administrative Tasks
If you are creating companies that contain similar information, you can create
companies from an existing company by copying information from the source
company. For more information, See Copying a Company on page 66.
To create and activate a company
1 Use any of the following methods to open the Company Maintenance window:
In the Administrative Tools screen, click Company Maintenance.
Select Library Master Main menu > Company Maintenance.
2 In the Company Maintenance window, enter a company code and company
name.
3 Enter the fields appropriate for your company.
4 Click Activate to activate one or more modules. Click Yes, when you are
prompted to save the new company.
5 In the Activate Module window, select the module(s) to activate and click
Proceed. This process creates data files for each selected module for the
company.
6 The Company Maintenance window appears again after the activation process
is complete. Verify that the modules you selected appear in the Activated
Modules section of the window.
The demo data company codes are automatically created and activated if they
were selected during the installation process.
Copying a Company
You can create a new company from an existing company. You can copy
information, including company data and company forms, from the source company.
To copy a company
1 Use any of the following methods to open the Company Maintenance window:
In the Administrative Tools window, click Company Maintenance.
Select Library Master Main menu > Company Maintenance.
2 In the Company Maintenance window, enter a company code and company
name.
3 Click Copy.
4 In the Copy Data window, at the Source Company field, enter the company you
are copying from.
5 To copy data and/or forms, select the corresponding check boxes.
NOTE
Although you can
define multiple
company codes,
you must define
at least one
company code
before activating
any modules.
NOTE
For Sage 100
Premium, only
data can be
copied.

Installation and System Administrator’s Guide Page 67
Upgrading and Converting Data
6 Click Proceed.
Upgrading and Converting Data
If you are upgrading data from a previous installation, refer to your Customer
Upgrade Guide for upgrading instructions.
Setting Up Security
Sage 100 offers a flexible security system that can be used to provide appropriate
access to the system and to meet your company's specific requirements. The
security system can be simple, or it can be elaborate, protecting various
combinations of companies, modules, menus, tasks, and security permissions by
creating multiple roles, and assigning these roles to users. Roles are assigned to
users so that users are restricted to only those tasks that pertain to the roles they are
assigned to. If the user attempts to access a secured area, access is denied.
Setting Up Roles and Users for Security
To implement effective security, you must define roles for your system, and then
create user codes and assign users to specific roles.
The security for Sage 100 is role-based. Roles should be set up to reflect the
functional roles of your organization. You should define roles with access to certain
modules, tasks, and security events that allow users to perform tasks related to their
jobs. Roles are company independent, though you can assign roles to users who are
restricted from entering certain companies.
A Default role is included in Sage 100. Users assigned to the Default role have
access to all modules except security events. The Default role cannot be modified in
Role Maintenance.
When establishing your system's security, use the concept of roles to identify the
specific tasks and options you want users to be able to access. Users can be
assigned to multiple roles so design your roles to be as granular as you like. Role
permissions are cumulative, which means if a user is assigned to two roles where
one role gives the user access to a program while another role does not, the user will
be granted access to this program.
You must determine the requirements for your security system. In most cases, it is
better to start with a simple arrangement. As more sophistication is needed, this
flexible system can be easily refined.
Defining Roles
Roles are set up to reflect the functional roles within an organization. These roles are
global to the software and are company independent. Permissions assigned to roles
allow assigned users access to the areas of the software they need to perform their
job functions.
NOTE
To access Role
Maintenance, you
must be logged
on as
Administrator, or
have a role
assigned to you
that allows
access to Role
Maintenance.

Installation and System Administrator’s Guide Page 68
Setting Up Security
For modules other than Job Cost, Material Requirements Planning, Payroll,
TimeCard, and Work Order, security can be further refined by assigning Create,
Modify, Remove, or View permissions to maintenance tasks, or by setting Update or
Print Only permissions to update tasks. For setup tasks, permissions can be set to
Modify or View. Additionally, some module options, such as allowing batches to be
merged can be allowed or restricted.
Defining roles is considered the first step in enabling security for your system. Before
you define roles in your system, determine the functional roles needed for your
organization.
After you have created a role, you can create a copy of it for use as a starting point
when creating additional roles.
To define roles
1 Use any of the following methods to open the Role Maintenance window:
In the Administrative Tools screen, click Role Maintenance.
Select Library Master Main menu > Role Maintenance.
2 In the Role Maintenance window, at the Role field, type the name of the role (for
example, AP Clerk).
3 At the Description field, type a description for the role (for example, Accounts
Payable Clerk).
NOTE
Library Master
tasks are not
company-specific.

Installation and System Administrator’s Guide Page 69
Setting Up Security
4 On the Tasks tab, you can restrict access to modules, tasks, or security
permissions within tasks.
To expand each level, click the + graphic. To select all items in a level, select
the check box next to the option.
To refine the level of security to individual modules and tasks, select the
check box next to the individual modules that you want to allow access to.
You can further allow or restrict the level of access to tasks within a module
by selecting or clearing the check boxes for tasks within modules.
5 On the Security Events tab, select the check boxes next to the module and
security events that you want to assign to the role. For more information, see
Role Maintenance in the Help system.
6 On the Module Options tab, select the check boxes next to the options to which
you are allowing access.
7 On the SData Security tab, select the check boxes next to the module and
business tables that you want to assign to the role.
8 On the ODBC Security tab, select the check boxes next to the module, data
tables, and fields that you want to assign to the role.
9 Click Accept and repeat this procedure for each role you want to define.
To Copy a Role from an Existing Role
1 Use any of the following methods to open the Role Maintenance window:
In the Administrative Tools screen, click Role Maintenance.
Select Library Master Main menu > Role Maintenance.
2 Select the role that you will copy from.
3 Click Copy Role.
4 In the Copy Role window, enter the name and description of the new role to
create.
5 Select the check boxes for copying menu tasks, security events, and module
options permissions, then click Proceed.
6 Make necessary changes on the Tasks, Security Events, Module Options, SData
Security, and ODBC Security tabs.
7 Click Accept.
After defining all roles for the system, you can create users, and then assign these
roles to users. For more information, See Creating Users and Assigning Roles on
page 70.
NOTE
To allow access
to all modules
and all security
permissions, for
the role, select
the Sage 100
check box.
NOTE
The ODBC
feature is not
available in Sage
100 Premium.

Installation and System Administrator’s Guide Page 70
Setting Up Security
Creating Users and Assigning Roles
Defining a user includes setting up a logon and password, assigning access to
specific companies, and assigning a role or multiple roles to the user.
A user account can be defined with an expiration date to lock the user out of the
system after a certain amount of time. You can also define start and end dates for
any role assigned to the user. This feature allows a user access to certain areas of
the system and security events for the limited period of time.
Before you create user logons and passwords, decide whether your system will
require a unified logon or a Sage 100 logon for all users. For more information, See
Requiring a Password on page 72.
To create a user and assign a role
1 Use any of the following methods to open the User Maintenance window:
In the Administrative Tools screen, click User Maintenance.
Select Library Master Main menu > User Maintenance.
2 In the User Maintenance window, enter the User Logon field. If you selected the
Use Unified Logon check box in the System Configuration window, this field
must match the Windows logon name for the user. For more information, See
Requiring a Password on page 72.
3 Enter the First Name, Last Name, and User Code fields. The user code is only
referenced in the software and is not used for logon purposes.
4 If the selected user will be performing group customizations in the Customizer
module, enter the Customization Group field.
5 Enter the Expires field to lock the user account after a certain date. A user will
not be able to access the system after the date entered.
6 If you selected the Require all Users to Enter a Password check box in the
System Configuration window, enter the Password and Confirm Password fields.
If you do not enter a password, when logging on to the software, the user will be
prompted to enter a password. For more information, See Requiring a Password
on page 72.
7 Select the company and role to assign to the user. You can assign multiple
companies and roles to the user.
8 Enter a Start Date and Expiration Date for each role to start and end for the
selected company, if required.
9 Click the Preferences tab and select user-specific preferences for the user and
click Accept. For more information, See Setting Additional User Preferences for
Security on page 71.
NOTE
You can access
User
Maintenance only
if you are logged
on as
Administrator, or
if you have a role
assigned to you
that allows
access to User
Maintenance.
NOTE
If you have
multiple roles
assigned to a
user, the role with
the most access
takes
precedence.

Installation and System Administrator’s Guide Page 71
Setting Up Security
Copying a User
You can create a new user from an existing user. You can copy information including
roles and preferences.
To copy a user
1 Use any of the following methods to open the User Maintenance window:
In the Administrative Tools screen, click User Maintenance.
Select Library Master Main menu > User Maintenance.
2 In the User Maintenance window, enter a new user logon.
3 Click Copy.
4 In the Copy User window, at the Copy From field, enter the user you are copying
from.
5 Select whether you are copying all user information including roles and
preferences, and then click Proceed.
Setting Additional User Preferences for Security
User preferences are preferences that apply to each user. You can set up additional
security measures for individual users such as setting a workstation to automatically
log off, and manually locking certain users out of the system.
For security purposes, a workstation can automatically log off if it is left unattended
for a specified period of time. This feature ensures that workstations are not
accidently left with the software running, allowing unauthorized users access to
sensitive information.
The Automatic Logoff feature is not activated if the Sage 100 Desktop is the active
window on your workstation. In addition, the Sage 100 Desktop does not
automatically shut down any activity in process, such as an update or report, that is
currently processing, or if the Sage 100 Desktop is idle within an option's window,
such as a data entry or inquiry window.
Setting a Workstation to Automatically Log Off
To automatically log off a workstation
1 Use any of the following methods to open the User Maintenance window:
In the Administrative Tools screen, click User Maintenance.
Select Library Master Main menu > User Maintenance.
2 Select a user at the User Logon field.
3 Click the Preferences tab and select the Automatic Logoff check box.
NOTE
You can access
User
Maintenance only
if you are logged
on as
Administrator, or
if you have a role
assigned to you
that allows
access to User
Maintenance.
WARNING
When a user is
working in Sage
CRM through the
Sage 100
Desktop, the
system does not
recognize the
Sage CRM
activity for the
purpose of
determining
whether to
automatically log
off the user.
Therefore, if this
check box is
selected, and
users are working
exclusively in
Sage CRM
accessed through
the Desktop, they
may be logged
out of Sage 100
without warning.
The Desktop will
close, and any
unsaved changes
in Sage CRM
would be lost.

Installation and System Administrator’s Guide Page 72
Setting Up Security
4 At the Automatic Logoff Delay in Minutes field, type the number of minutes that
the system is to remain active before automatically logging off this workstation.
The maximum amount of time that can be specified is 999 minutes.
5 Click Accept. After you save a user record, the dollar signs ($) in the Confirm
Password field disappear.
Locking Users Out
Another security feature is the option to lock users out of the system. This procedure
illustrates how to manually lock users out of the system. Users can also be locked
out of the system if a number of incorrect logon attempts occur, or if the expiration
date for all users' roles has expired. This can be done using the System
Configuration task.
To lock users out of the system
1 Use any of the following methods to open the User Maintenance window:
In the Administrative Tools screen, click User Maintenance.
Select Library Master Main menu > User Maintenance.
2 Select a user at the User Logon field.
3 Select the User Account Locked check box and click Accept.
Setting System Preferences
The software is equipped with a number of features that can effectively keep
unauthorized users from accessing programs and files. In addition to basic security
features, additional measures can be taken to further secure your data. These
additional measures include, requiring a password, enabling intruder detection, and
specifying lockout duration.
Requiring a Password
To further protect your system, you can require all users to have a password. First
decide if you will set up your users with a unified logon, or a Sage 100 logon. A
unified logon allows Sage 100 to authenticate and use the Windows logon. If you
implement a unified logon, users do not need to reenter a logon and password when
accessing the software. You can, however, require that users enter their password
before accessing the software. A Sage 100 logon is independent of the Windows
logon, and will be required to enter the software.
When you set up a Sage 100 logon, you can enable intruder detection. Intruder
detection locks a user out of the system when a certain number of logon attempts
fail. This prevents unauthorized users from trying numerous passwords while
attempting to access your system.

Installation and System Administrator’s Guide Page 73
Setting Up Security
To require a unified logon
1 Use any of the following methods to open the System Configuration window:
In the Administrative Tools screen, click System Configuration.
Select Library Master Main menu > System Configuration.
2 In the System Configuration window, select the Use Unified Logon check box to
enable a unified logon for each user.
3 Click Accept.
To require a Sage 100 password
1 Use any of the following methods to open the System Configuration window:
In the Administrative Tools screen, click System Configuration.
Select Library Master Main menu > System Configuration.
2 In the System Configuration window, select the Require all Users to Enter a
Password check box.
3 To require passwords that are at least eight characters in length, include both
letters and numbers, and do not include repeating characters, select the Require
all User Passwords to be System Defined Strong Passwords check box.
If this check box is
selected after user
codes are set up
without passwords,
when a user accesses
the software, a dialog
box will prompt the
user to define a
password.

Installation and System Administrator’s Guide Page 74
Setting Up Security
4 To include a minimum length on passwords, select the User Defined Passwords
must be of a Minimum Length check box, and type a minimum number of
characters needed for passwords.
5 To require all users to change their password after a number of days, select the
Force Password Change After a Set Number of Days check box, and type a
number of days.
6 To enable intruder detection, select the Lock Out User After a Set Number of
Invalid Logon Attempts check box, and then type the number of attempts you will
allow before a user is locked out of the system (cannot attempt to log on
anymore).
7 To specify an optional lockout duration, select the Unlock User After a Set
Number of Minutes Elapse from the Last Invalid Logon check box, and type the
amount of time you want the lockout to be in effect. After the amount of time has
passed, the user can attempt to access the system.
8 Click Accept.
Setting Accounting Date Preferences
The software maintains personal preferences for each workstation. One of these
preferences is to prompt for the accounting date the first time a user accesses a
module for that day, or you can automatically default the accounting date based on
the system date.
Setting a Prompt for the Accounting Date
If a prompt for the accounting date is not set in Company Maintenance, the module
defaults to the accounting date it was last set at on that workstation, unless the Auto
Set Accounting Date from System Date check box is selected.
To set a prompt for the accounting date
1 Select Library Master Main menu > Company Maintenance.
2 On the Preferences tab, select the Prompt for Accounting Date check box. The
default date is the system date.
3 Click Accept.
Setting the Accounting Date from the System Date
The accounting date for all modules can be set from the workstation's system date
for convenience and to ensure that users do not accidentally use an old accounting
date.
NOTE
If you do not
specify a lockout
duration, a user
locked out by
intruder detection
can attempt to log
back onto the
system only if the
User Account
Locked check
box is cleared in
the User
Maintenance
window.

Installation and System Administrator’s Guide Page 75
Setting Up Security for Sage CRM
To set the accounting date from the system date
1 Select Library Master Main menu > Company Maintenance.
2 On the Preferences tab, select the Auto Set Accounting Date from System Date
check box.
3 Click Accept.
Restricting the Accounting Date to Current and One Future Period
When performing certain data entry and register printing functions, the accounting
date is used as the default. When the posting date used for updates does not fall
within the current and one future period for the module, the summarized totals for the
current or future period will not match the transaction detail reports.
To prevent this problem, you can restrict the accounting date to the current and one
future period for the Accounts Payable, Accounts Receivable, Inventory
Management, Job Cost, Purchase Order, and Sales Order modules.
To restrict the accounting date
1 Select Library Master Main menu > Company Maintenance.
2 On the Preferences tab, select the Restrict Accounting Date to Current and One
Future Period check box.
3 Click Accept.
Changing Your Administrator Password
Changing your administrator password on a frequent basis is a good idea to protect
your system from unauthorized users.
To change your administrator password
1 In the Administrative Tools screen, click Administrator Password.
2 In the Administrator Security Password window, enter a new password and then
confirm the password. Click OK.
Setting Up Security for Sage CRM
This section describes basic security concepts for Sage CRM, including how to log
on after installing, passwords, and the types of security that can be set up. For more
information about Sage CRM security, refer to your Sage CRM System Administrator
Guide.

Installation and System Administrator’s Guide Page 76
Setting Up Security for Sage CRM
Logging On as the Administrator
After installing Sage CRM, you can log on as the system administrator with a user
name of admin and no password. You should also change the password to prevent
unauthorized administrative access.
User Authentication / Password Setup
A user requires a user name logon ID to access the system. You can also set the
minimum length and strength of passwords. A user's password is encrypted both
within the system and in the database for maximum security. The System
Administrator can change, but not view, a user's existing password.
A password can also be set to expire within a specified number of days. When the
password is changed, the expiration date is adjusted accordingly.
Security Profiles and Territories
The system administrator can manage security access rights across the
organization by setting up security profiles and territories. A profile is a way of
grouping users together when defining access rights (for example, View, Update,
Insert, and Delete).
In addition to basic access rights profiles, you can further divide users rights by
territory. For example, you may want users in the West Coast territory to view all
Opportunities within the East Coast territory, but not to be able to update them.
Field Security
The system administrator can set up field security for the entire Sage CRM system,
for individuals, teams, and for security profiles.
For example, it is possible to make a field invisible to some users, allow others to
view the contents of the field but not to change it, and allow others to both view and
change it. In addition, it is possible to require a field entry before the user can submit
the form. For more information on field security, refer to your Sage CRM System
Administrator Guide.

Installation and System Administrator’s Guide Page 77
Setting Up Security for Sage CRM
Company Team Restrictions
Rights to view the following tabs can be restricted to individual users depending on
company team membership. If a user has not been assigned to work on an account
on the Company Team tab, that user cannot view or update information in the
following tabs:
Quick Look
Dashboard
Marketing (if available)
Notes
Communications
Opportunities
Cases
Company Team
Documents
The tabs are displayed with “no entry” symbols. If the user selects one of the
restricted tabs, a message is displayed informing the user that this information is
available only to members of the appropriate team.
If the user searches for a related entity, such as an Opportunity, and they are not on
the Company Team of the associated company, when they click the hyperlink of the
entity in the list, a security message dialog box is displayed.
Restricting Updates
The Delete and Edit buttons are available on the Company summary page only if the
user is on the Company team.
In addition, rights to update the following tabs can be restricted for individual users
depending on Company Team membership. This means that if you have not been
assigned to work on an account using the Company Team tab, you can view, but not
update any of the following information related to that account:
Quick Look
Notes
Communications
Leads
Opportunities
Cases
Documents
Server Security
There are many ways to secure the system from unauthorized access:
Use NT Challenge/Response to allow access to clients with a valid domain login.
Use SSL Encryption to secure your data sessions with client users.
Use a firewall to restrict unauthorized access from outside of your network and
allow only authorized users through.

Installation and System Administrator’s Guide Page 78
Setting Up Security for Sage CRM
You can use all three or a combination of the above methods to secure connections
to the system.
Database Security
Users do not have direct access to the SQL database for the Sage CRM server. The
eWare DLL accesses the database by using a predefined logon. When a user
requests data, the eWare DLL connects to the database using Microsoft Data
Access Components (MDAC) and retrieves the required data.
For more security the eWare DLL can be configured to access SQL using a login
with limited access, or access with the appropriate rights to add, change and delete
data from every table in the database.
For information on changing the SQL logon password, refer to your Sage CRM
System Administrator Guide.
Firewalls
To allow users to access the system remotely, the best way to protect your network
from the Internet is to install a firewall. This will ensure that only authorized traffic
accesses your Sage CRM database and protects your server from unauthorized
users. You can configure rules to allow only certain traffic through. By doing this you
can ensure that your server is protected from Internet attacks. You can also install a
firewall in all of your remote sites and set up Virtual Private Networks (VPNs) to
increase the security of data being sent. Mobile users can be set up as mobile
firewall users so they can access the VPN to transmit and receive data securely.
SSL (Secure Sockets Layer)
Without using a firewall, IIS can use different methods to secure transmitted and
received data. One of these methods is by using an SSL server certificate. This
ensures that data that has been transmitted and received between the server and
the user is encrypted. There are two versions of SSL encryption: 40-bit and 128-bit.
It is currently possible to crack the 40-bit encryption, but not 128-bit. SSL cannot
protect your server from unauthorized access, only encrypt sessions between the
server and a user.
An SSL certificate can be imported into IIS to create a secure connection between
Sage CRM and its users. When a client logs onto Sage CRM, the SSL certificate is
downloaded and the data sent to and from the client is encrypted. Using this method,
anybody can log on and download the SSL certificate. To be more secure, IIS can be
configured to only allow clients with a SSL certificate installed on their machine and
deny anybody without the appropriate certificate. IIS can also use Windows NT
Challenge/Response, which requests a user to log on using a valid user name and
password for that domain before allowing them access to data.

Installation and System Administrator’s Guide Page 79
Setting Up Security for Sage CRM
Application Security
All users must be assigned a valid user name and password by the system
administrator. Each user can be assigned different levels of access security
depending on their job role (for example, IT, Accounts). To increase security, all
users should be advised to use an alphanumeric password of no fewer than six
characters. When IIS uses SSL encryption, Sage CRM is aware of this and when the
client attaches any documents to a form in Sage CRM, it sends it through the
encrypted session.

Installation and System Administrator’s Guide Page 80
Chapter
13
System Administrator Tasks
Chapter 13
This chapter provides procedures for maintaining certain tasks that are performed by
a system administrator.
Determining Who is Accessing the System/Modules
Use Master Console to display all currently logged on users. The Master Console
includes data on each workstation, the module and task being accessed, and the
accounting date for each user.
To determine who is accessing the system/modules
1 Use either of the following methods to open the Master Console window:
Select Library Master Main menu > Master Console.
Select File menu > Master Console.
On the Standard toolbar, click the Master Console button.
2 In the Master Console window, determine the module and task being accessed
by viewing the Module column and the Program column.

Installation and System Administrator’s Guide Page 81
Modifying Company Preferences
Modifying Company Preferences
For each company, you can set a preference to print a user logon on all reports,
allow the company to be accessed externally, and change the location of the
company data and Payroll folder.
To modify company preferences
1 Use any of the following methods to open the Company Maintenance window:
In the Administrative Tools screen, click Company Maintenance.
Select Library Master Main menu > Company Maintenance.
2 In the Company Maintenance window, click the Preferences tab.
3 To display the user logon of the user generating a report or listing on all reports,
select the Print User Logon on Reports check box.
4 To default to the workstation's default printer when printing reports (such as the
General Ledger Detail Report) with the STANDARD report setting, select the
Use Workstation Default Printer for STANDARD Report Setting check box. Clear
this check box to save a specific printer as the default for the STANDARD report
setting in the report windows.
5 To default to the workstation's default printer when printing forms (such as sales
orders) with the STANDARD form code, select the Use Workstation Default
Printer for STANDARD Form Code check box. Clear this check box to save a
specific printer as the default for the STANDARD form code in the form windows.
6 To change the location of the company data and Payroll folder for security
reasons, click Change Data Location, and type the path of the new location. The
data location is company-specific and not module-specific. The path must be
appended with MAS_XXX, where XXX represents the company code.
7 Click Accept.
Uninstalling Modules
You can remove all menu records and programs from the software for a specific
module. Prior to removing modules, this utility will check to ensure there are no data
files for that module. If data files exist, they can be deleted using the Remove feature
in Company Maintenance.
The Custom Office module cannot be removed using Uninstall Modules. Removing
this module will impact access to customized forms and user-defined fields (UDFs).
Removing the Visual Integrator (VI) module will remove the module from the
Modules menu; however, the VI folder and two associated files, VI0PER and
VI0XRF, will remain in the file structure. The VI0XRF file contains the definitions for
the default VI perform logic and is a cross-referenced file that provides shared UDF
access between Visual Integrator and Custom Office.

Installation and System Administrator’s Guide Page 82
Uninstalling Modules
To uninstall a module
1 Use either of the following methods to open the System Configuration window:
In the Administrative Tools screen, click System Configuration.
Select Library Master Setup menu > System Configuration.
2 In the System Configuration window, click Uninstall.
3 In the Uninstall Modules window, select the module to uninstall and click Delete.

Installation and System Administrator’s Guide Page 83
Chapter
14
Advanced Features and
Troubleshooting
Chapter 14
This chapter explains some of the advanced features of Sage 100 Advanced and
Premium, including Remote Access using Windows Routing and Remote Access
Service (RRAS), push-down installation through Microsoft's Systems Management
Server (SMS), and some basic troubleshooting techniques. Detailed technical
information required by some IT professionals is also provided; some of the content
in this chapter may not be applicable to every Sage 100 user.
Remote Access
Sage 100 Advanced and Premium are ideally suited for remote access and
wide-area networks (WANs) by virtue of the product architecture. Communication
across the remote connection is limited to data displayed on the window and user
interface commands from the server. The local workstation handles the actual user
interface and leaves the processing to the server.
Routing and Remote Access Service (RRAS)
Performance through RRAS is slower than the performance of a computer attached
directly to the network because the transfer rate is limited by the Internet connection
speed. The minimum workstation requirements are the same for a remote
workstation as they are for a local workstation. For a complete list of system
requirements, refer to the Supported Platform Matrix. To access the matrix, see
article ID 47649 in the Sage Knowledgebase at support.na.sage.com.
The server must be configured with RRAS provided by Microsoft on the appropriate
Windows Server DVD. For more information on installing and configuring RRAS on
your server system, consult a Microsoft Windows Server engineer or consultant.
After RRAS is configured, remote users should be able to dial into the network and
log on. Before attempting to start Sage 100, perform the following tasks:
Verify that you can access Windows Explorer and see all appropriate network
resources.
Verify that firewalls between the remote workstation and the Sage 100 server are
configured to allow traffic between the server and workstation using the specified
TCP/IP port.
Verify that the IP addresses are unique.
Verify that you can ping to the server on which Sage 100 is installed.
If these tasks are successful, Sage 100 will start. Run the workstation installation
wizard from the server. The installation may take several minutes, depending on the
speed of the network and the modem connecting the workstation to the server.
This chapter applies to:
Sage 100 Advanced
Sage 100 Premium
NOTE
You should limit
the initial number
of records
displayed in a
lookup by setting
the Lookup Limit
for Initial Display
field in Library
Master User
Maintenance.

Installation and System Administrator’s Guide Page 84
Remote Access
Sage 100 does not require a logical drive connection; however, if you intend to use
SAP Crystal Reports or other third-party software that accesses Sage 100 data files,
these programs will require a drive mapping. When accessing a system remotely, if
possible, install the applications on the local hard drive rather than accessing them
from the server. This minimizes the amount of data transferred across the phone line
and significantly improves performance.
Wide Area Networks (WAN)
Sage 100 runs on any TCP/IP-based WAN and has been tested using ISDN, Frame
Relays, and T1 connections. The configuration and setup of Sage 100 on a WAN are
the same as those for remote access, and the same tests should be performed to
make sure the remote workstation can access all network resources (including the
ability to ping to the Sage 100 server). Individual requirements vary from site to site,
based on the amount of data being transferred and the number of users on the
system. Sage cannot support the various hardware configurations possible in
TCP/IP WANs. To set up and configure TCP/IP WANs using Windows servers
(including routers, gateways, and DNS servers), consult with a Windows server
WAN specialist or a Sage business partner qualified to support WAN configurations.
Performance Over RRAS/WAN
When running Sage 100 over a WAN or RRAS, you will experience slower system
performance, specifically with screen displays. Slower system performance is
caused by actions that travel from the remote workstation through the phone lines or
dedicated cabling to the server, which processes the request and sends the
response back to the remote workstation. Clicking action controls (such as buttons)
may require you to click the control more than once before the action begins. To
make sure the command executes, hold the mouse button down until you see the
button change to its depressed mode. When you release the mouse button, control
returns to its normal mode. Additionally, do not click controls before the screen loads
completely.
The Low Speed Connection check box on the User Maintenance Preferences tab
will turn off the screen display while the panel is loading. Otherwise, if you click
controls before they are loaded completely, you may receive some error conditions if
certain controls are not loaded or are not properly initialized. Similar conditions may
also be experienced when running through Windows with Terminal Services,
especially if you are dialing in to the Windows server.
Virtual Private Network (VPN)
If you are implementing VPN, you should consider that software-based solutions,
such as VPN bundled with Windows Server on low speed connections, may slow
performance, because of the security overhead.
NOTE
Verify that routers
and other
network services
do not re-map IP
addresses for the
server or
workstation when
packets are
transferred
through the WAN.
NOTE
Selecting the Low
Speed
Connection
check box is
recommended in
environments
with low
bandwidth.

Installation and System Administrator’s Guide Page 85
Pinging to a Server or Workstation
Pinging to a Server or Workstation
If you are having problems pinging to a server or workstation, for each LAN
workstation, use the built-in TELNET utility to ping the specific socket and port the
Application Server is listening on. For remote workstations, you can use ping and
TELNET if the server’s router or firewall does not block Internet Control Message
Protocol (ICMP) commands. If the router or firewall does block ICMP commands,
use a port scanning utility instead.
Configuring the Workstation for the ODBC Driver
Service
When configuring a Sage 100 Advanced workstation to use the client/server ODBC
driver, if a failure occurs when testing the connection from the workstation to the
client/server ODBC service, use the built-in TELNET utility or a port scanning utility
to verify the workstation can connect to the server on port 20222.
Hanging Processes
On occasion, a process may become orphaned from the workstation if the
connection between the workstation and server fails. This is more prevalent in low
bandwidth remote WAN connections where reliability and stability cannot be
guaranteed.
Detecting Existing Processes
When the Sage 100 Desktop is started, Sage 100 checks to see whether any
processes exist for that computer. If there are orphaned processes or if a Sage 100
Desktop is already in use by this workstation, a message appears informing you that
another Desktop has already been started for the computer.
Users in a LAN environment should not encounter these errors unless an error
previously occurred, causing the workstation to lose its connection with the server, or
if another Sage 100 Desktop is in use for this workstation. There is also the
possibility that another computer on the network has the same name as the machine
attempting to connect to the server.
Ending Processes
If the message dialog box stating that a Sage 100 Desktop is already in use appears
when there is no Desktop in use, use Windows Task Manager to end any orphaned
processes.
Use this option only when you are certain that the tasks left on the server are, in fact,
orphaned and not processing any information. Tasks that are interrupted in the
middle of an update can continue to update, even though the connection has been
severed. If an update process has started and the connection is lost, let the task
complete and end rather than “kill” the task using the option mentioned on page 86.
Unless a remote connection is extremely stable (such as a dedicated ISDN line), do
not run update or register programs from a remote workstation. This reduces the
chances of data corruption and allows the files to be updated and closed correctly.
WARNING
Use the Windows
Task Manager to
end processes
only when the
tasks for this
machine are
known to be
“dead.” Killing
“live” tasks in this
manner may
cause data
corruption or loss.

Installation and System Administrator’s Guide Page 86
Increasing Default Limits Set by Windows Server
To end an orphaned process
1 Press CTRL+ALT+DELETE to access the Windows Task Manager.
2 In the Windows Task Manager window, click the Processes tab.
3 Select each instance of Pvxwin32.exe, and click End Process.
Increasing Default Limits Set by Windows Server
Windows servers may limit the number of Sage 100 processes that can run
simultaneously, especially when the Application Server has been configured to run
as a service. This can create an issue when a significant number of users are using
Sage 100 at the same time. Blank, white screens may appear when any user tries to
start a new task. If a user closes down an existing screen and then tries to open the
original task, it then opens successfully. For more information on this issue, use the
Knowledgebase on the Sage Customer Portal at
https://customers.sagenorthamerica.com to search for the following text: Cannot
create a new session with a large number of users.

Installation and System Administrator’s Guide Page 87
Appendix
A
Sage 100 Security Permissions
Appendix A
The information in this appendix provides the minimum Share and NT File System
(NTFS) permission settings for servers and workstations to work properly with
Sage 100. This appendix also provides procedures for setting permissions.
Setting NTFS and Share Permissions
There are two methods mentioned in this appendix for applying permission settings
in an operating system: the Share (share point) method and the NTFS method. The
following procedures describe how to set permissions using each method.
To set permissions using the Share method
1 In Windows Explorer, right-click the share point folder and select Properties.
The Properties window appears.
2 Click the Sharing tab, and then select Share this folder.
3 Click Permissions. The Permissions window appears.
4 In the Group or user names section, select the group or user.
5 In the Permissions section, select the applicable permission (Full Control,
Change, or Read).
To set permissions using the NTFS method
1 In Windows Explorer, right-click the folder and select Properties. The Properties
window appears.
2 Click the Security tab.
3 In the Group or user names section, select the group or user.
4 In the Permissions section, select the applicable permission (Full Control,
Change, or Read).
Sage 100 Server Minimum Permission Settings
The following information provides minimum permission settings for the local user
account running on the Sage 100 server and for any network user account
accessing the server from another computer.

Installation and System Administrator’s Guide Page 88
Sage 100 Server Minimum Permission Settings
Permissions for the Local User Running the Sage 100
Server
The following table provides the minimum permission settings for the local user
account running the Sage 100 application either as a service or an application. The
user account must be a member of the Administrators group (or equivalent). Do not
use the system account to run the Sage 100 server application.
Set the share point and NTFS permissions in the table below for the local user
account running on the server to perform the functions and tasks indicated.
When updating user-defined fields (UDFs), if alternate directories exist, the account
running on the Sage 100 server must have Change permissions set to all share
point folders where company data exists to be able to update records.
Task Minimum
Share
Permission
Minimum
NTFS
Permission
Folder
Application Utilities Change Full Control ..\MAS90
Business Insights
Explorer
Change Full Control ..\MAS90
Business Insights
Reporter
Change Full Control ..\MAS90
Change Data Location Change Full Control
(for the
destination
location)
..\MAS90
Custom Office Change Full Control ..\MAS90
Office Template Manager Change Full Control ..\MAS90
Modifying Forms and
Reports from within
Modules
Change Full Control ..\MAS90
Library Master Utilities Change
(for the
Sage 100
share point)
Full Control ..\MAS90
Printing Tasks Change Full Control ..\MAS90
Report Manager Change Full Control ..\MAS90
Update Tasks Change Full Control ..\MAS90

Installation and System Administrator’s Guide Page 89
Sage 100 Server Minimum Permission Settings
Permissions for Other Users accessing the Sage 100 Server
The following information provides the minimum permission settings for user
accounts performing Sage 100 tasks on the Sage 100 server from another
computer.
Task Minimum
Share
Setting
Minimum
NTFS
Setting
File or Folder
ACH Electronic
Payments
Folder
Change Write ..\MASxxx\APxxx
where xxx represents the
company code
(Default folder can be
changed in Accounts
Payable Options)
Application
Utilities
No
Permissions
Required
No
Permissions
Required
Business
Insights
Explorer
Change Write ..\MAS90\BIExplorer\views
Business
Insights
Reporter
Change Write Files:
..\MAS90\Providex.DDF
..\MAS90\PVXVIEW
..\MAS90\PVXVIEW.GPD
..\MAS90\PVXVIEW.ITM
..\MAS90\PVXVIEW.SRC
..\MAS90\PVXVIEW.VUE
Folders:
..\MAS90\HOME\LIB
..\MAS90\MAS_SYSTEM
..\MAS90\Reports\BIReporter
Change Data
Location
No
Permissions
Required
No
Permissions
Required
Custom Office No
Permissions
Required
No
Permissions
Required
Office Template
Manager
Change No
Permissions
Required
..\MAS90\OfficeTemplates

Installation and System Administrator’s Guide Page 90
Sage 100 Server Minimum Permission Settings
Task Minimum
Share
Setting
Minimum
NTFS
Setting
File or Folder
Modifying
Forms and
Reports from
within Modules
Change Write
..\MAS90\MAS_XXX\Reports
. . \ M A S 9 0 \ R e p o r t s \ # # # - # # #
..\MAS90\###-XXX
..\MAS90\MAS_System\Reports
(where XXX is the company
code)
Federal and
State eFiling
and Reporting
Change Write ..\MAS90\MAS_XXX
\APXXX\eFilingReporting
..\MAS90\MAS_XXX
\PRXXX\eFilingReporting
(where XXX is the company
code)
Library Master
Utilities
No
Permissions
Required
No
Permissions
Required
Paperless Office
PDF Folder
Change Write Defined in Paperless Office
maintenance tasks
Payroll Direct
Deposit (ACH)
File Folder
Change Write ..\MASxxx\PRxxx
where xxx represents the
company code
(Default folder can be
changed in Payroll Options)
Printing Tasks None/
Read/
Change/
Full
No
Permissions
Required
Report Manager
(for modifying
forms)
Change Write
..\MAS90\MAS_XXX\Reports
. . \ M A S 9 0 \ R e p o r t s \ # # # - # # #
..\MAS90\###-XXX
..\MAS90\MAS_System\Reports
Update Tasks No
Permissions
Required
No
Permissions
Required
NOTE
For printing
tasks, a Read,
Change, or Full
permission is
required to print
to local and
network printers.
If no share
permission is
defined, printing
is restricted to
deferred reports.
Access to the
Deferred Printing
task is based on
security settings
in Role
Maintenance.

Installation and System Administrator’s Guide Page 91
Sage 100 Workstation Permission Settings
Sage 100 Workstation Permission Settings
The following information provides minimum permission settings that must be set for
Sage 100 workstations.
Installation Security for Workstations
Administrator rights must be set at the local workstation to install the workstation
software and to run the Migrate Level 3 Data wizard and the Parallel Migration
Wizard.
Report Security for Sage 100 Advanced Workstations
For Sage 100 Advanced, reports are cached in the following client workstation
hidden folder:
C:\ProgramData\Sage Software\Cache\MAS 200\Reports
The permission setting for this folder is set by the operating system, and should not
be changed.
NTFS Permissions for Sage 100 Advanced and Premium
Workstations
The following NTFS permission settings must be set at the Sage 100 Advanced and
Premium workstations
.
Minimum NTFS Setting Folder
Modify ..\Mas90\Launcher
Write ..\Mas90\Home
Write ..\Mas90\Soa

Installation and System Administrator’s Guide Page 92
Appendix B
TCP/IP Protocol
Appendix B
Sage 100 uses the TCP/IP protocol for all communications between the workstation
and server. TCP/IP must be properly configured on both the Windows server and all
workstations.
Although this section discusses configuration settings and options available in
configuring a TCP/IP network, it is not a guide for installing TCP/IP on your server or
workstation. Contact your Windows systems consultant for specific information
regarding the installation and configuration of TCP/IP on your network.
Basic Configuration
There are no specific requirements for your Sage 100 system with regard to the
configuration of TCP/IP. To determine if a workstation is communicating with a server
or vice versa, ping the server or workstation.
To ping a server or workstation
1 Select Windows Start menu > All Programs > Accessories > Command Prompt.
2 In the Command Prompt window, type
PING MACHINE_NAME, where
MACHINE_NAME is the name of the server or workstation with which you are
attempting to communicate.
3 If you are successful in communicating with another machine, a response similar
to the output below will appear.
C:\WINDOWS>PING SERVER
Pinging SERVER [128.0.153.253] with 32 bytes of data:
Reply from 128.0.153.253: bytes=32 time=1ms TTL=32
Reply from 128.0.153.253: bytes=32 time=1ms TTL=32
Reply from 128.0.153.253: bytes=32 time=1ms TTL=32
Reply from 128.0.153.253: bytes=32 time=1ms TTL=32
C:\WINDOWS>
If you do not get a response and receive messages such as “unknown host
MACHINE_NAME” or “timed_out,” then the computer with which you are attempting
to communicate is not receiving or acknowledging information from the workstation.
This indicates that either TCP/IP is not configured correctly on the server or
workstation, or the server is unreachable.
If the workstation cannot find a server by its name, it is likely that a name resolution
mechanism is not in place. If this is the case, go to the server to find its IP address or
contact your system administrator. You will receive a Bad IP address message
dialog box if your name resolution is not working.
WARNING
Do not make
changes to the
TCP/IP
configuration
without consulting
your system
administrator.
WARNING
If an Internet
connection is
used in your
Sage 100
infrastructure,
make sure
adequate
precautions are
taken to secure
the data traveling
through those
connections.

Installation and System Administrator’s Guide Page 93
Testing the Configuration for Sage 100 Advanced and Premium
If you receive an error message when running the Ping program, it is possible that
the workstation itself is not configured properly for TCP/IP. Contact your system
administrator or a Windows system consultant for assistance in configuring TCP/IP.
Testing the Configuration for Sage 100 Advanced
and Premium
After installing Sage 100 Advanced or Premium, test the TCP/IP configuration.
To test the configuration
1 At the server, use the built-in NETSTAT utility or equivalent software to verify
that the Application Server is running on its configured port. The default port is
10000.
2 From each workstation, ping the Application Server on its configured port. The
TCP/IP built-in ping.exe utility does not provide a way for pinging a specific port.
The network administrator should use port scanning software or equivalent to
ping the specific port the Application Server is listening on.
NOTE
If you encounter
problems pinging
to the server or
workstation, see
Pinging to a
Server or
Workstation on
page 85.

Installation and System Administrator’s Guide Page 94
Appendix C
Running in a Remote
Desktop Services or Citrix
Environment
Appendix C
The Sage 100 server supports running through a Windows Server with Remote
Desktop Services (RDS) enabled. (Remote Desktop Services was called Terminal
Services in earlier versions of Windows Server.)
The Sage 100 server application should be installed on a server within the LAN that
is not running RDS/Citrix. Remote users connect up to a Windows server running
RDS. From there, they run the workstation component and connect to the Sage 100
server. This limits the amount of processing and resources required by the Terminal
Server computer. Separating out the workstation and server components allows
users coming through Remote Desktop Services to take advantage of the
client-server architecture of Sage 100.
Installing the Sage 100 Server
Install Sage 100 as you would any other installation. This server should not have
RDS running on it. Because the Sage 100 server is doing all the processing for each
of the clients attaching to the server, having the additional burden of running RDS
will significantly slow down the server. The Sage 100 Server can be a Windows
server that meets the minimum system requirements for Sage 100.
Users can connect to the Sage 100 server from anywhere on the network; they do
not have to come in through the Terminal Server. This flexibility allows some users
who are running through a corporate intranet to connect directly to Sage 100 while
remote users can run Sage 100 through the Terminal Server.
Installing on the Workstation
From a RDS/Citrix session, run the workstation installation wizard logged on as an
administrator. Do not run the workstation installation wizard directly at the RDS/Citrix
Server.
Run the Sage 100 installation program from the Terminal Server. You can also run
Workstation Setup from the Sage 100 server’s share point by browsing to the
MAS90\Wksetup folder and double-clicking the WkSetup.exe file.
Because multiple users will use the Sage 100 client, a multi-user activation key is
required. To obtain this key, you must first activate the server before running
Workstation Setup. This causes a multi-user activation key to be copied to the
Sage 100 client folder on the Terminal Server.
To install the workstation, see Workstation Setup on page 18 for
Sage 100 Advanced or page 29 for Sage 100 Premium.
This chapter applies to:
Sage 100 Advanced
Sage 100 Premium

Installation and System Administrator’s Guide Page 95
Remote Desktop Services Considerations
Remote Desktop Services Considerations
Sage 100 will retrieve the workstation name of the client that is coming into the
Terminal Server environment and will use that workstation's name for tracking
sessions. This allows for a single installation of the workstation that all users can
access; however, verify that all user's machines that are coming in through the
Terminal Server have unique workstation names.
Because multiple users will use the Sage 100 client, a multi-user activation key is
required. To obtain this key, you must first activate the server. After the server is
activated, running the workstation installation wizard through a Terminal Server
desktop session (not directly at the server) will copy the ACTIVATE.PVX file in the
Sage 100 server's MAS90\Home\Lib\Keys folder to the MAS90\Home\Lib\Keys
folder of the Sage 100 client on the Terminal Server. If a message appears indicating
that the copy was not successful, you must manually copy the file.
To use Sage 100 under Remote Desktop Services, users must be granted
permissions to the MAS90 folder where the client-side application software is
installed, if it is installed on an NT File System (NTFS). For information on NTFS
permissions requirements, see NTFS Permissions for Sage 100 Advanced and
Premium Workstations on page 91.
For a complete list of system requirements, refer to the Supported Platform Matrix.
To access the matrix, see article ID 47649 in the Sage Knowledgebase at
support.na.sage.com.
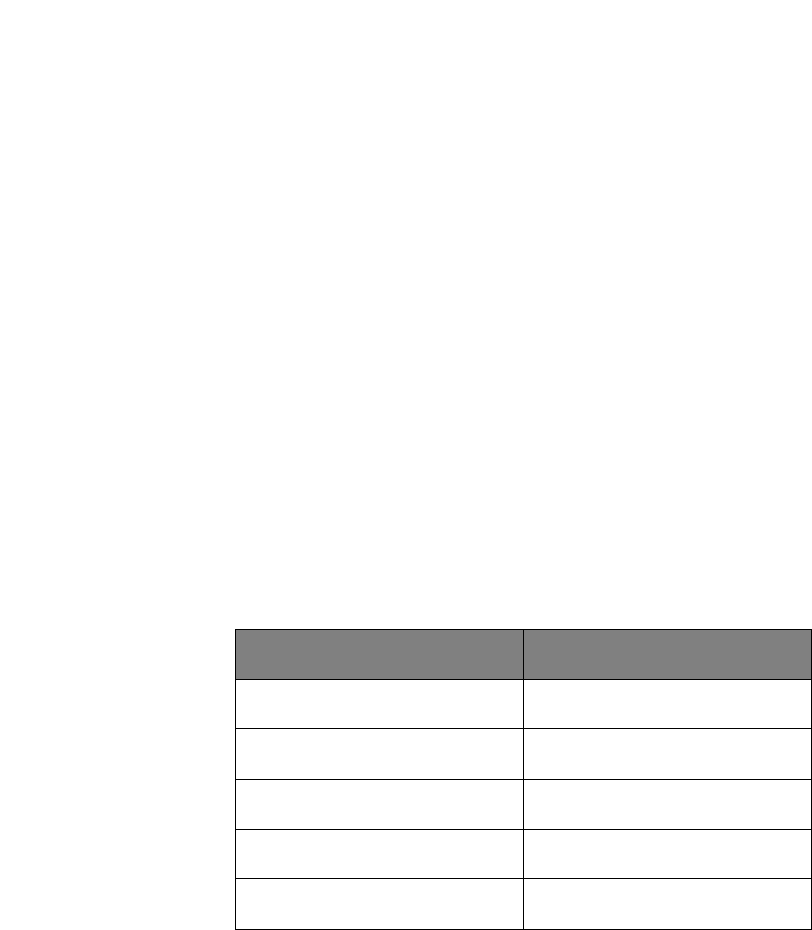
Installation and System Administrator’s Guide Page 96
Appendix D
Running Sage Intelligence Reporting
outside of Sage 100
Appendix D
Sage Intelligence Reporting is accessible from the Sage 100 Modules Menu toolbar
and Tasks tab; however, you can also run the program outside of Sage 100. To do
this, create shortcuts for the different Sage Intelligence Reporting menu items.
To create Sage Intelligence Reporting desktop shortcuts
1 Right-click the Windows Desktop.
2 Point to New and select Shortcut to open the Create Shortcut window.
3 For the item location, enter the path to the BISignOn.exe file followed by the
parameter for the specific Sage Intelligence Reporting menu item.
The table below lists the parameters that you must append to the item location
to create each shortcut.
The BISignOn.exe file is located in the Intelligence folder within the Sage 100
installation folder.
If you installed Sage Intelligence Reporting using the Sage 100 Standard
Workstation Setup program, the location will always be:
C:\Program Files(x86)\Sage\Intelligence\BISignOn.exe
Otherwise, the location will vary depending on where you installed Sage 100,
and the BISignOn.exe file will always be located in the
..\MAS90\Home\Intelligence folder.
Menu Item Shortcut Name
Report Manager RMNG
Report Viewer VWR
Connector ADMIN
License Manager LICMAN
Security Manager SEC

Installation and System Administrator’s Guide Page 97
You can click the Browse button to locate the file, and then type the parameter.
4 Click Next.
5 Type the name of the menu item, and then click Finish.
After creating the shortcuts, change the icons so that they match the ones used in
the product.
To change the icon for a shortcut
1 Right-click the shortcut and select Properties.
2 Click the Shortcut tab.
3 Click Change Icon.
4 Click Browse, and browse to the ..\Intelligence\BIRES\Icons folder.
5 Select the appropriate icon for the menu item using the table below.
Menu Item Icon Name
Report Manager ReportManager.ico
Report Viewer ReportViewer.ico
Connector Administrator
License Manager LicenseManager.ico
Security Manager SecurityManager.ico
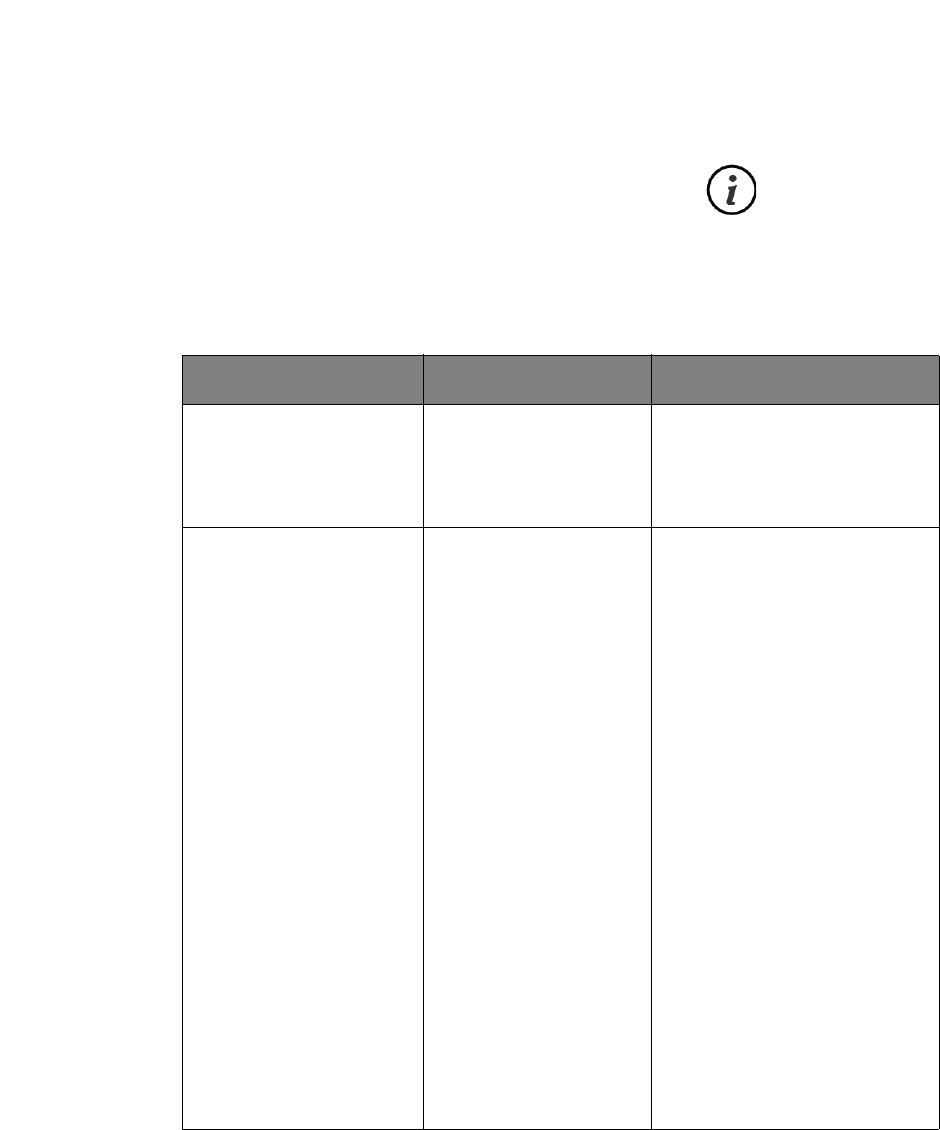
Installation and System Administrator’s Guide Page 98
Appendix E
Sage Configured Installation
for SQL Server
Appendix E
The Microsoft SQL Server Runtime Edition installation program purchased through
Sage has a Sage Configured Option for installing SQL Server. If you select this
option, parameter settings are defined as shown in the following table.
Parameter Setting Description
ACTION INSTALL Specifies a setup work
flow, such as Install,
Uninstall, or Upgrade. This
is a required parameter.
FEATURES SQL, IS, TOOLS Specifies which features to
install, uninstall, or
upgrade. The list of
top-level features includes
SQL, AS, RS, IS, and
Tools. The SQL feature
installs the database
engine, replication, and
full-text. The IS feature
installs Integration
Services, which includes
the SQL Server Import and
Export Wizard, Log
Providers and Logging,
XML Source, SSIS
Run-Time, Basic Data
Profiling Tools, and SSIS
Package Designer and
Service. The Tools feature
installs Management Tools,
Books Online, Business
Intelligence Development
Studio, and other shared
components.
This chapter applies to:
Sage 100 Premium

Installation and System Administrator’s Guide Page 99
Parameter Setting Description
INSTANCENAME MSSQLSERVER Specifies a default or
named instance.
MSSQLSERVER is the
default instance for
non-Express editions, and
SQL Express is the default
for Express editions. This
parameter is required
when installing the SQL
Server Database Engine
(SQL), Analysis Services
(AS), or Reporting
Services (RS).
SECURITYMODE SQL SQL is used for
mixed-mode
authentication.
SQLSVCACCOUNT SYSTEM Specifies the account for
the SQL Server service:
domain\user or system
account.
ISSVCAccount SYSTEM Can be either domain user
name or a system account.
SQLSYSADMINACC
OUNTS
ADMINISTRATOR Specifies which Windows
account(s) to provision as
SQL Server system
administrators.
AGTSVCACCOUNT SYSTEM Can be either domain user
name or a system account.

Installation and System Administrator’s Guide Page 100
Appendix F
Default Database
Properties
Appendix F
Certain properties are set by default for the company and MAS_SYSTEM SQL
Server databases. Changing the default settings may cause the product to operate
incorrectly. The following is a list of properties and their default settings that should
not be changed.
Property Default Setting
General
Collation SQL_Latin1_General_CP1_CI_AS
Options
ANSI NULL Default False
ANSI NULLS Enabled False
ANSI Padding Enabled False
ANSI Warnings Enabled False
Concatenate Null Yields Null False
Parameterization Forced
Database Read-Only False
This chapter applies to:
Sage 100 Premium

Installation and System Administrator’s Guide Page 101
Index
A
accounting date
restricting to current and one future period
75
setting from system date
74
setting prompt for
74
activating a company
65
administrative tasks, performing
65
Application Server
configuring
47, 48, 52
overview
47
turning off
48, 55
C
client workstation
installing for Sage 100 Standard
8
reinstalling
45
company
activating
65
coping
66
creating
65
modifying preferences
81
converting
data
67
SAP Crystal Reports from a prior version
57
copy a company
66
creating
companies
65
user code
70
Credit Card Processing, setting up
63
D
data
converting
67
migrating
67
date
prompt for
74
restricting accounting date
75
setting accounting date from system
74
defining System Security
67
E
enabling intruder detection 74
G
graphic conventions 1
H
hanging process
ending processes
85
overview
85
how to use this manual
1
I
installation requirements
Sage 100 Advanced
13
Sage 100 Premium
23
Sage 100 Standard
4
installation, overview
2
installing
client workstation for Sage 100 Advanced
18
client workstation for Sage 100 Premium
30
client workstation for Sage 100 Standard
8
Microsoft SQL Server Runtime Edition
24
Sage 100 Advanced
15
Sage 100 Premium
26
Sage 100 Standard
5
Sage CRM
35
SAP Crystal Reports Designer
56
intruder detection, enabling
74
L
lockout duration, specifying 74
M
migrating, data 67
modifying company preferences
81
modules, uninstalling
81
P
password, requiring 72
Payroll
for Sage 100 Advanced
20
for Sage 100 Premium
32
for Sage 100 Standard
9

Installation and System Administrator’s Guide Page 102
Index
ping
command
92
server
92
workstation
92
post-installation tasks
Sage 100 Advanced
16
Sage 100 Premium
27
Sage 100 Standard
7
Sage CRM
35
pre-installation tasks
Sage 100 Advanced
13
Sage 100 Premium
25
Sage 100 Standard
4
Sage CRM
34
productivity applications
3
prompt for accounting date
74
R
reinstalling
client workstation
45
Sage CRM
45
remote access
83
Remote Access Server (RAS)
workstation requirements
83
requiring a password
72
restricting accounting date
75
Routing and Remote Access Service (RRAS)
performance
83
RRAS, performance
83
S
Sage 100 Advanced
installation requirements
13
installing
15
post-installation tasks
16
Sage 100 Premium
installation requirements
23
installing
26
post-installation tasks
27
Sage 100 Standard
installation requirements
4
installing
5
installing workstation
8
post-installation tasks
7
Sage CRM
installing
35
post-installation tasks
35
pre-installation tasks
34
reinstalling
45
upgrading
36
Sage CRM Server
uninstalling
43
Sage Intelligence Reporting
installing for Sage 100 Advanced
21
installing for Sage 100 Premium
32
installing for Sage 100 Standard
10
SAP Crystal Reports Designer
installing
56
overview
56
SAP Crystal Reports, converting from a prior ver-
sion
57
security
See System Security
security permissions
87
session tracking
50
setting
accounting date from system date
74
prompt for accounting date
74
SQL Server
Sage Configured installation
24
Sage Configured Installation Type
98
SSL
encryption
50
generating a certificate
51
system security
administrative tasks
65
creating user code
70
intruder detection, enabling
74
lockout duration, specifying
74
overview
67
setting permissions
87
T
TCP/IP
configuration
92
ping
92
protocol
92
U
uninstalling
modules
81
overview
41
Sage CRM Server
43
workstation
43
upgrading, Sage CRM
36
user code
creating
70
enabling intruder detection
74

